Generative Enclosures for Laser Cutting #algorithmic #fabrication #p5js #javascript #itp #introduction-to-fabrication
I was tasked to create an enclosure and I thought it would be fun to design an enclosure with an organic exterior. I wanted to continue exploring computational design approaches, so I started sketching in p5.js.
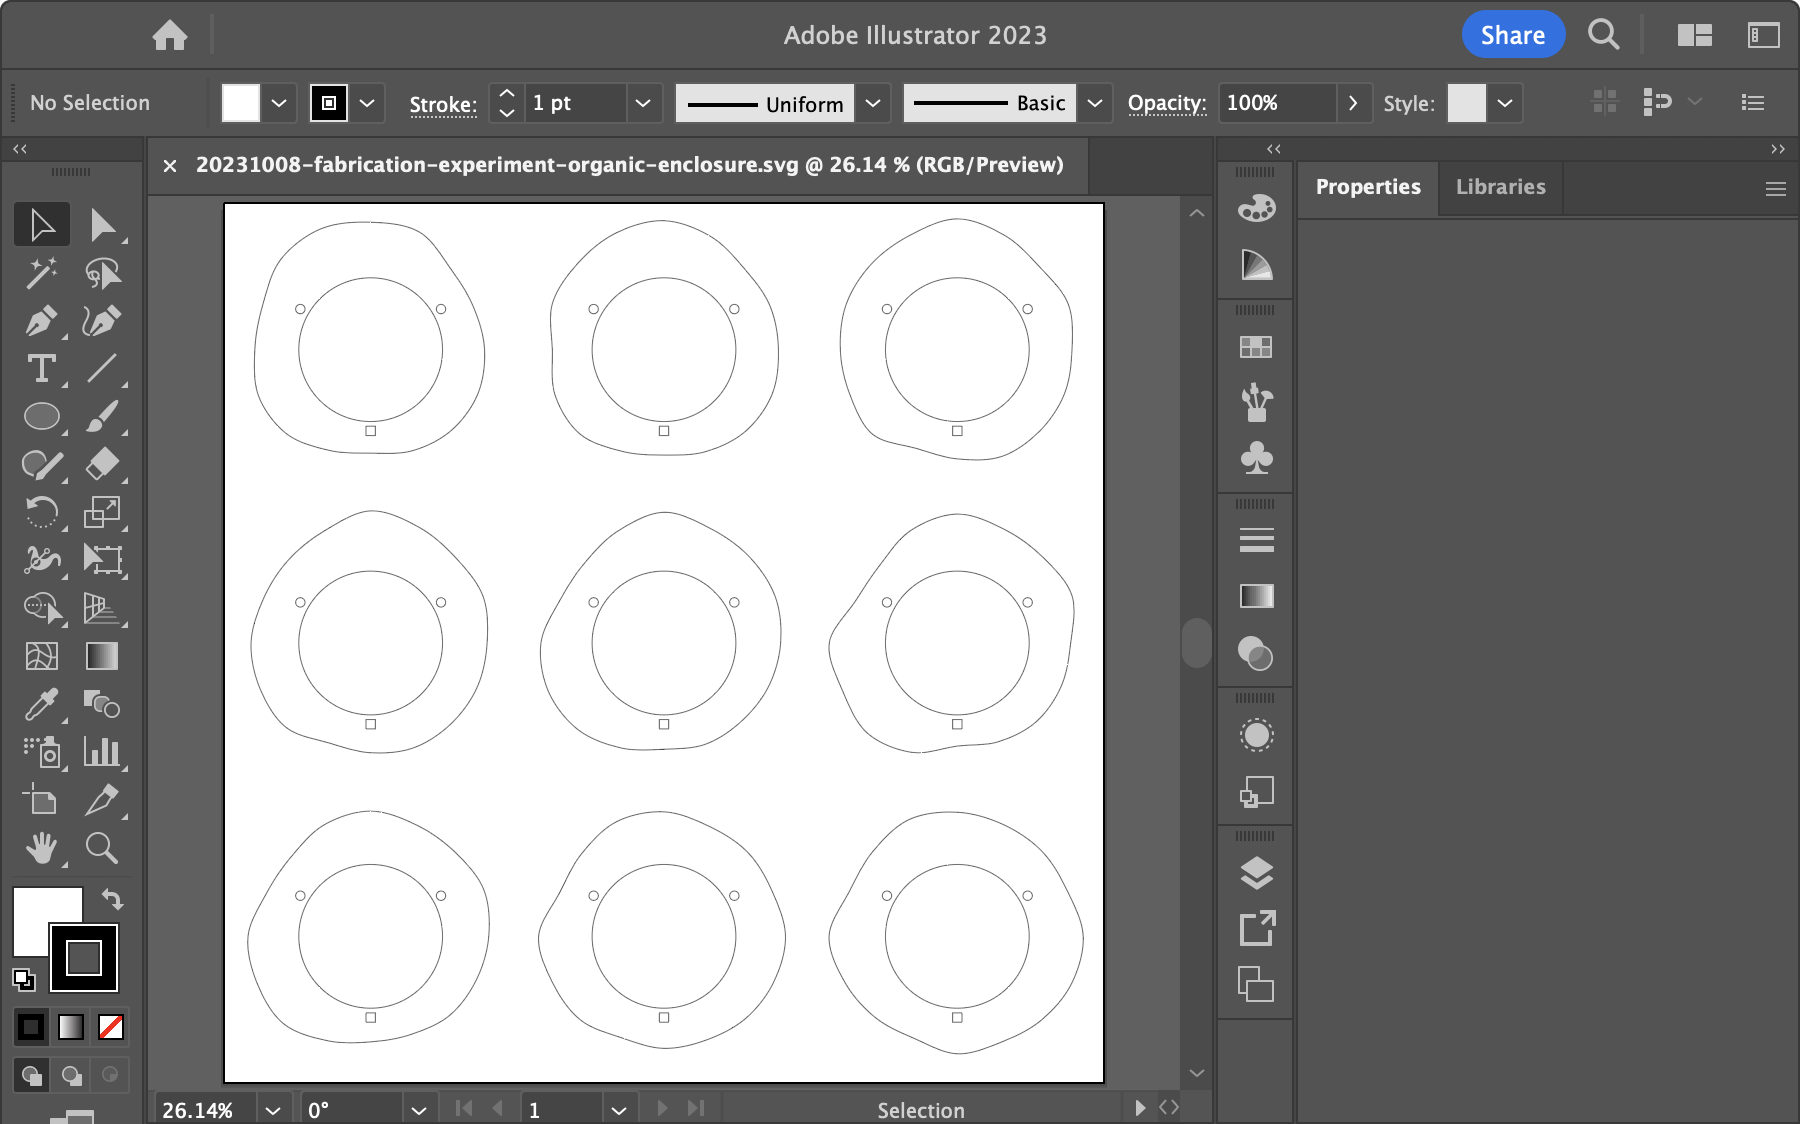
I started with a blob generated using Perlin noise.
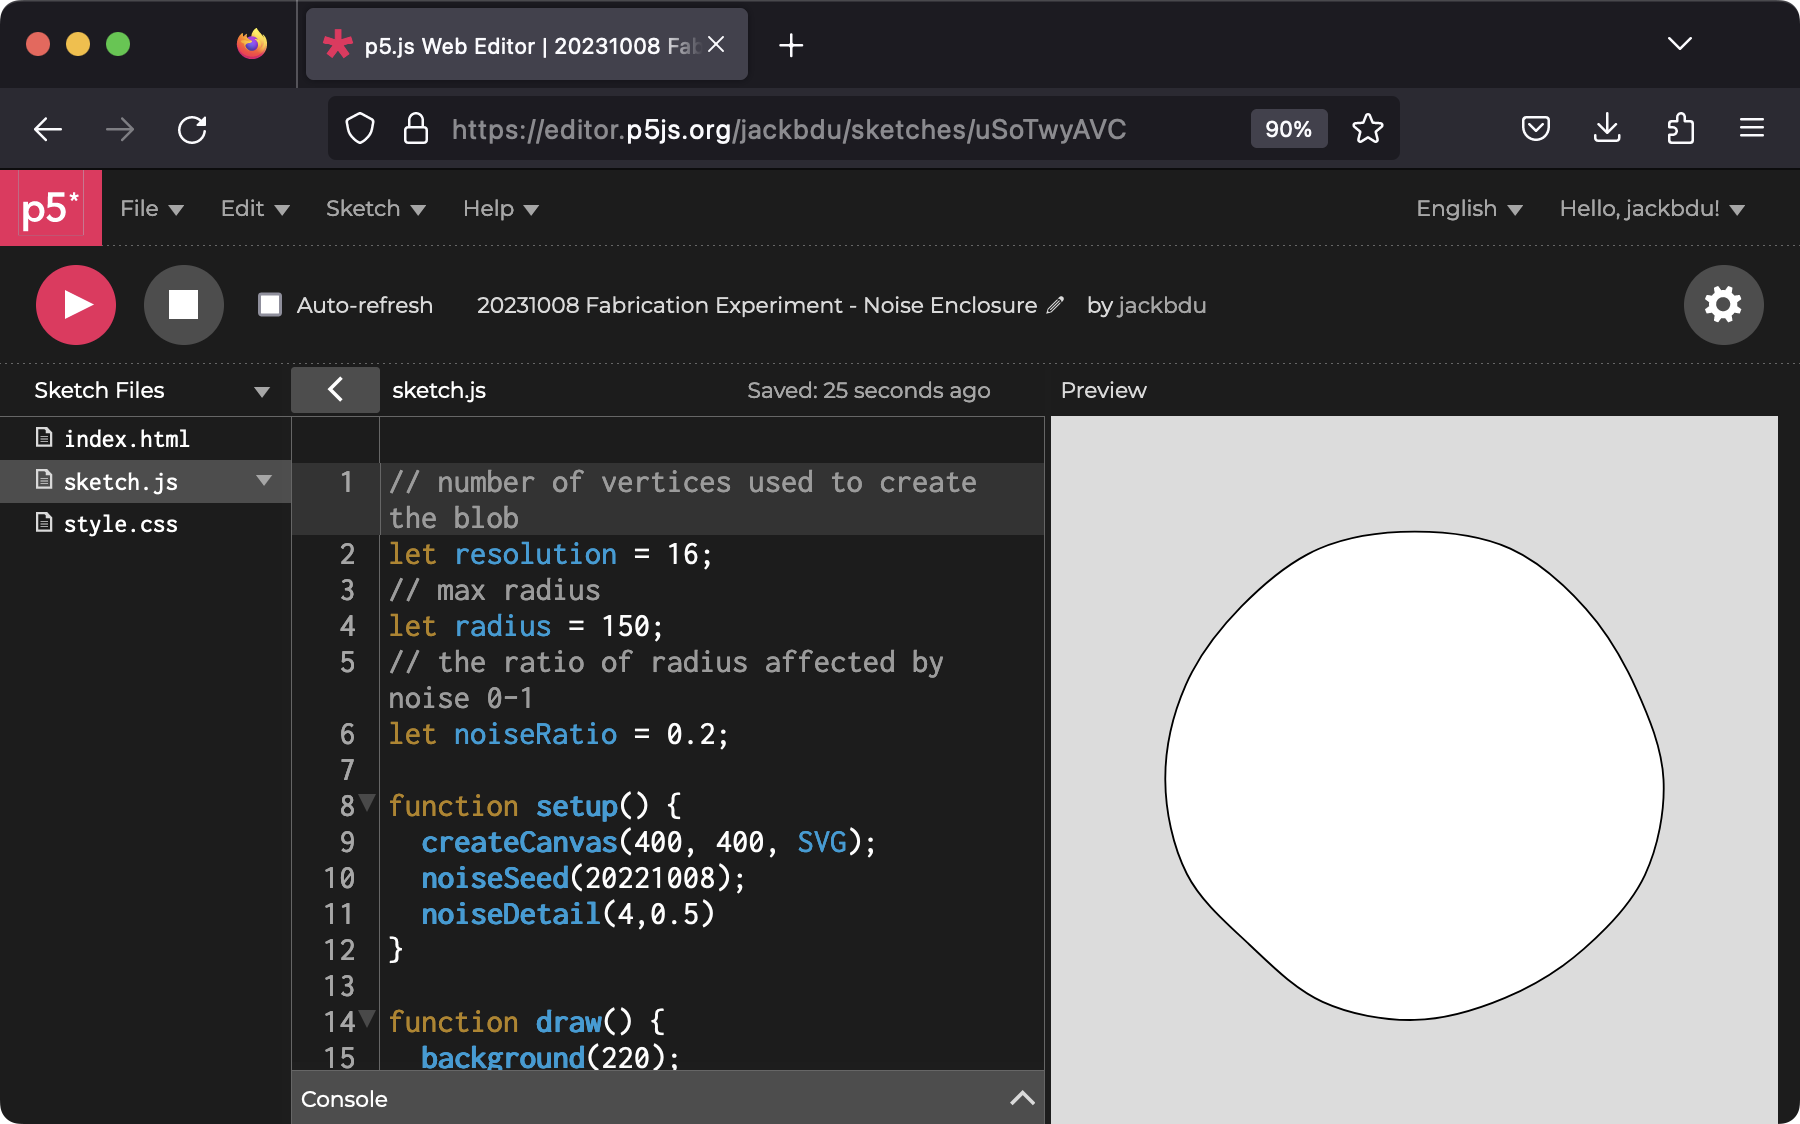
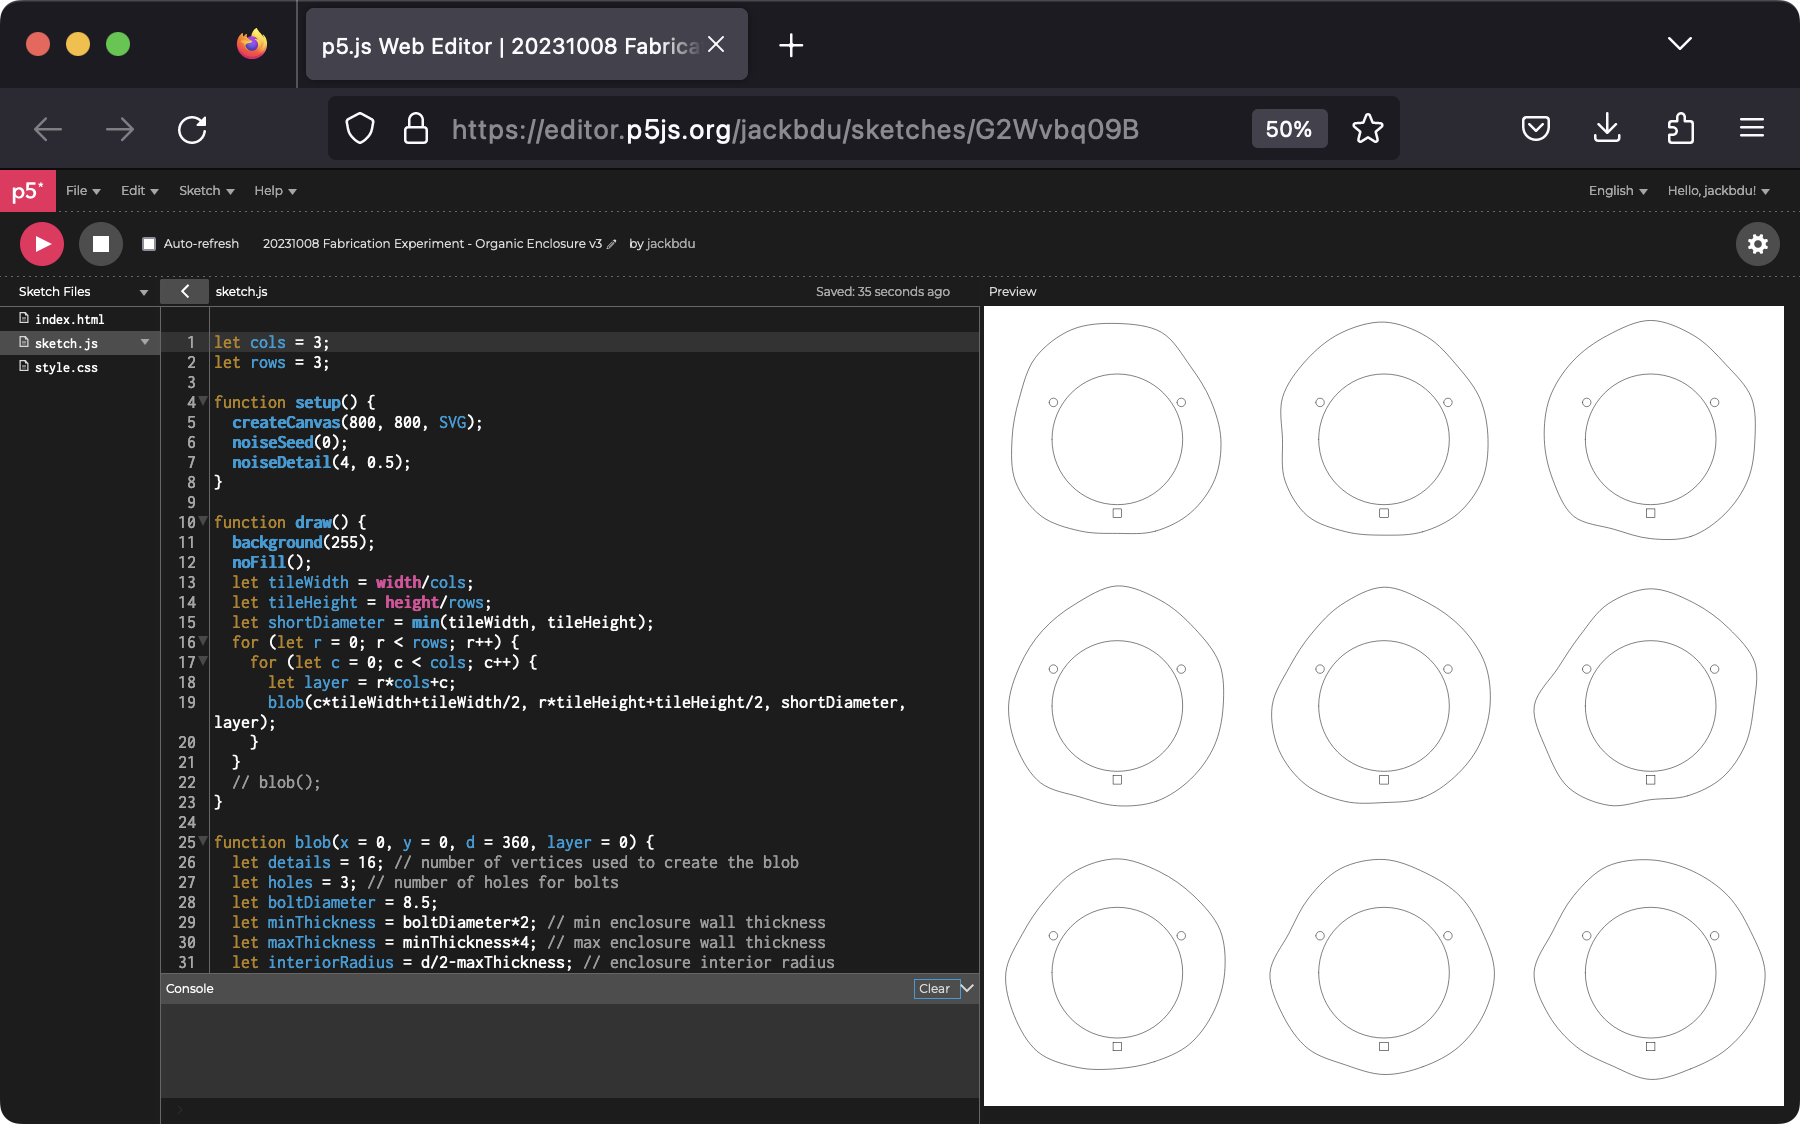
Then I added a large circular interior, some small holes for bolts, and repeated the design (with slight variations generated using Perlin noise) for laser cutting.
As usual, I exported the design as a SVG so I could open it in Adobe Illustrator, which is the application we use for laser cutting.
I was lucky enough to find a piece of very even cardboard for a prototype. Below is a timelapse of the laser cutting process:
Here is what it looks like after fully assembled.
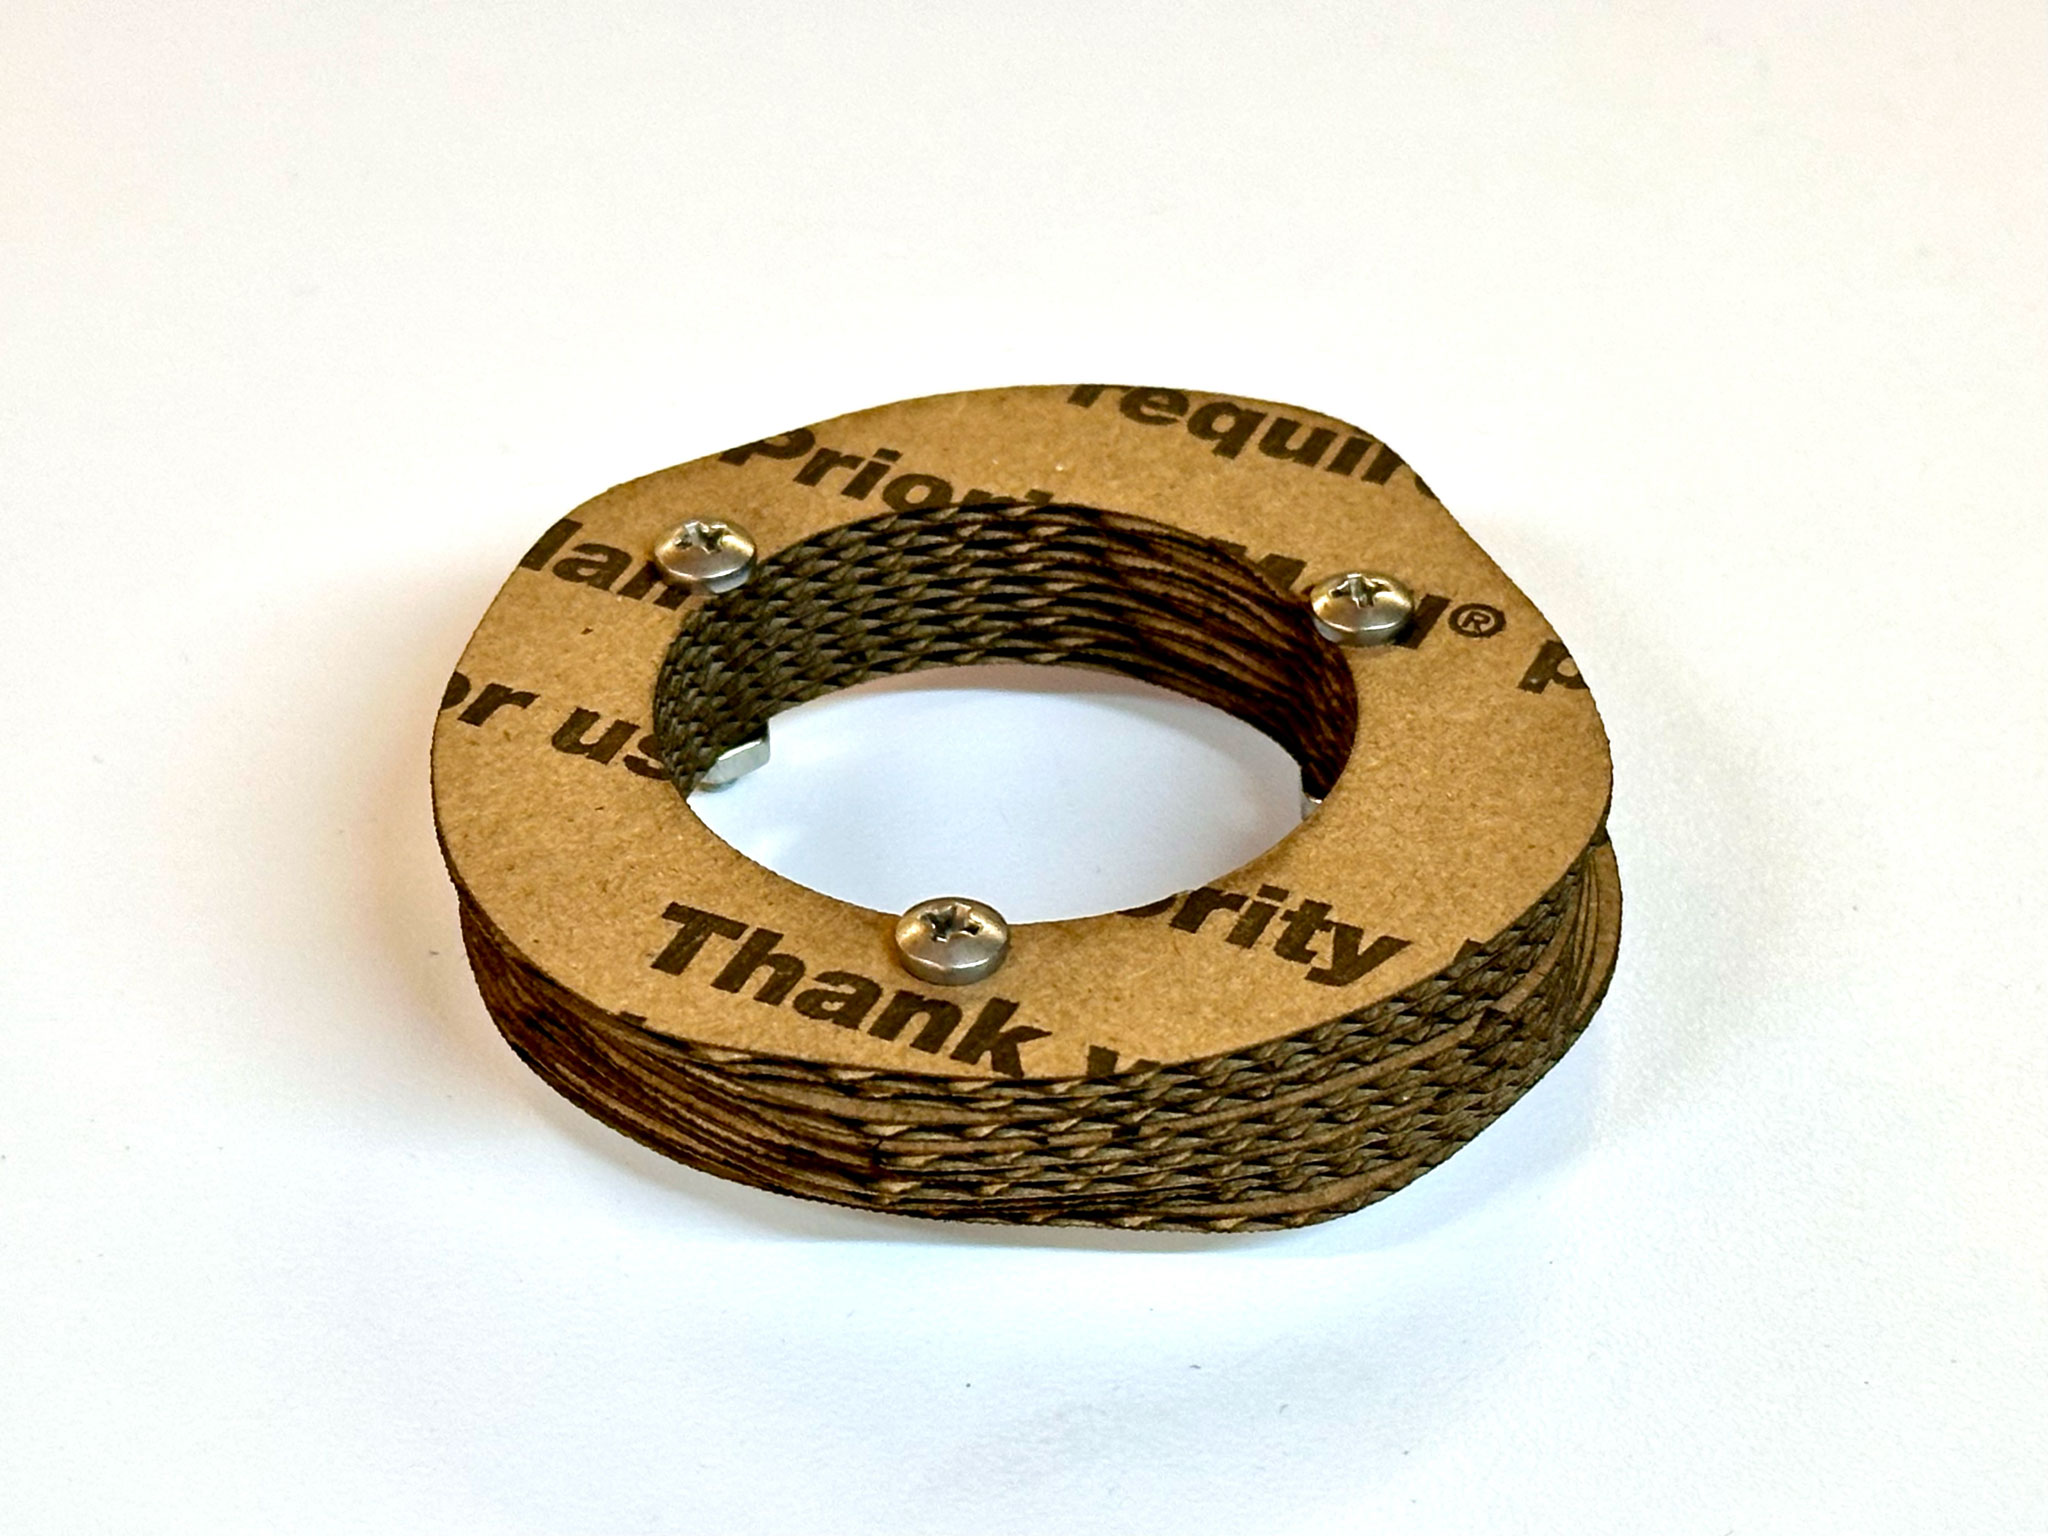
The prototype was very helpful. I noticed that the variations between layers needed to be even subtler for a smooth transition.
I was going to make a plywood enclosure based on this design but I realized it will require a lot of plywood if I wanted it to be tall. As I was scouting around, I found a large amount of transclucent acrylic scraps someone else disposed of at NYU MakerSpace. I thought they would be perfect for an enclosure.
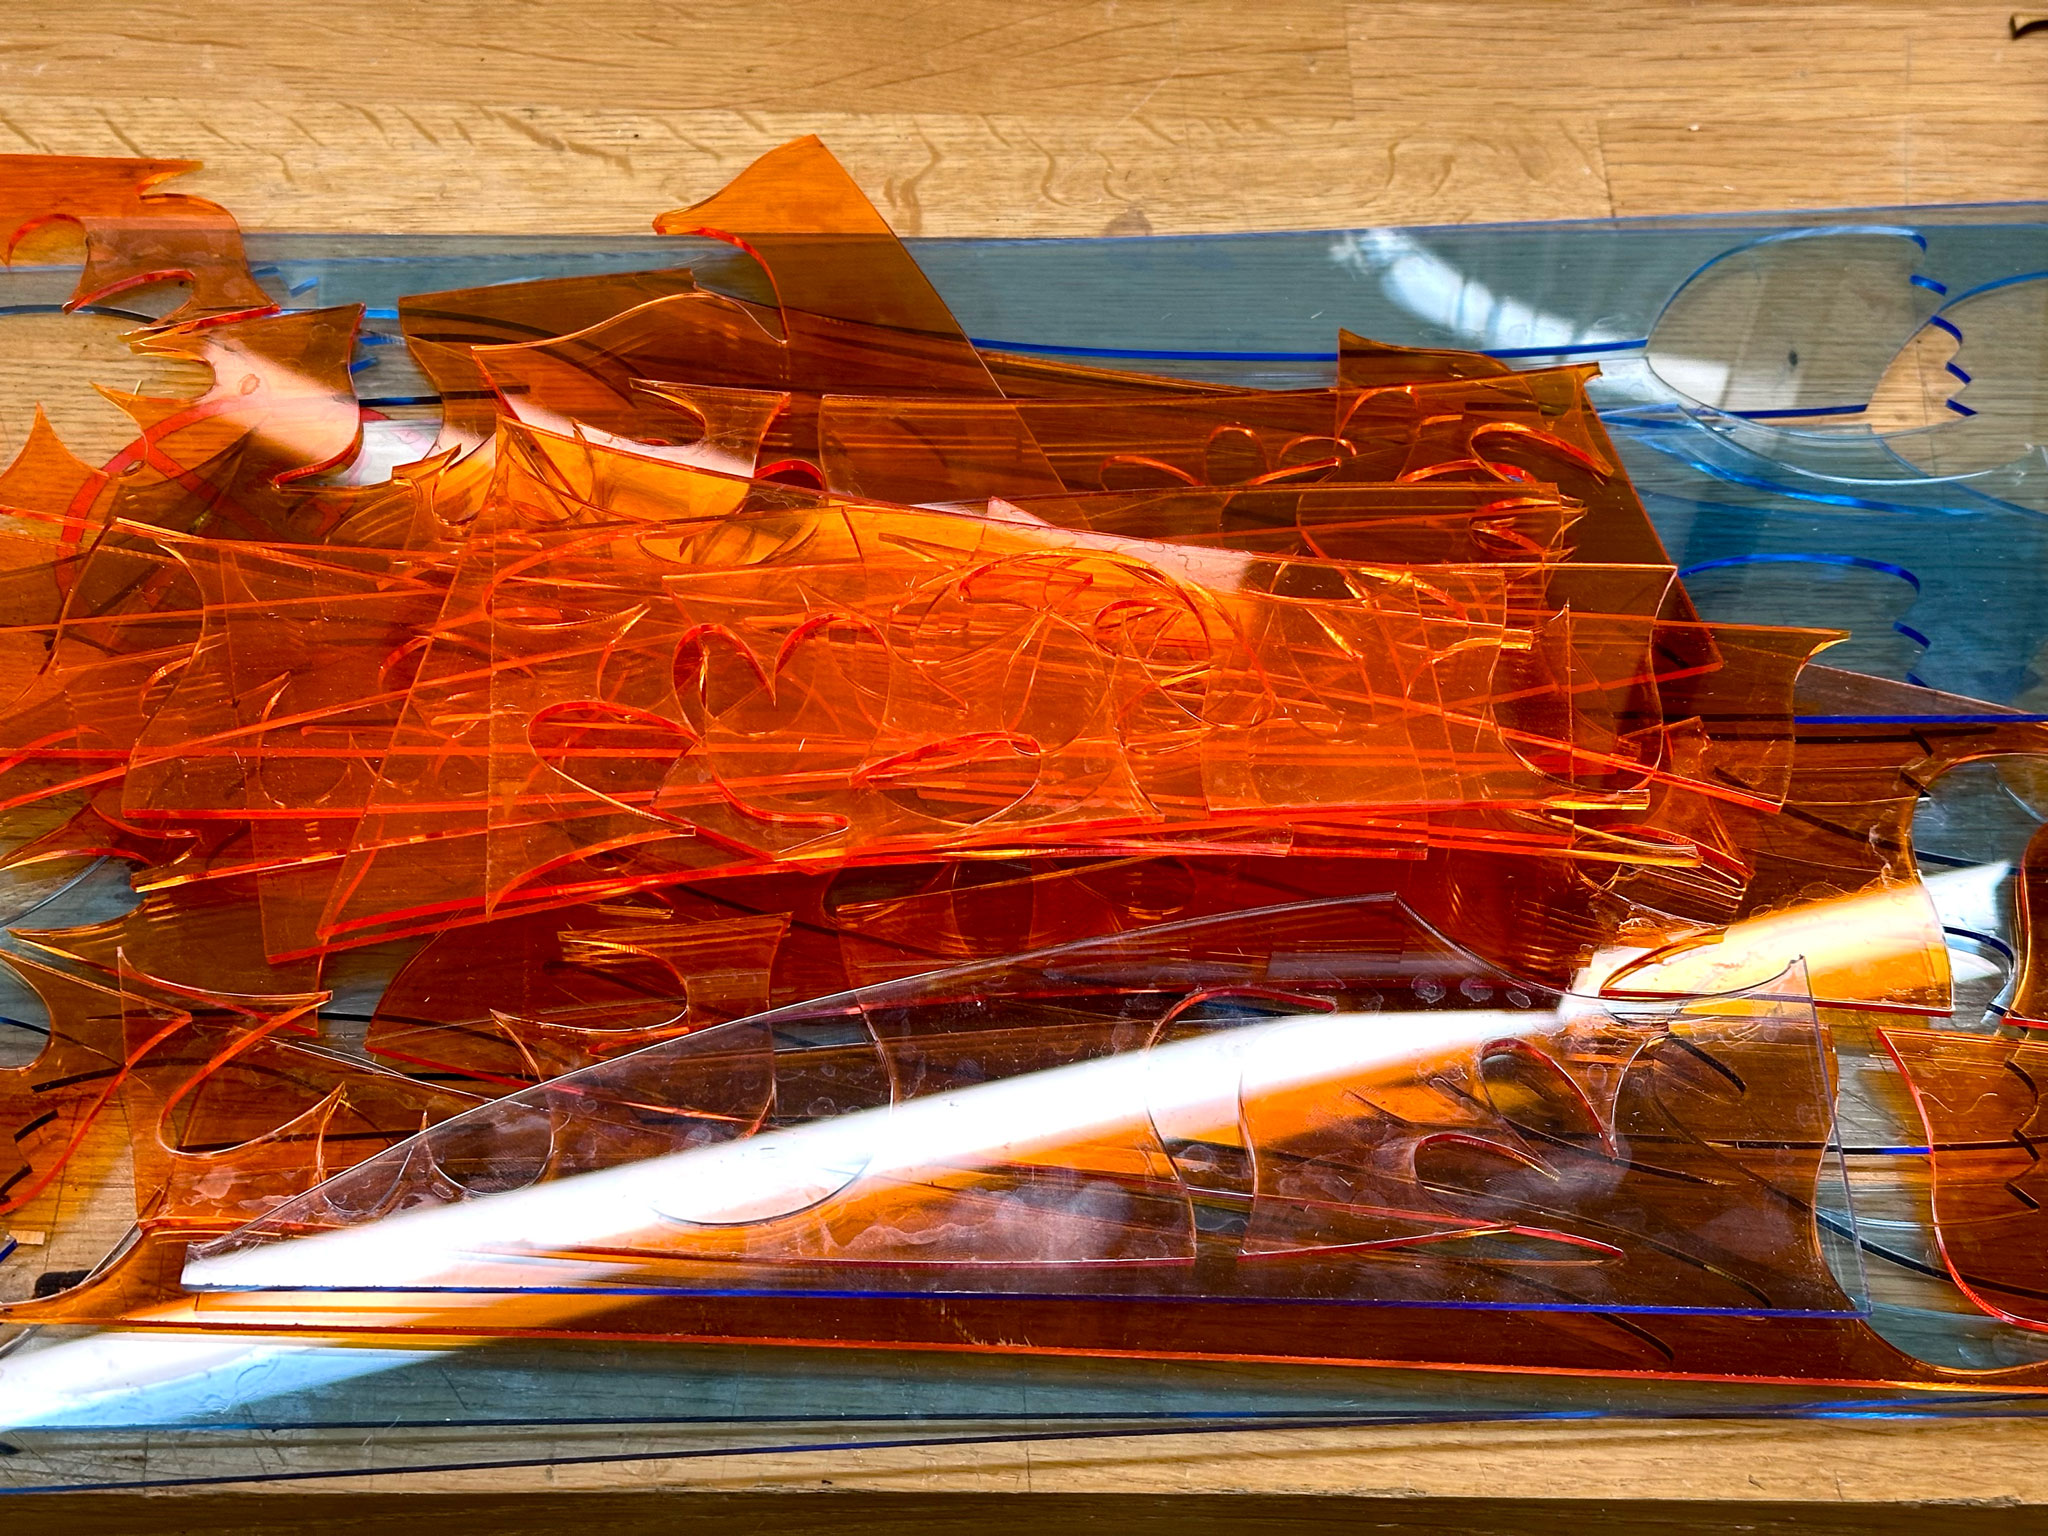
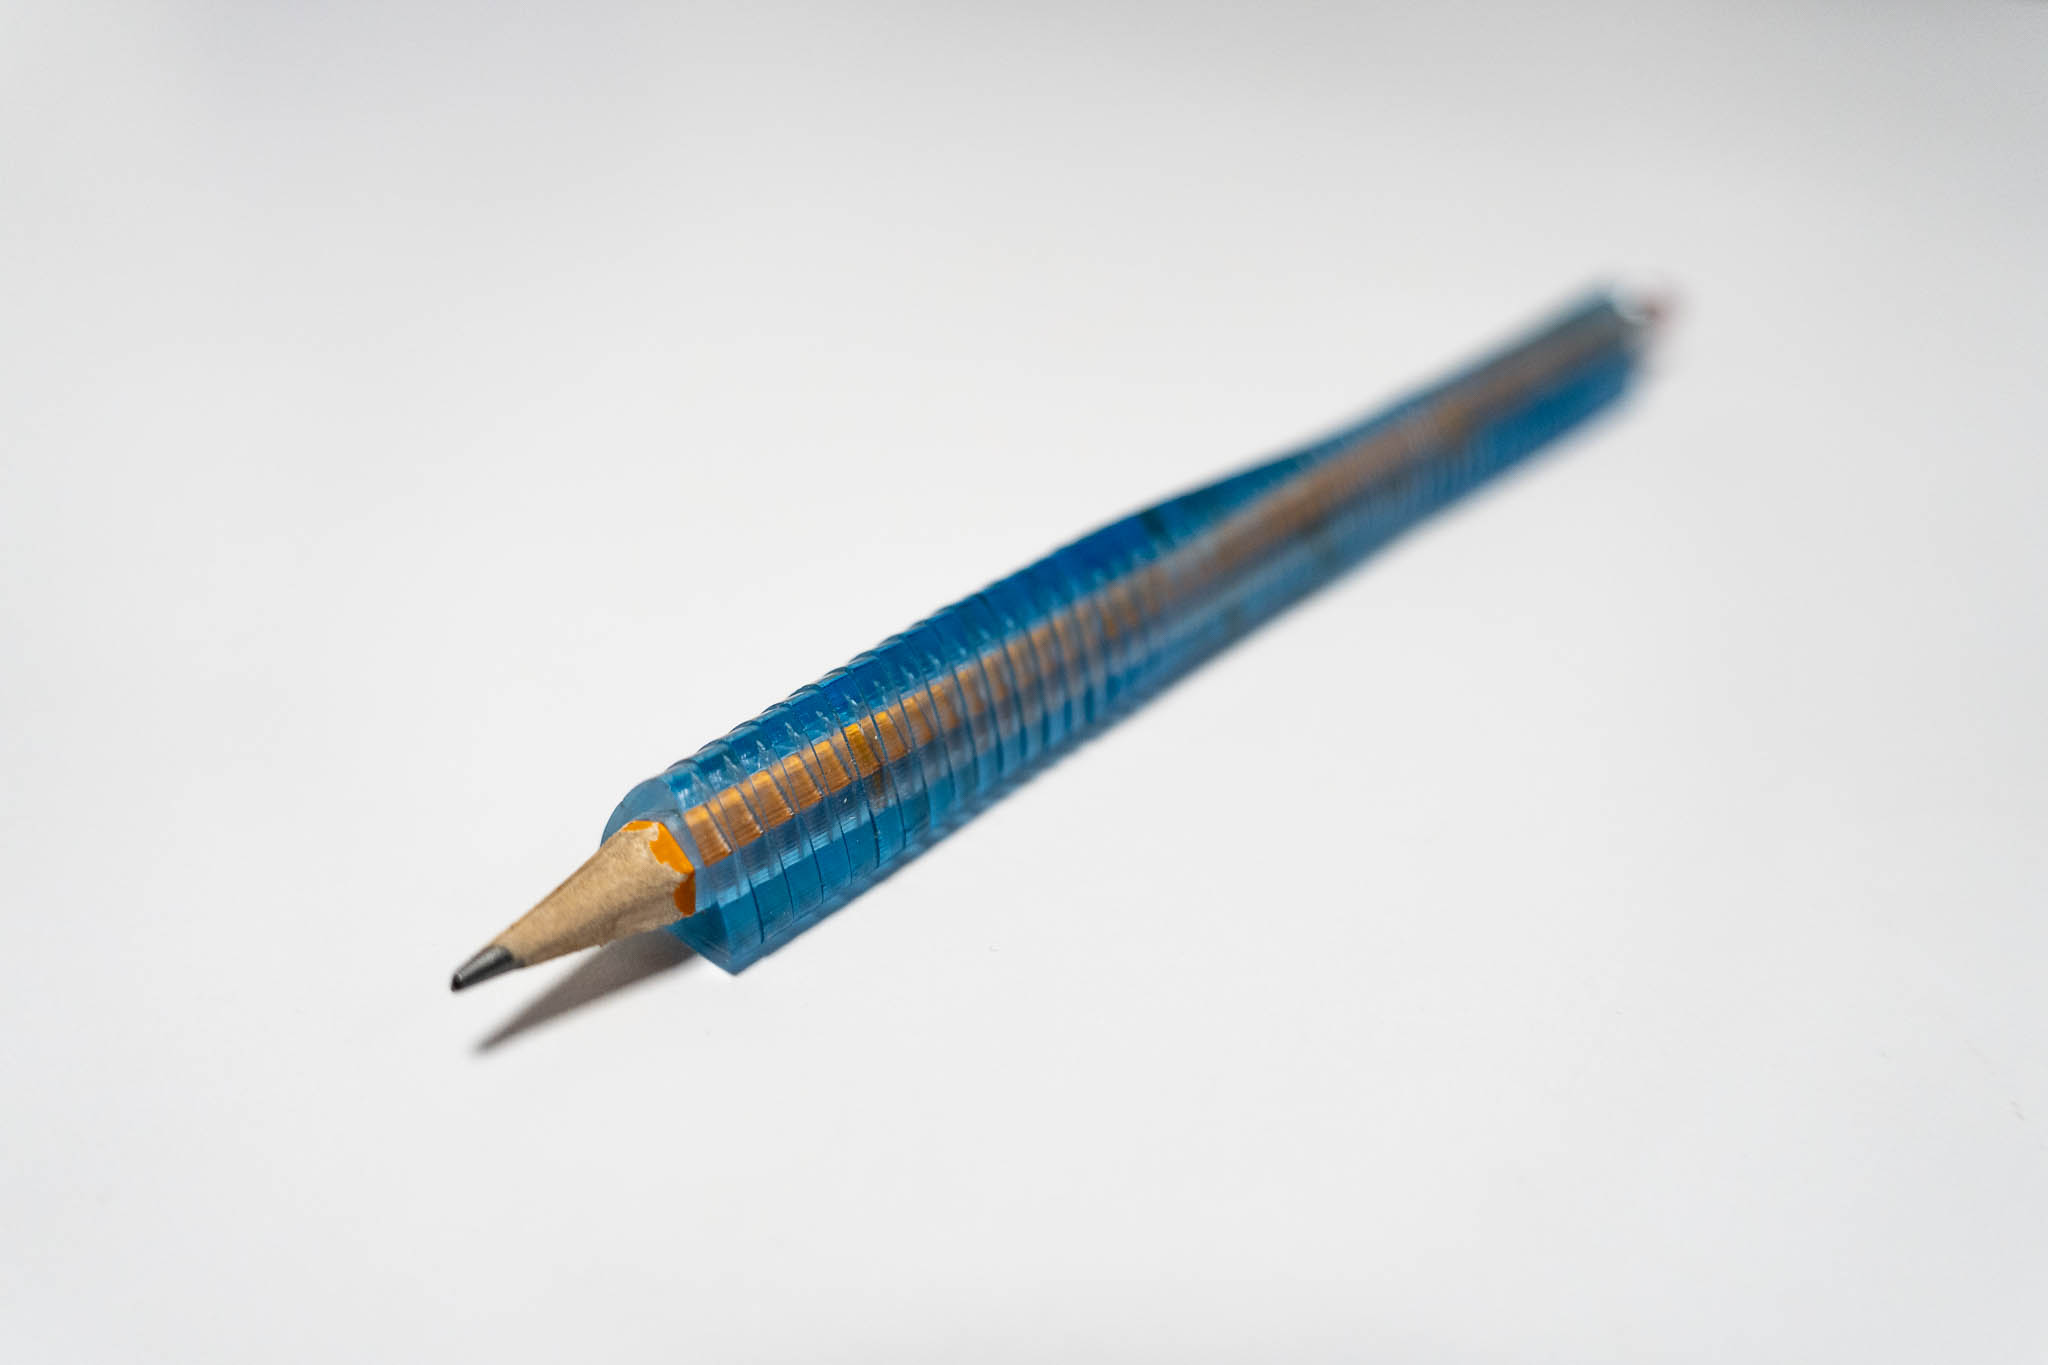
I did not think I have enough to make a large enclosure as I originally planned, so I decided to make enclosures for pencils.
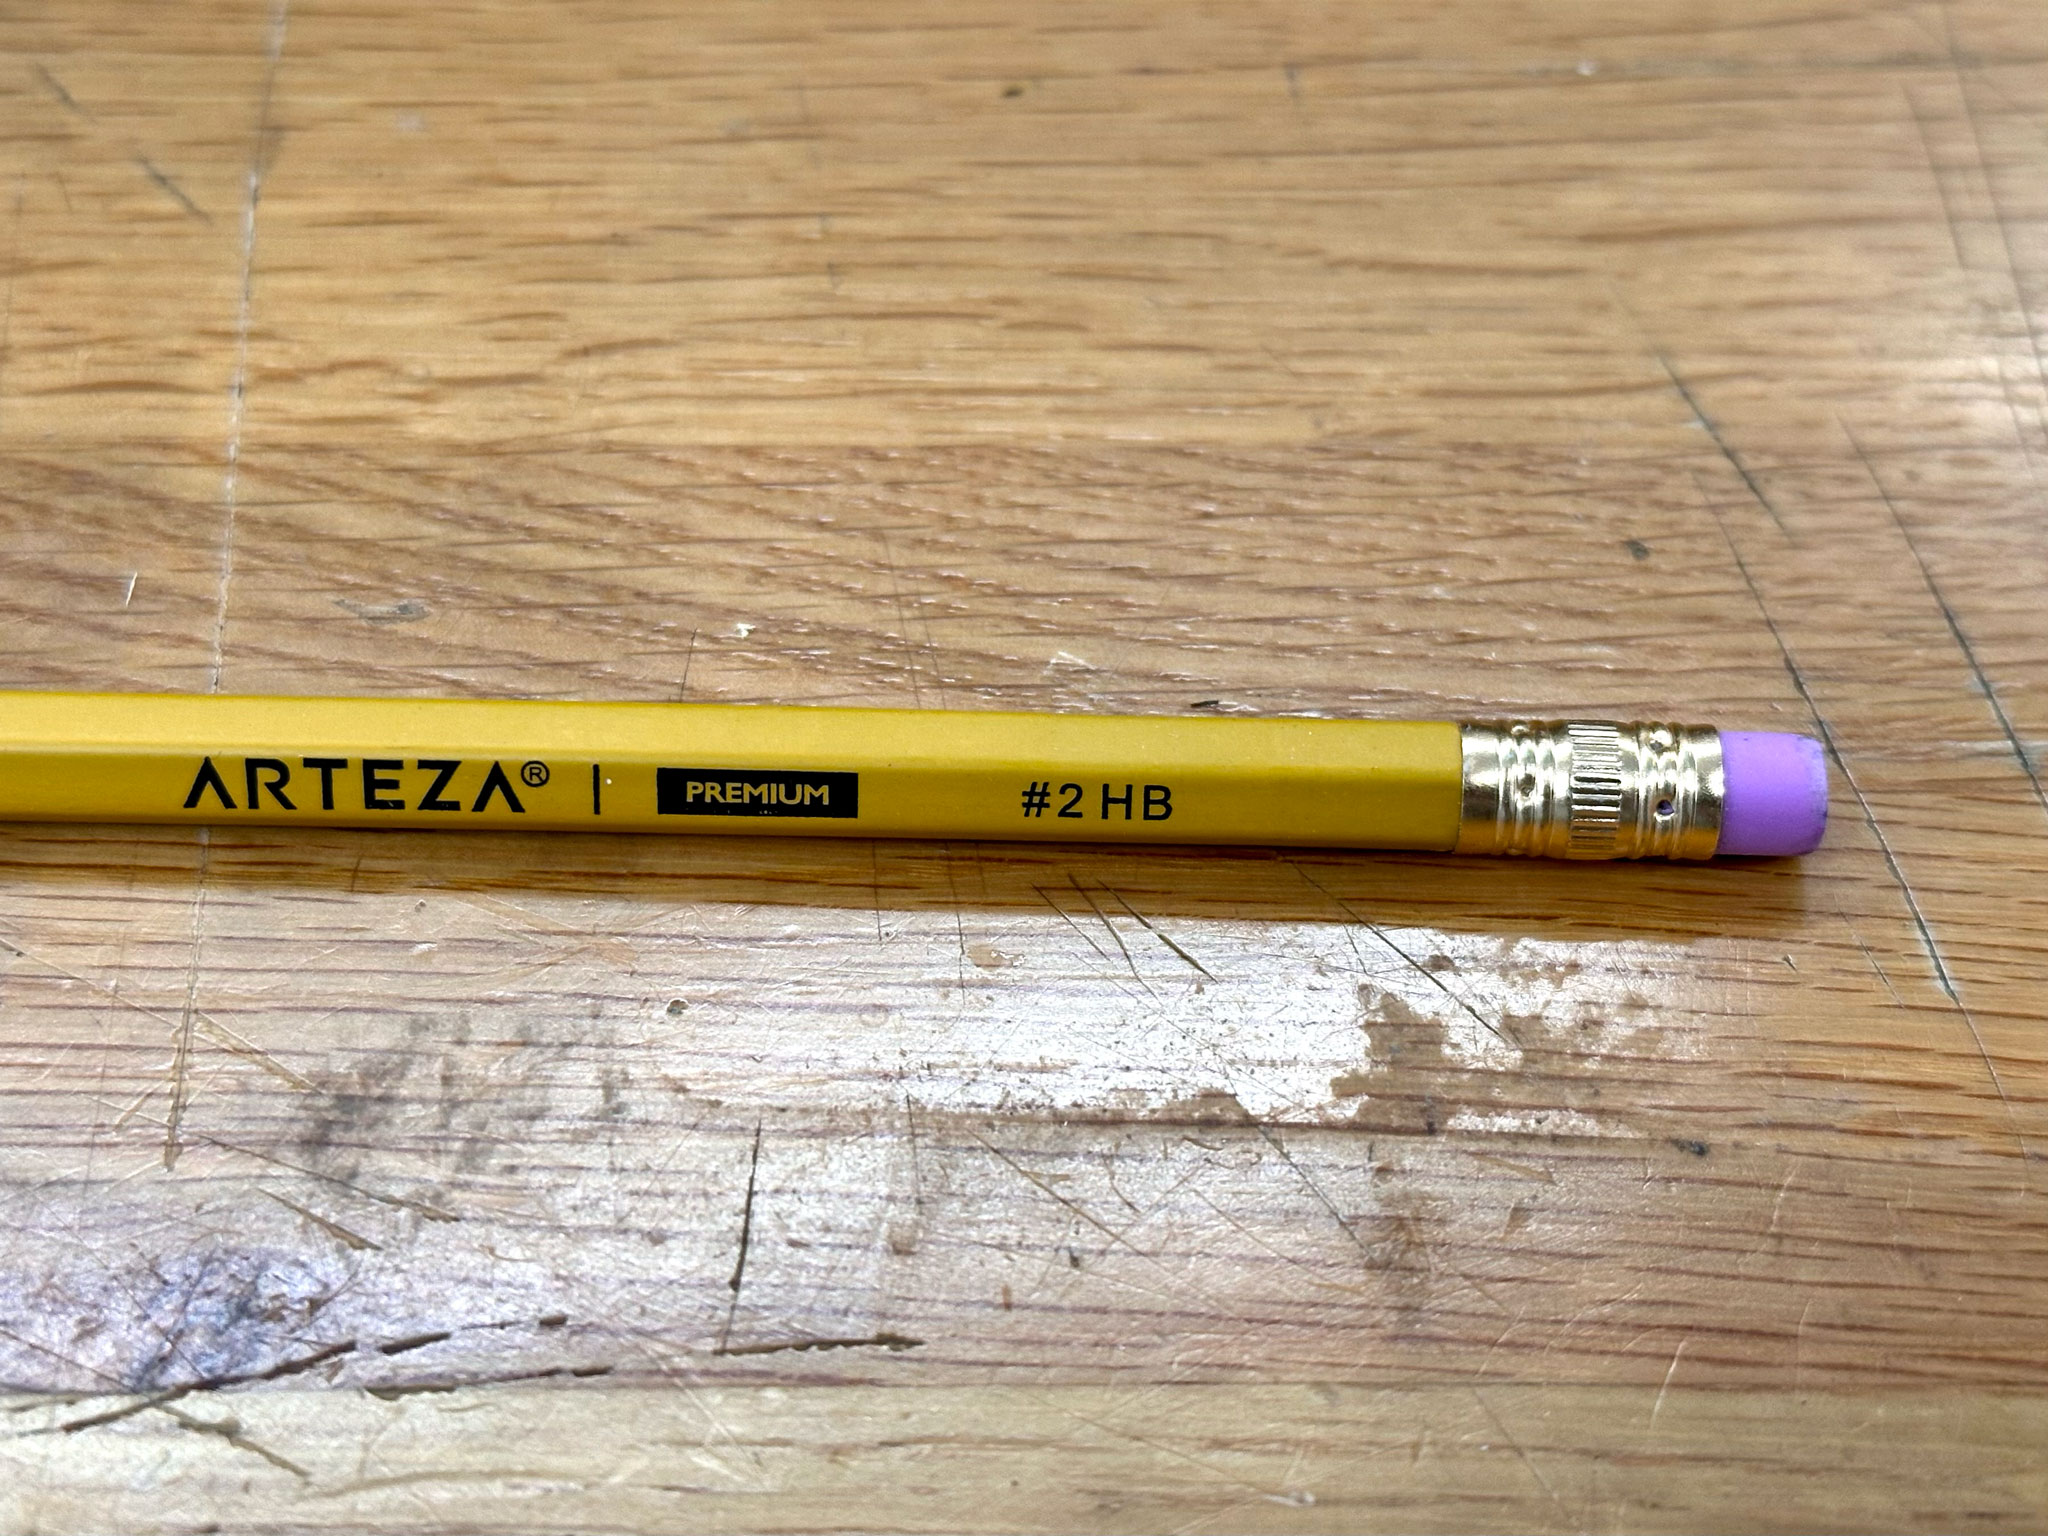
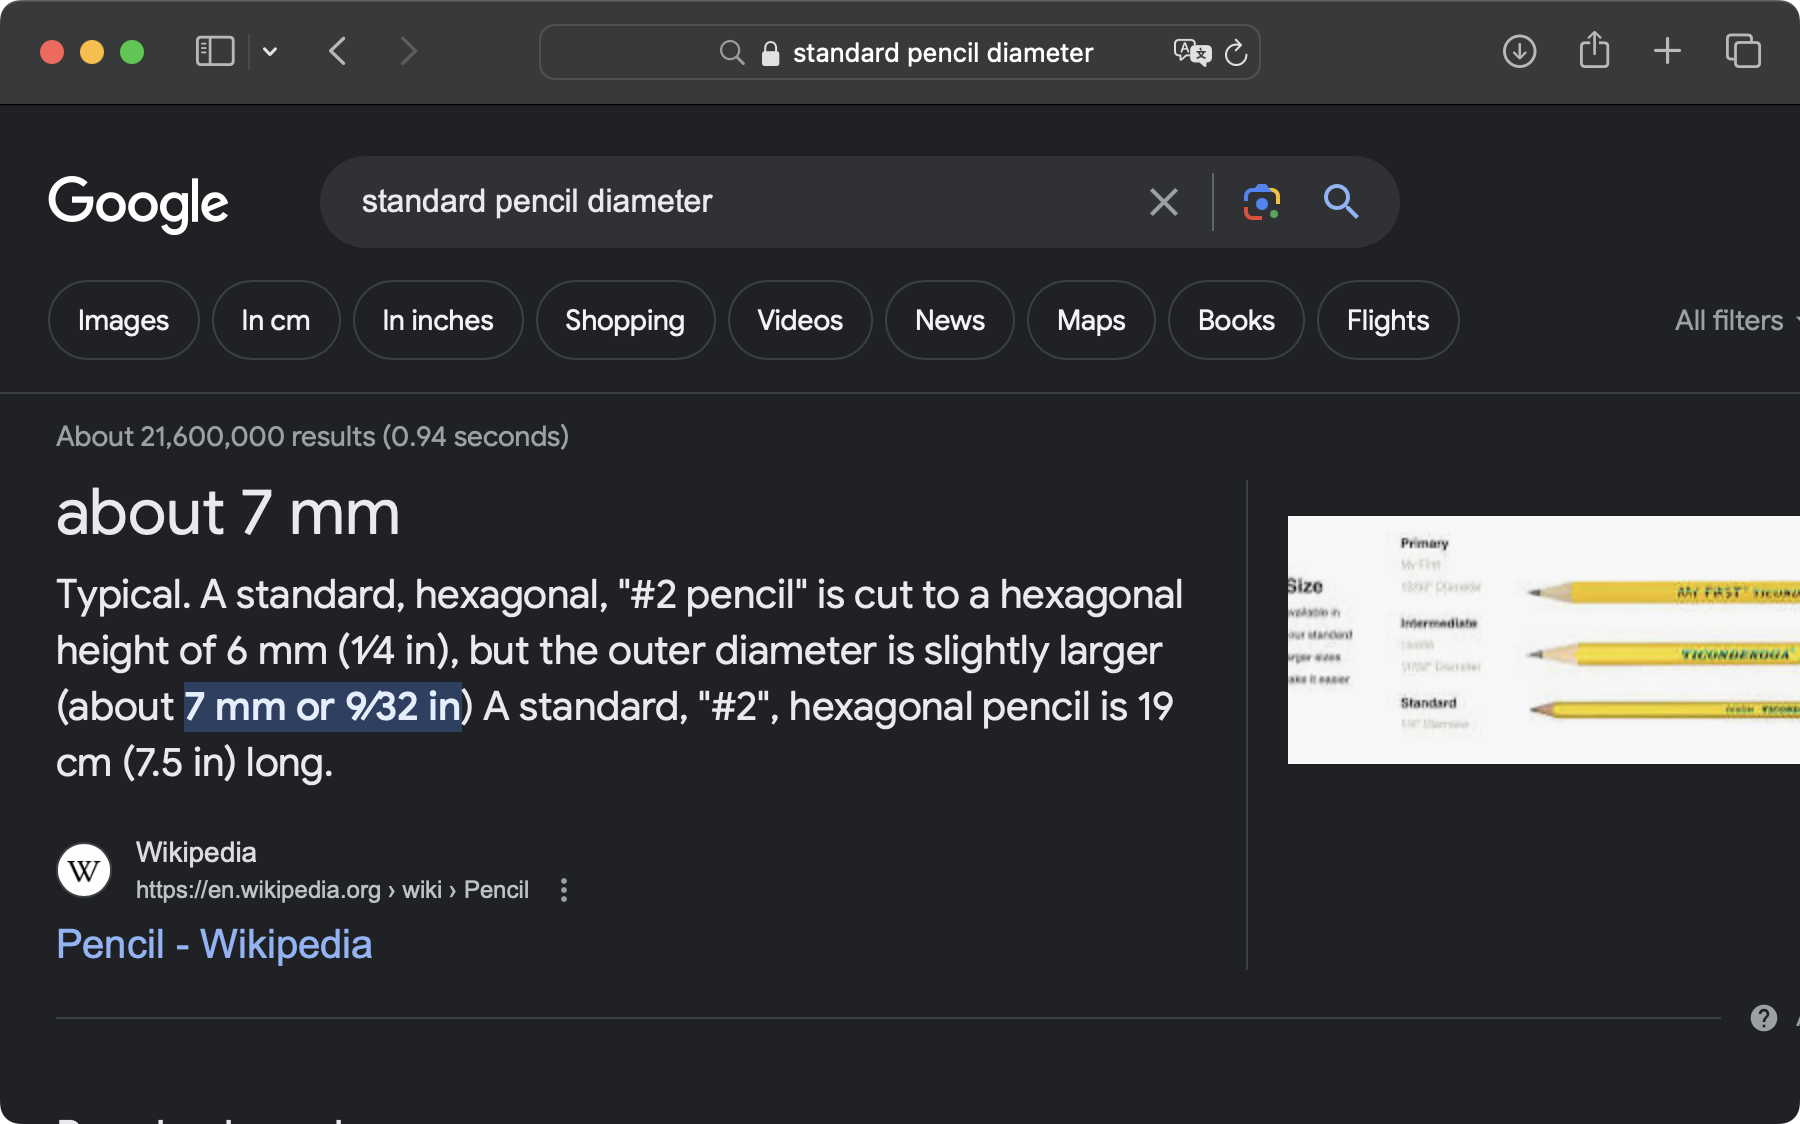
I looked up the standard pencil diameter on Google, and it showed that the outer diameter was about 7mm.
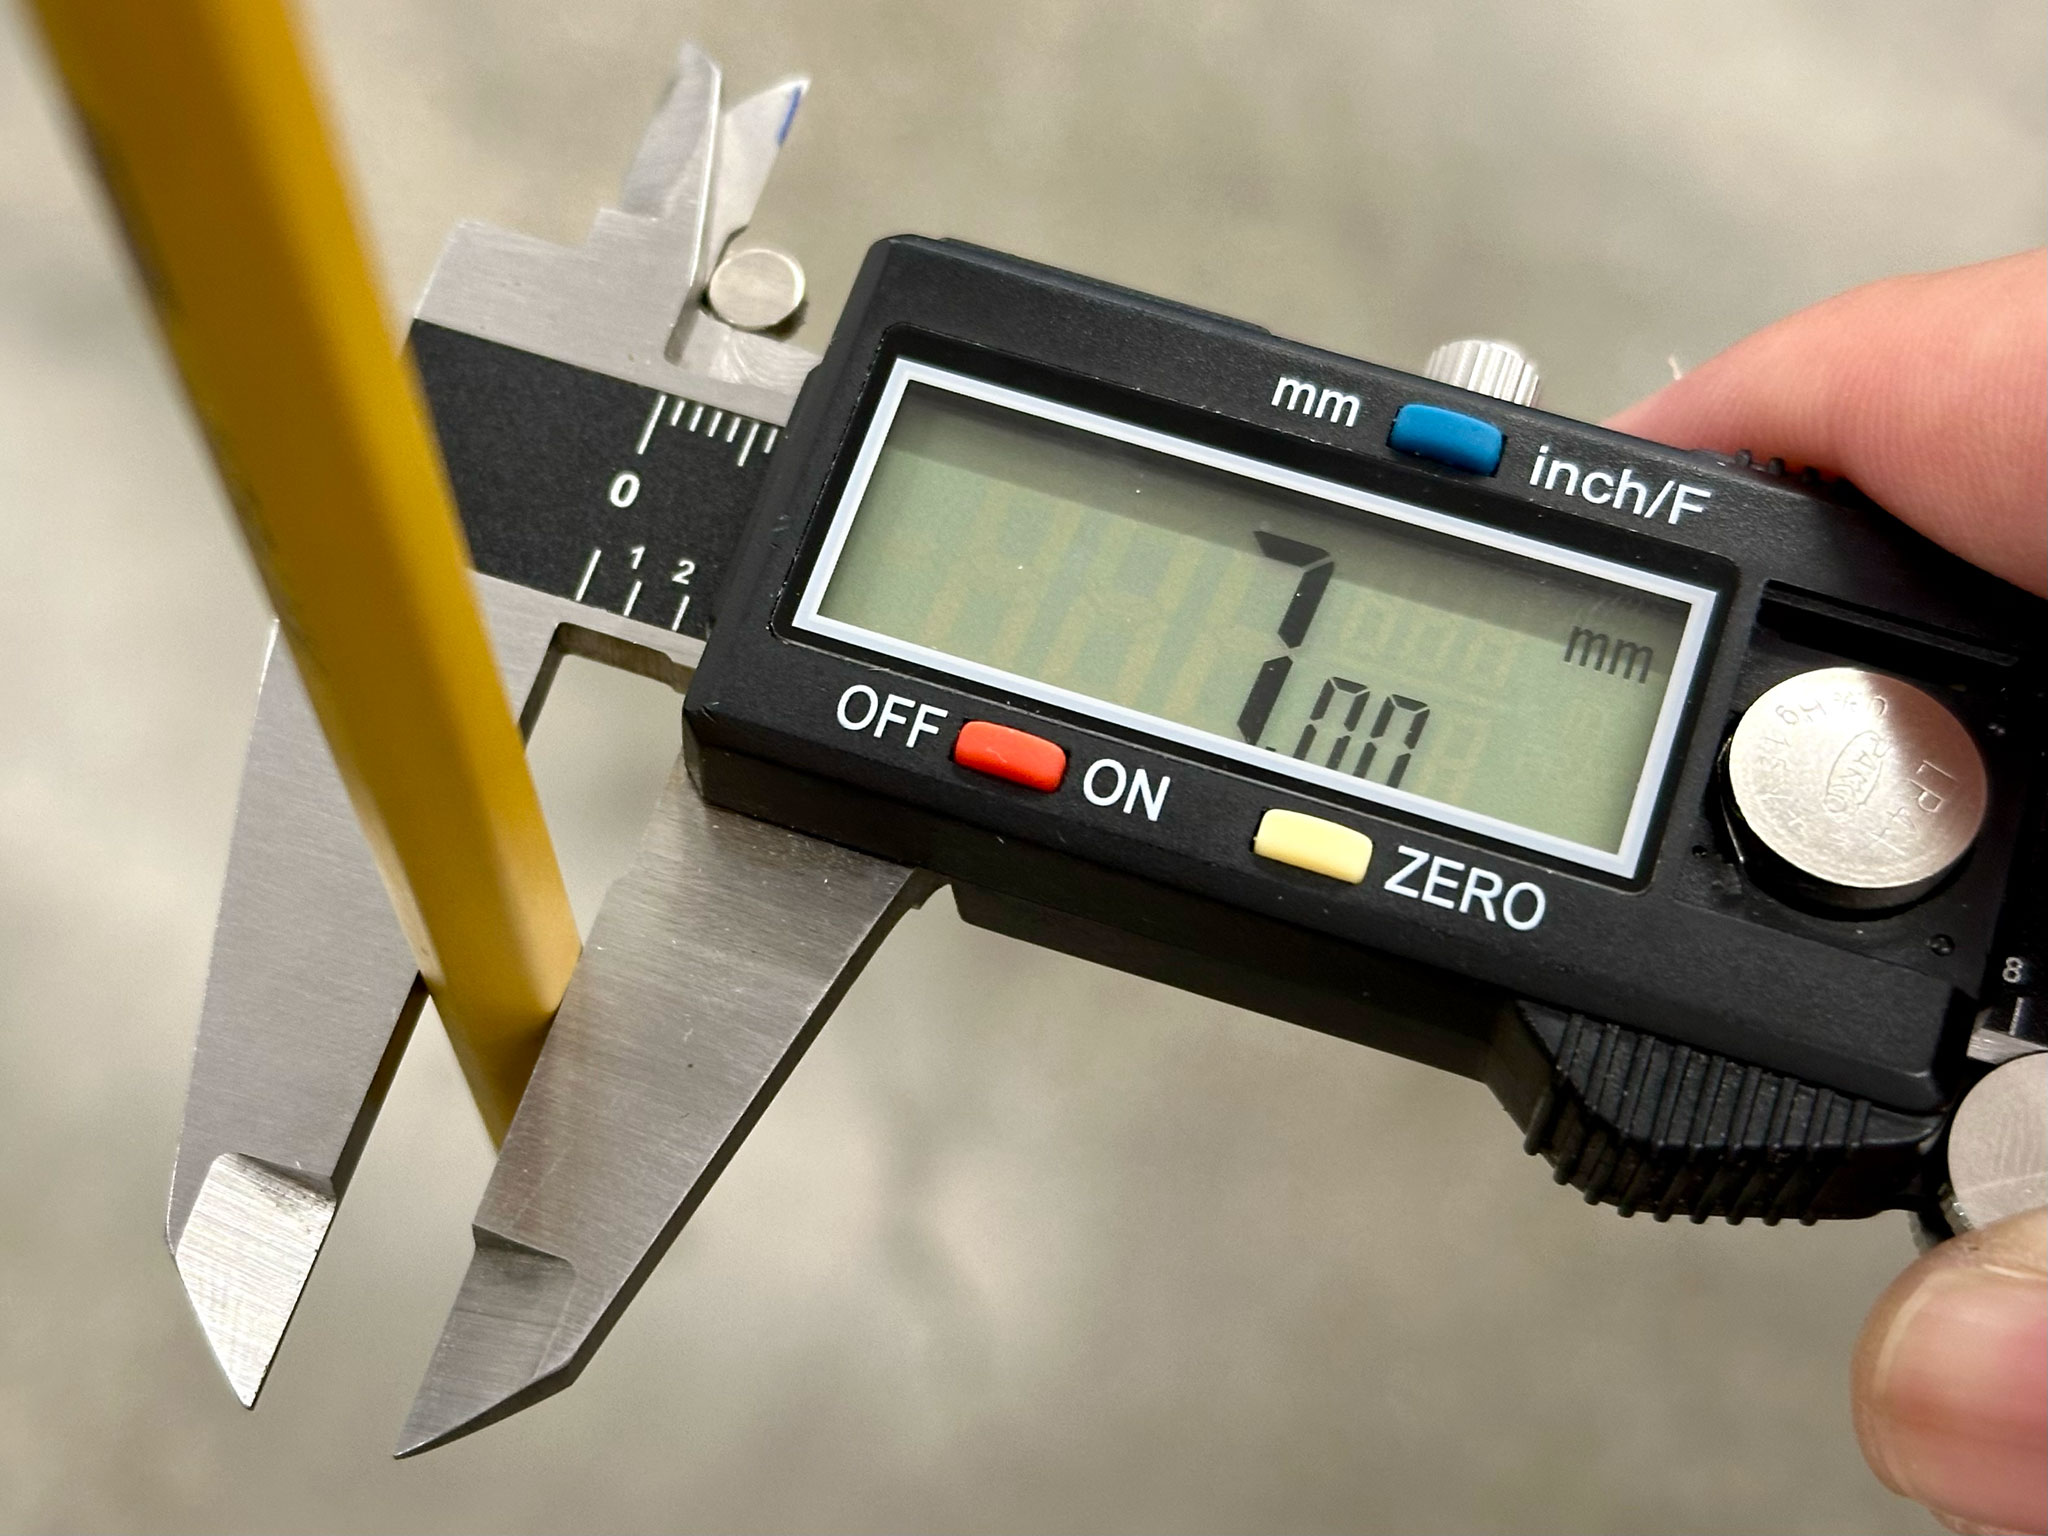
When I measured the pencil I had with a caliper, I found its height to be 7 mm, and the outer diameter was even larger.
I made a few test cuts to find the right fit and friction.
 |
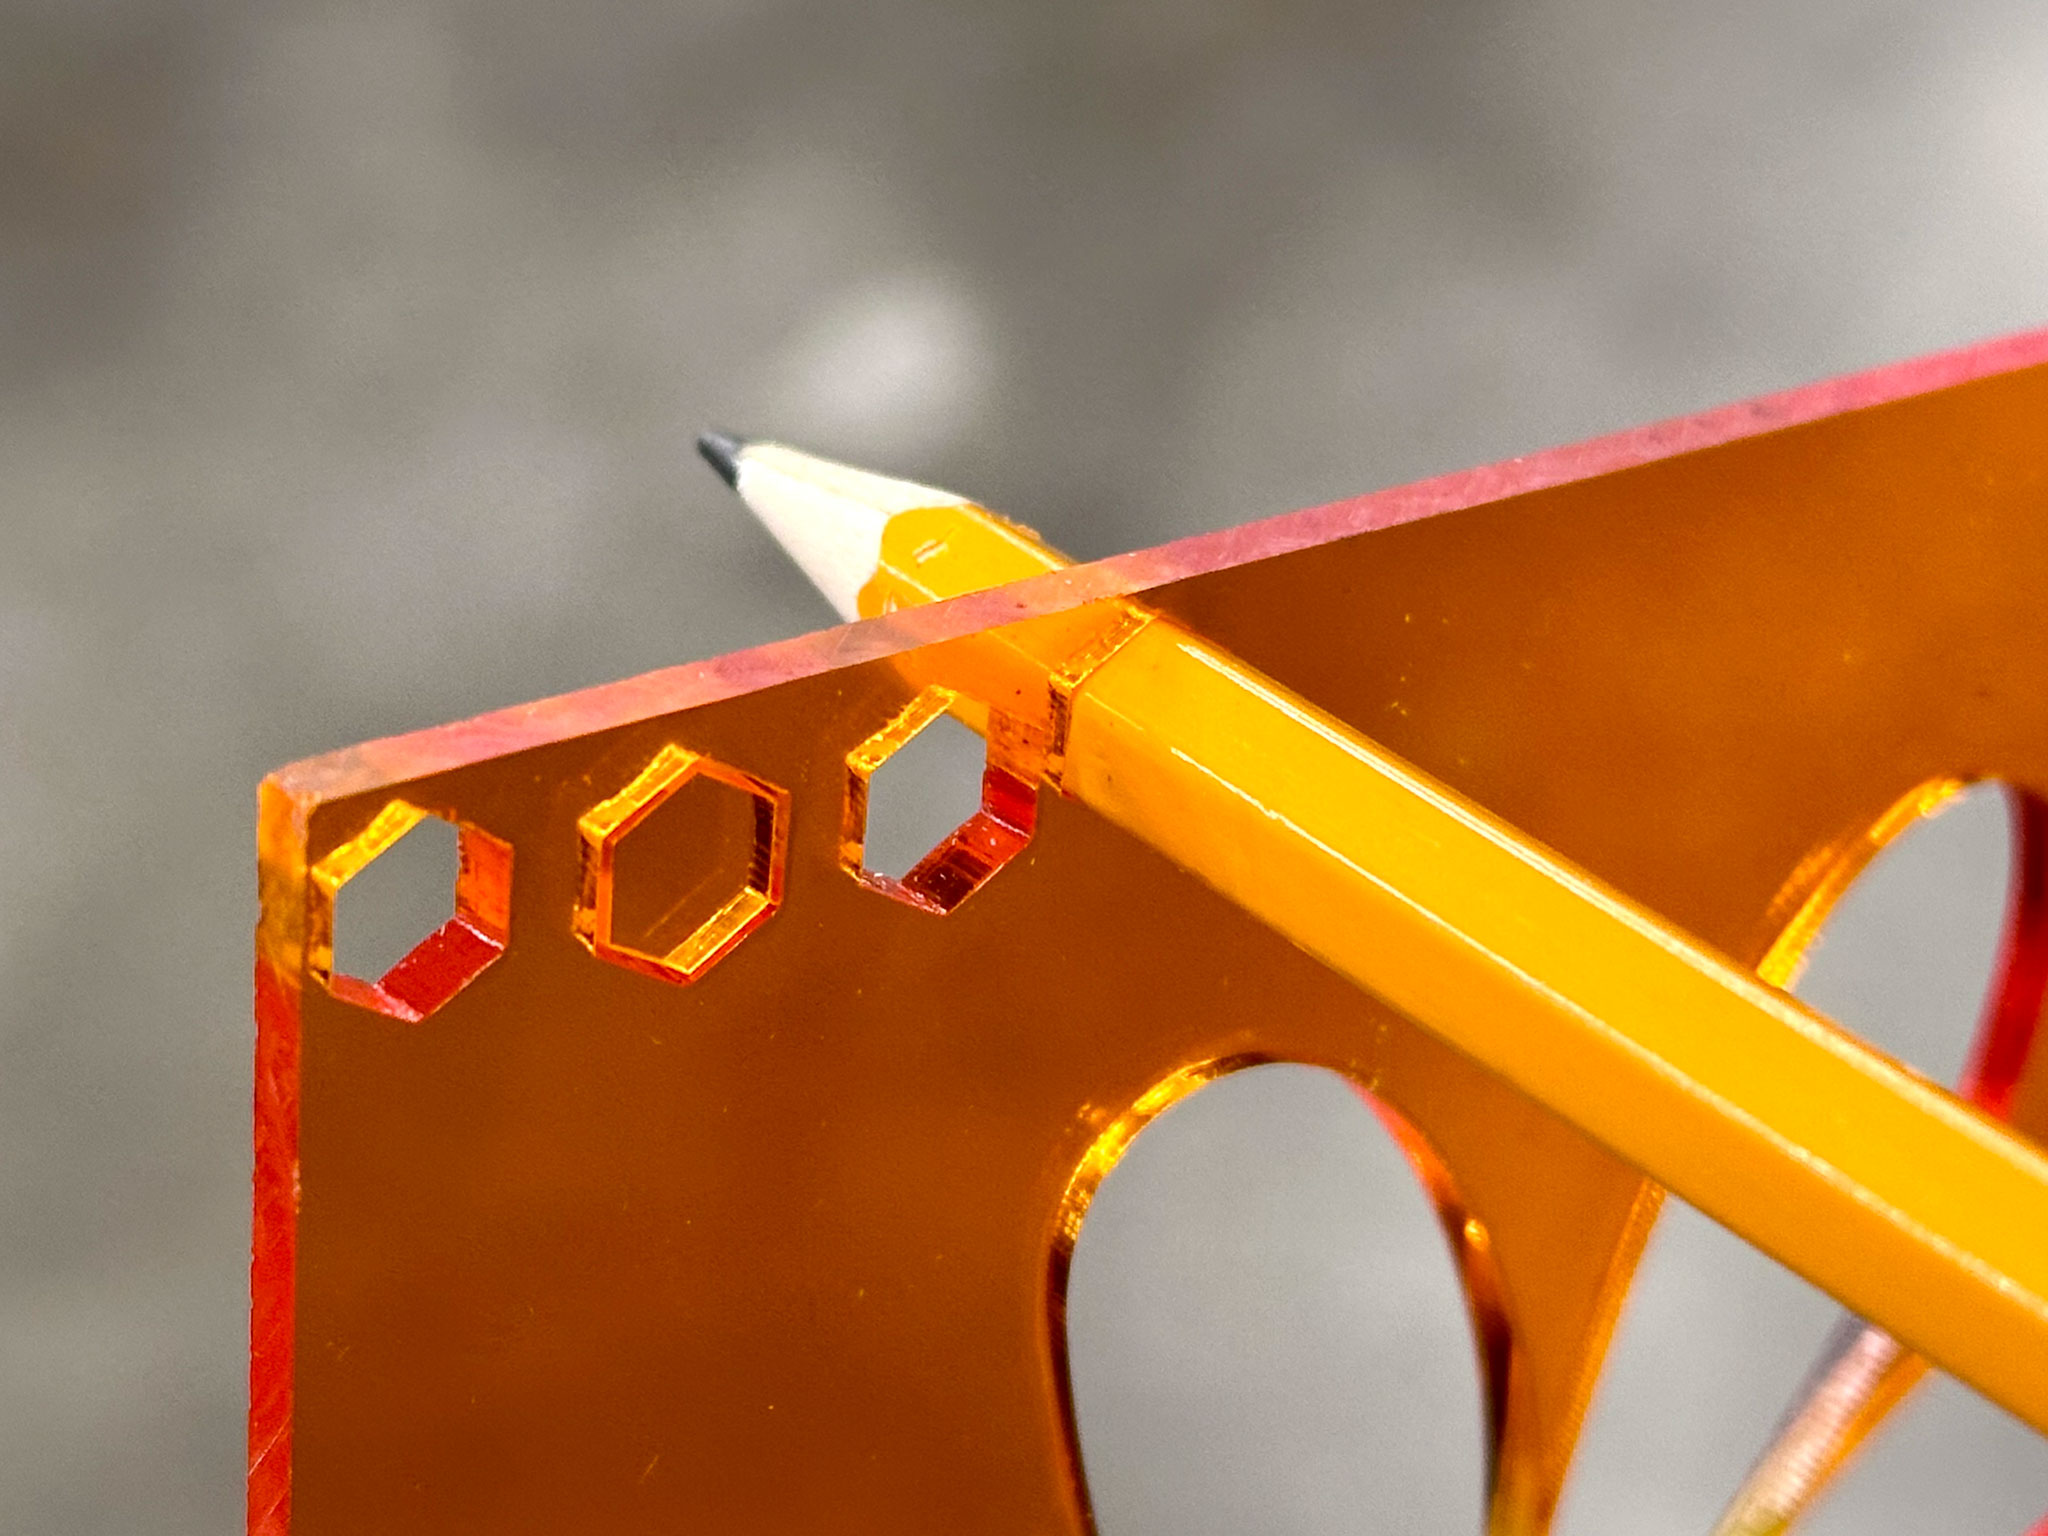 |
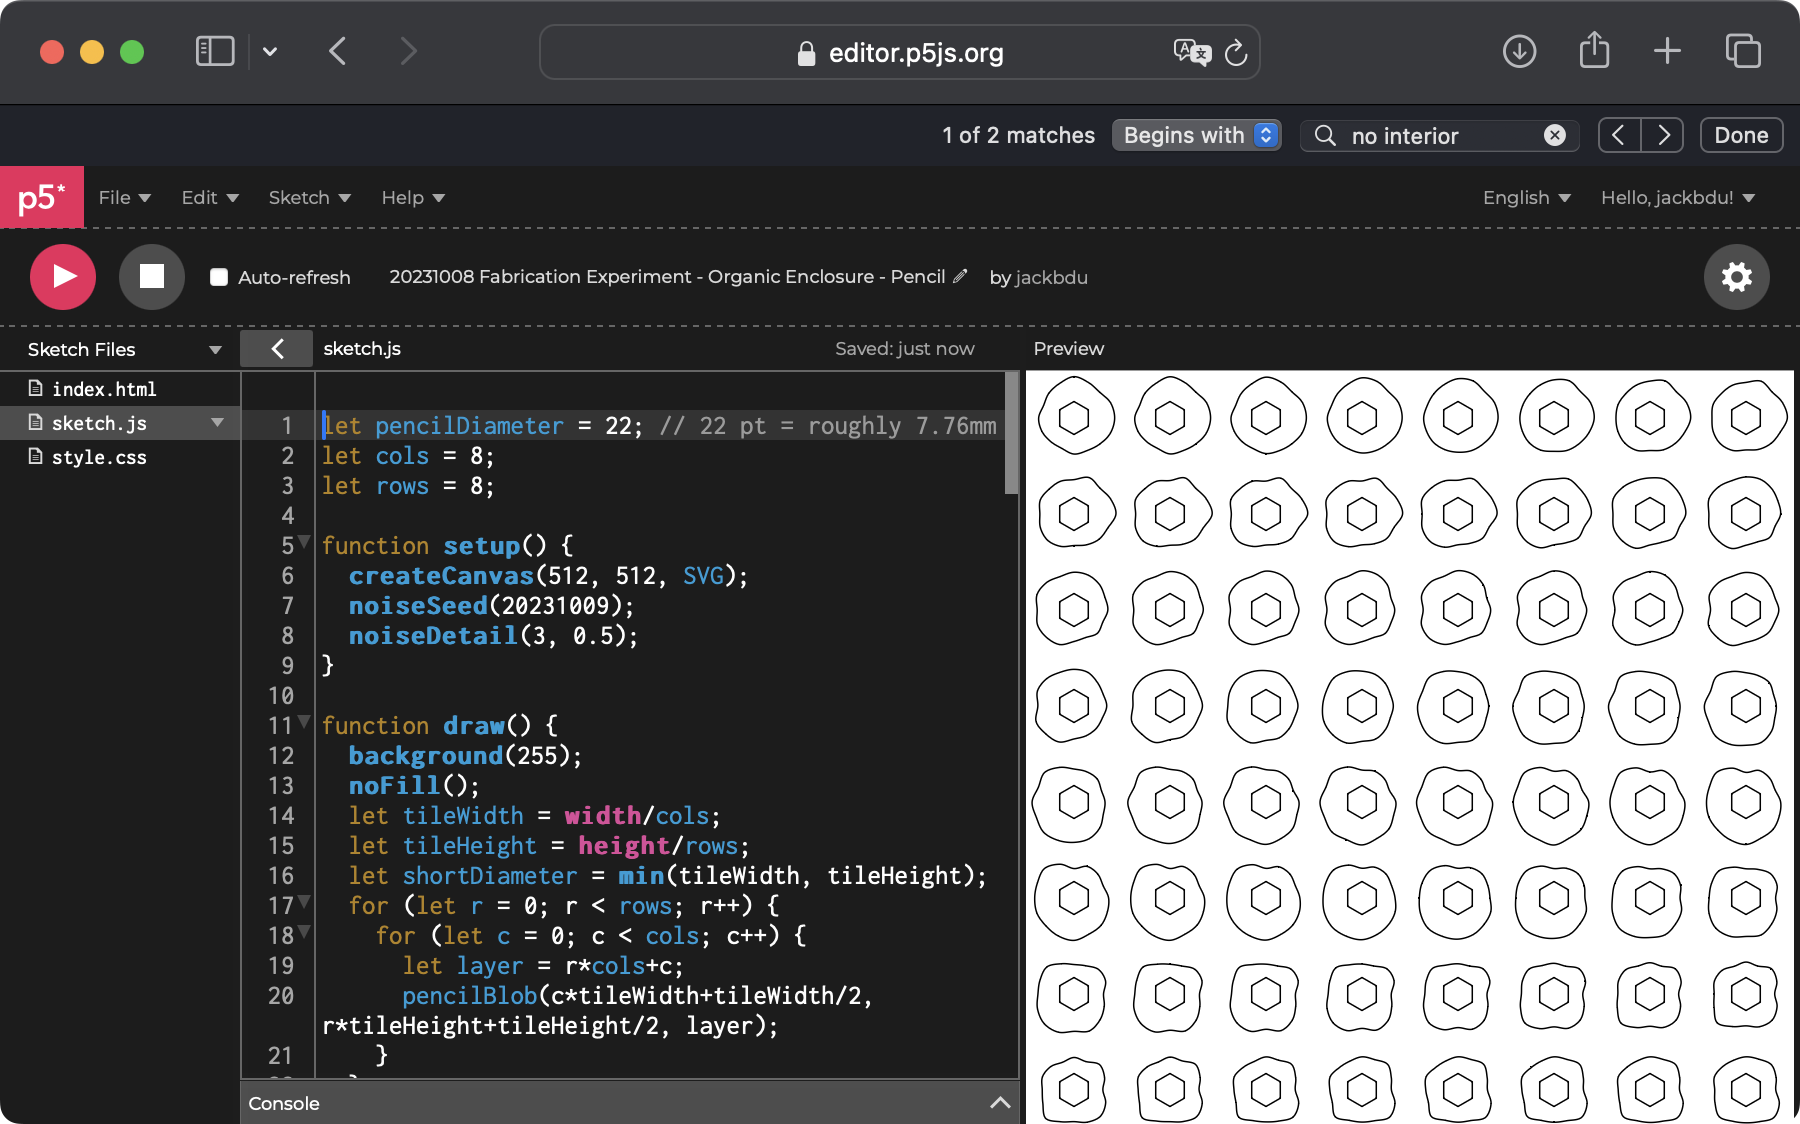
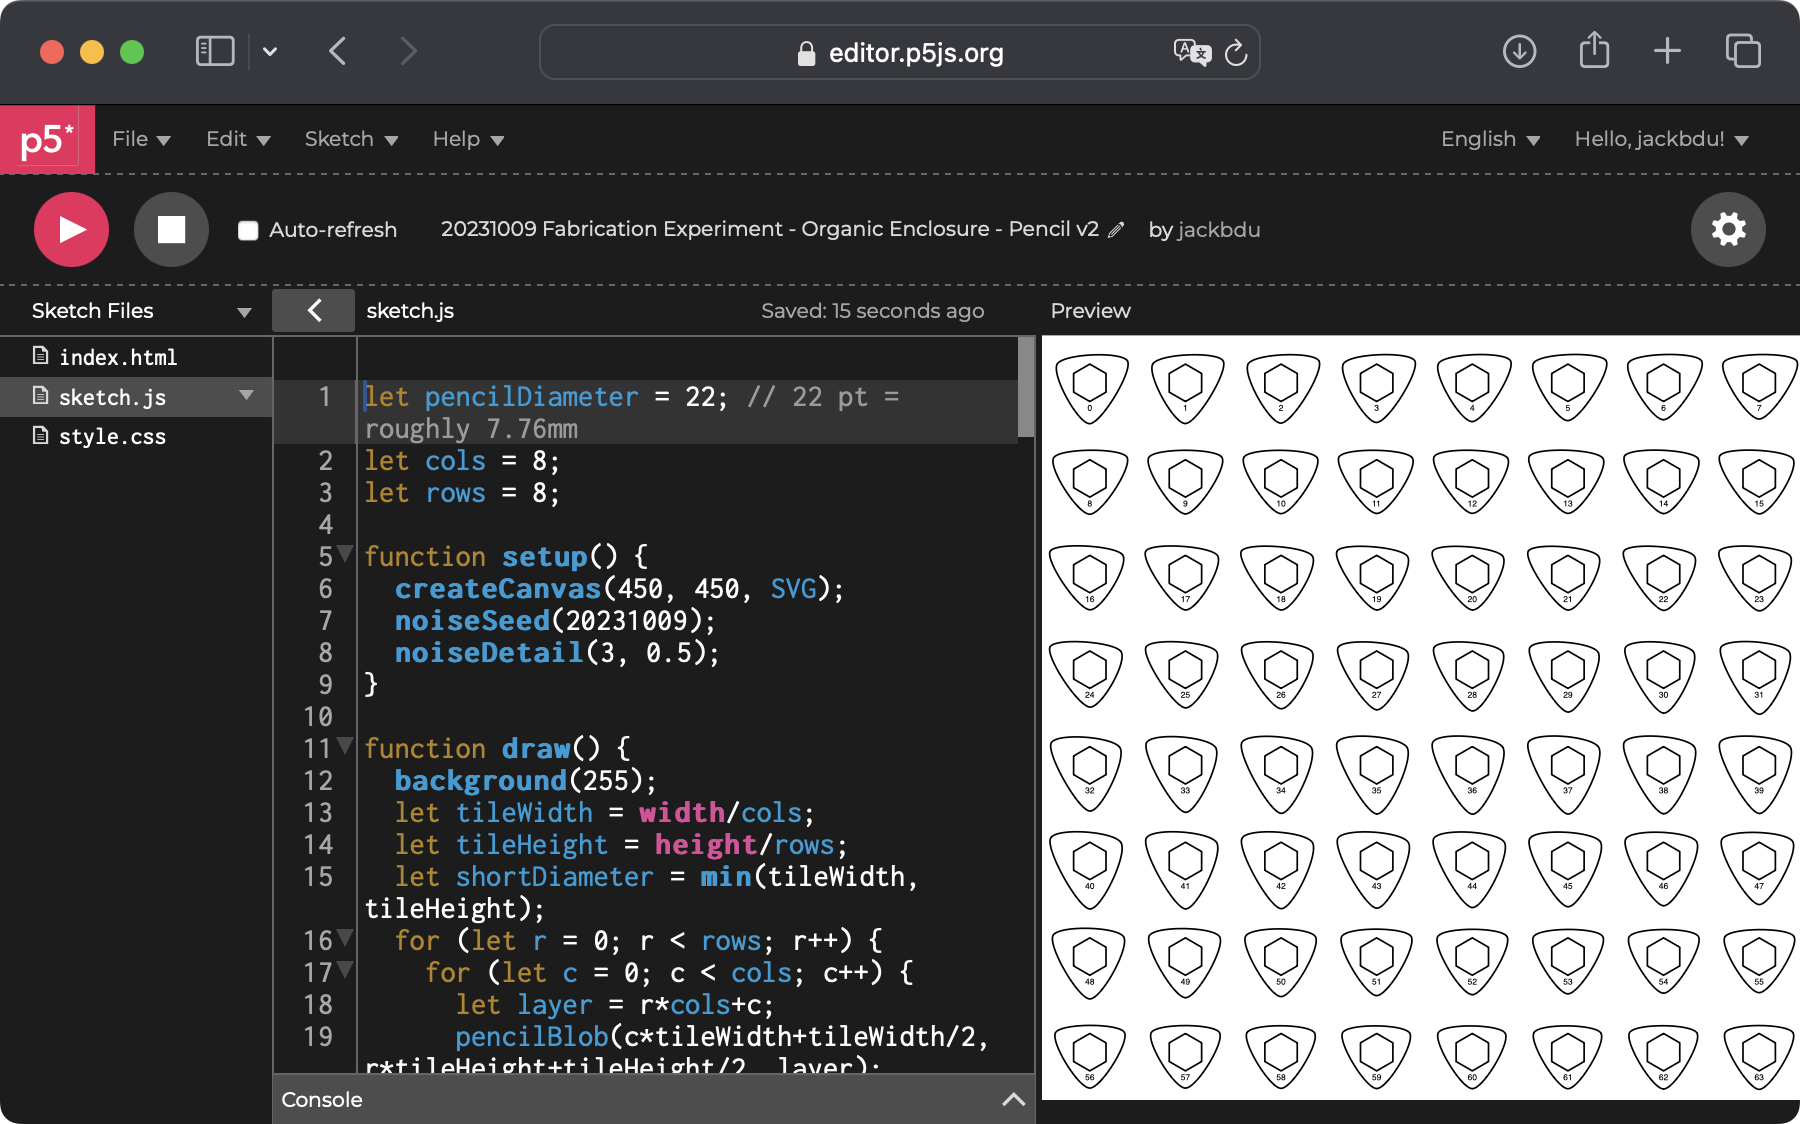
Ultimately landed on 22 pt (which translated to roughly 7.76 mm) for outer diameter of the hexagonal hole. I used Perlin noise to generate 64 organic blobs with the same hexagonal hole.
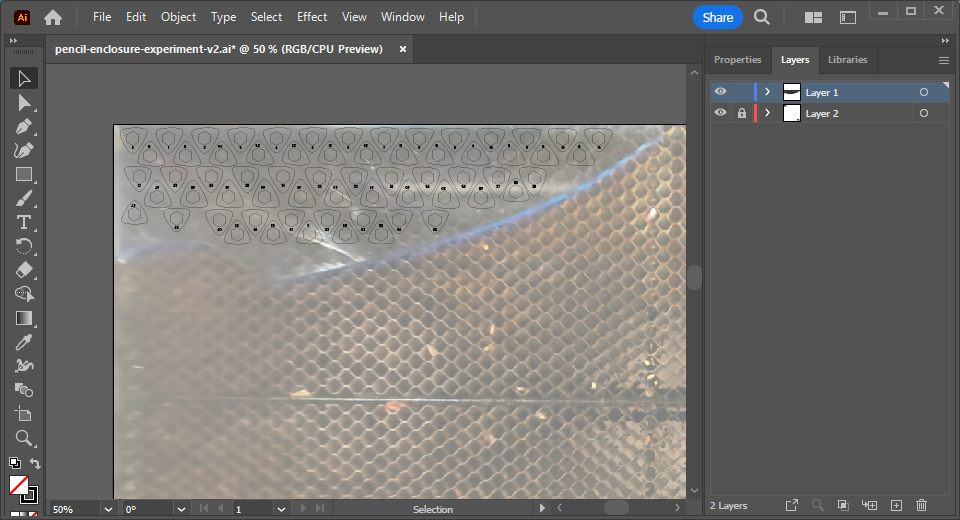
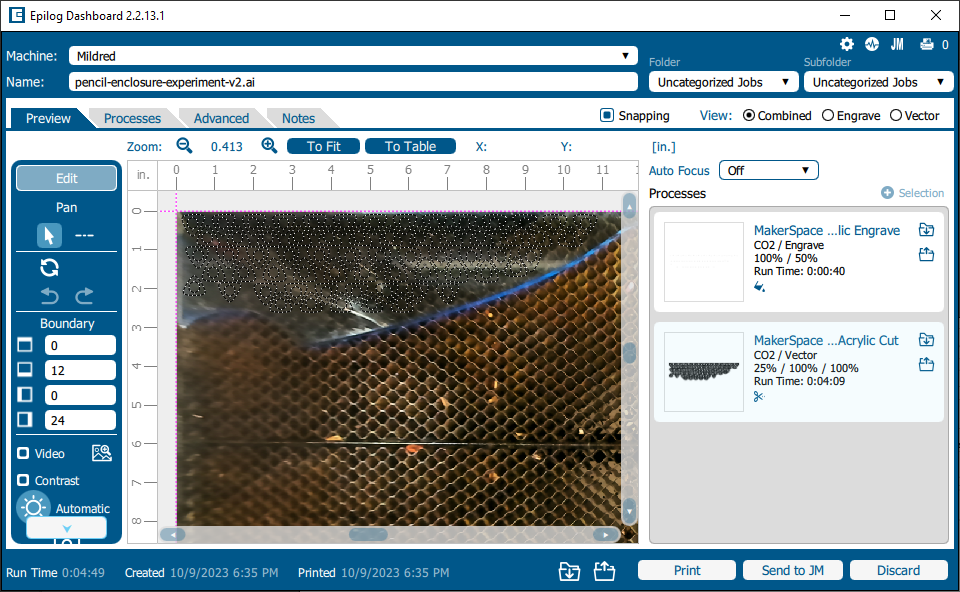
Since I was using scrap pieces, I had to carefully arrange my designs onto each piece of acrylic. Fortunately, I was using one of those camera-enabled Epilog Engravers. I found that, in Epilog Dashboard, I could export an image of camera view and imported it to Adobe Illustrator as a reference.

Below is a timelapse for cutting some of the pieces:
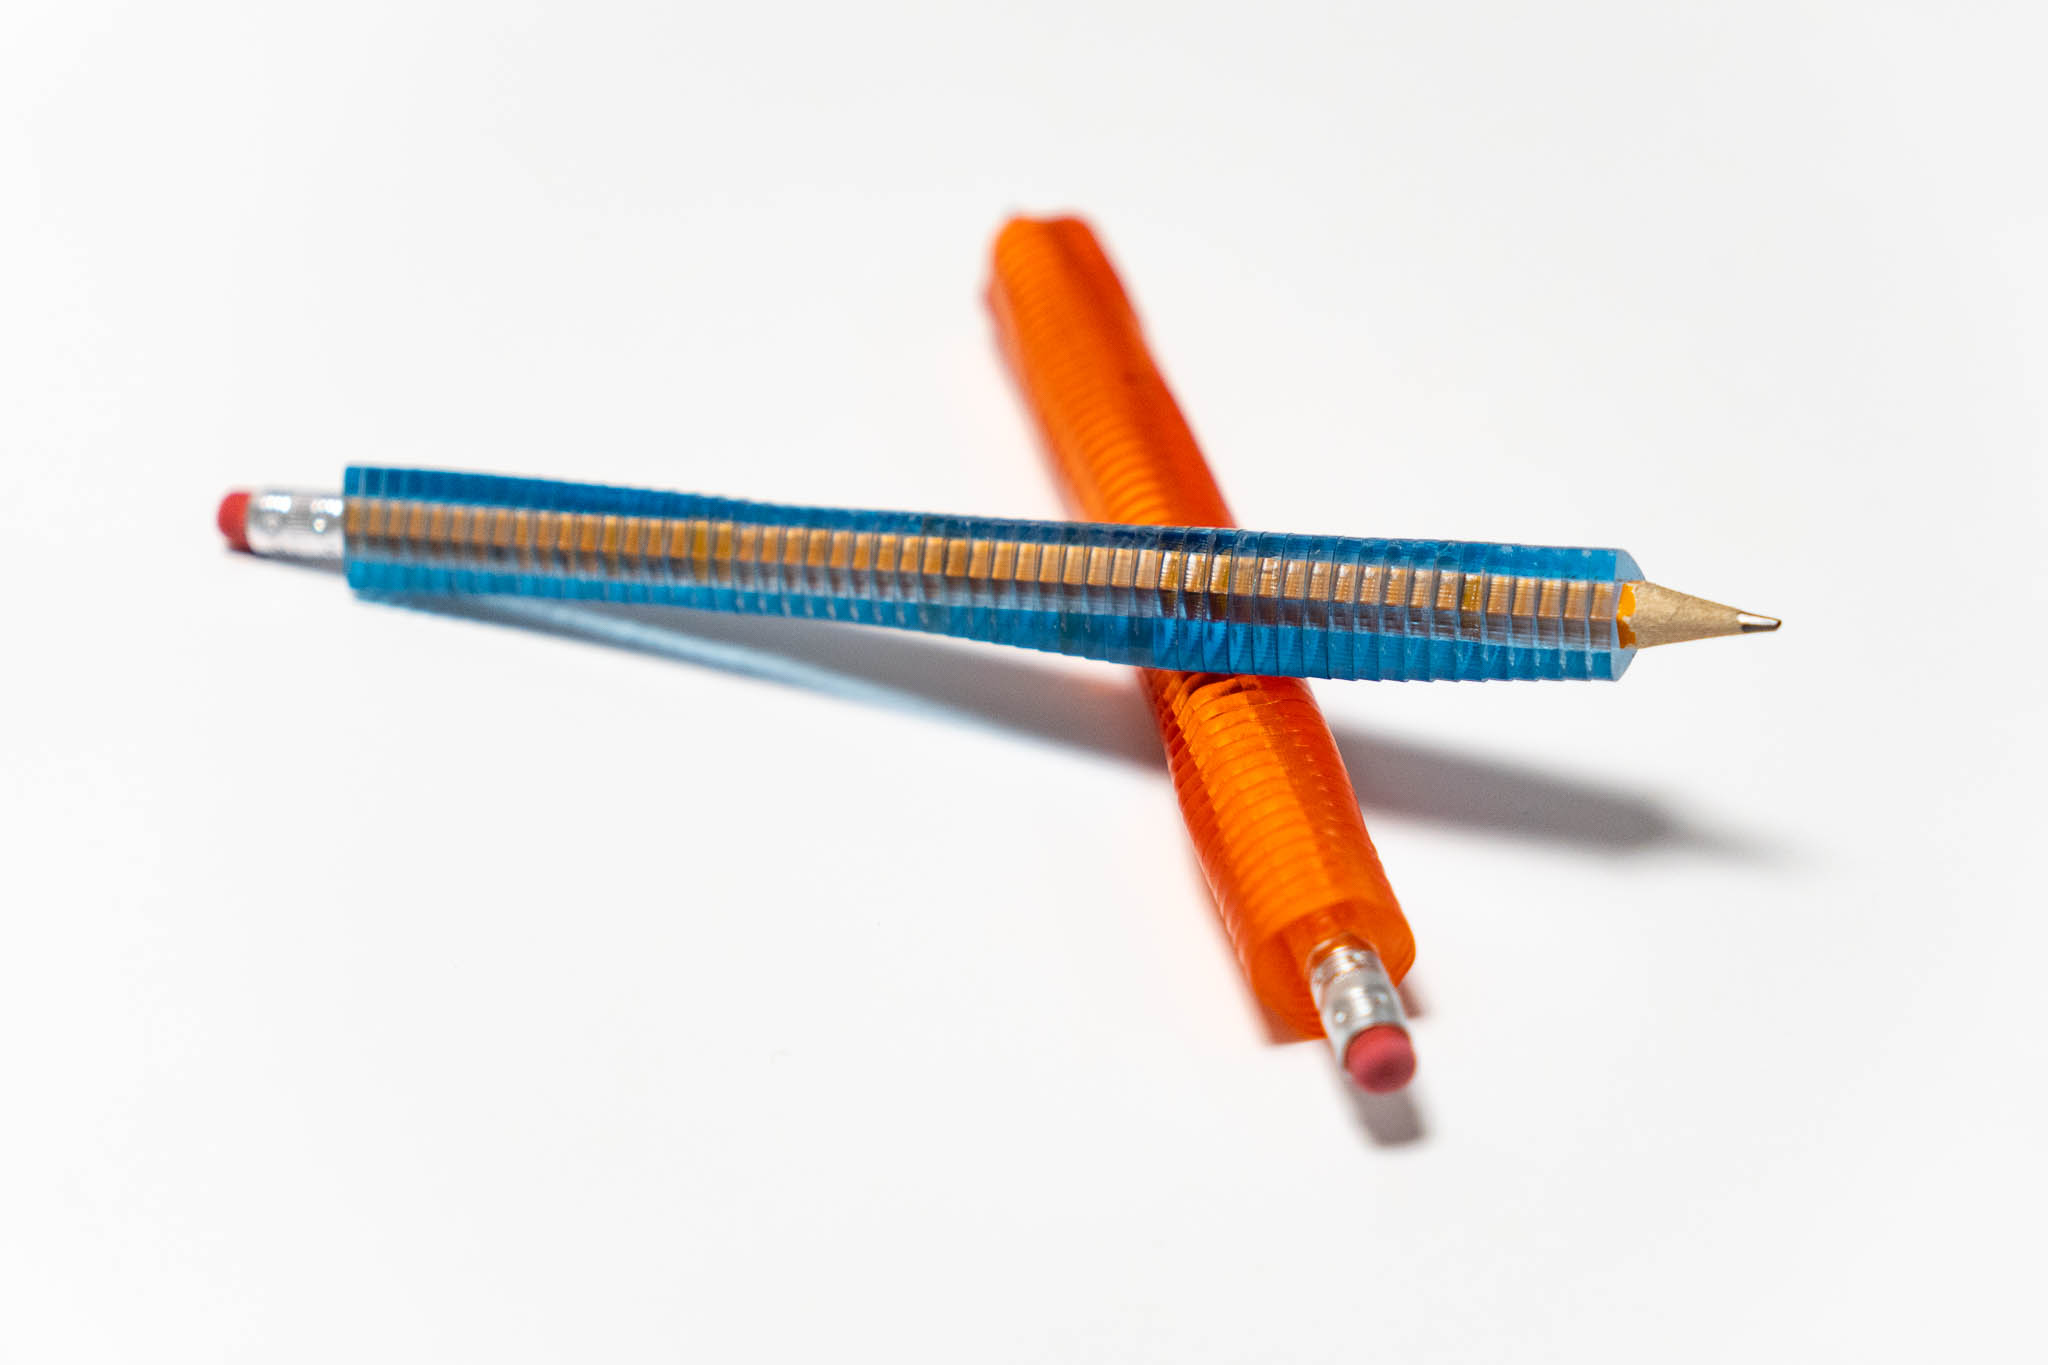
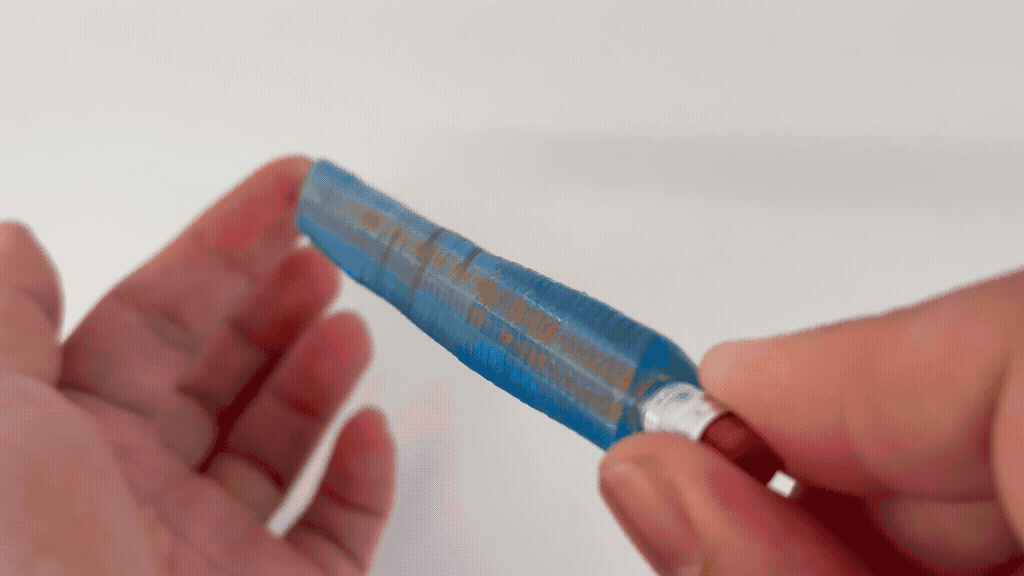
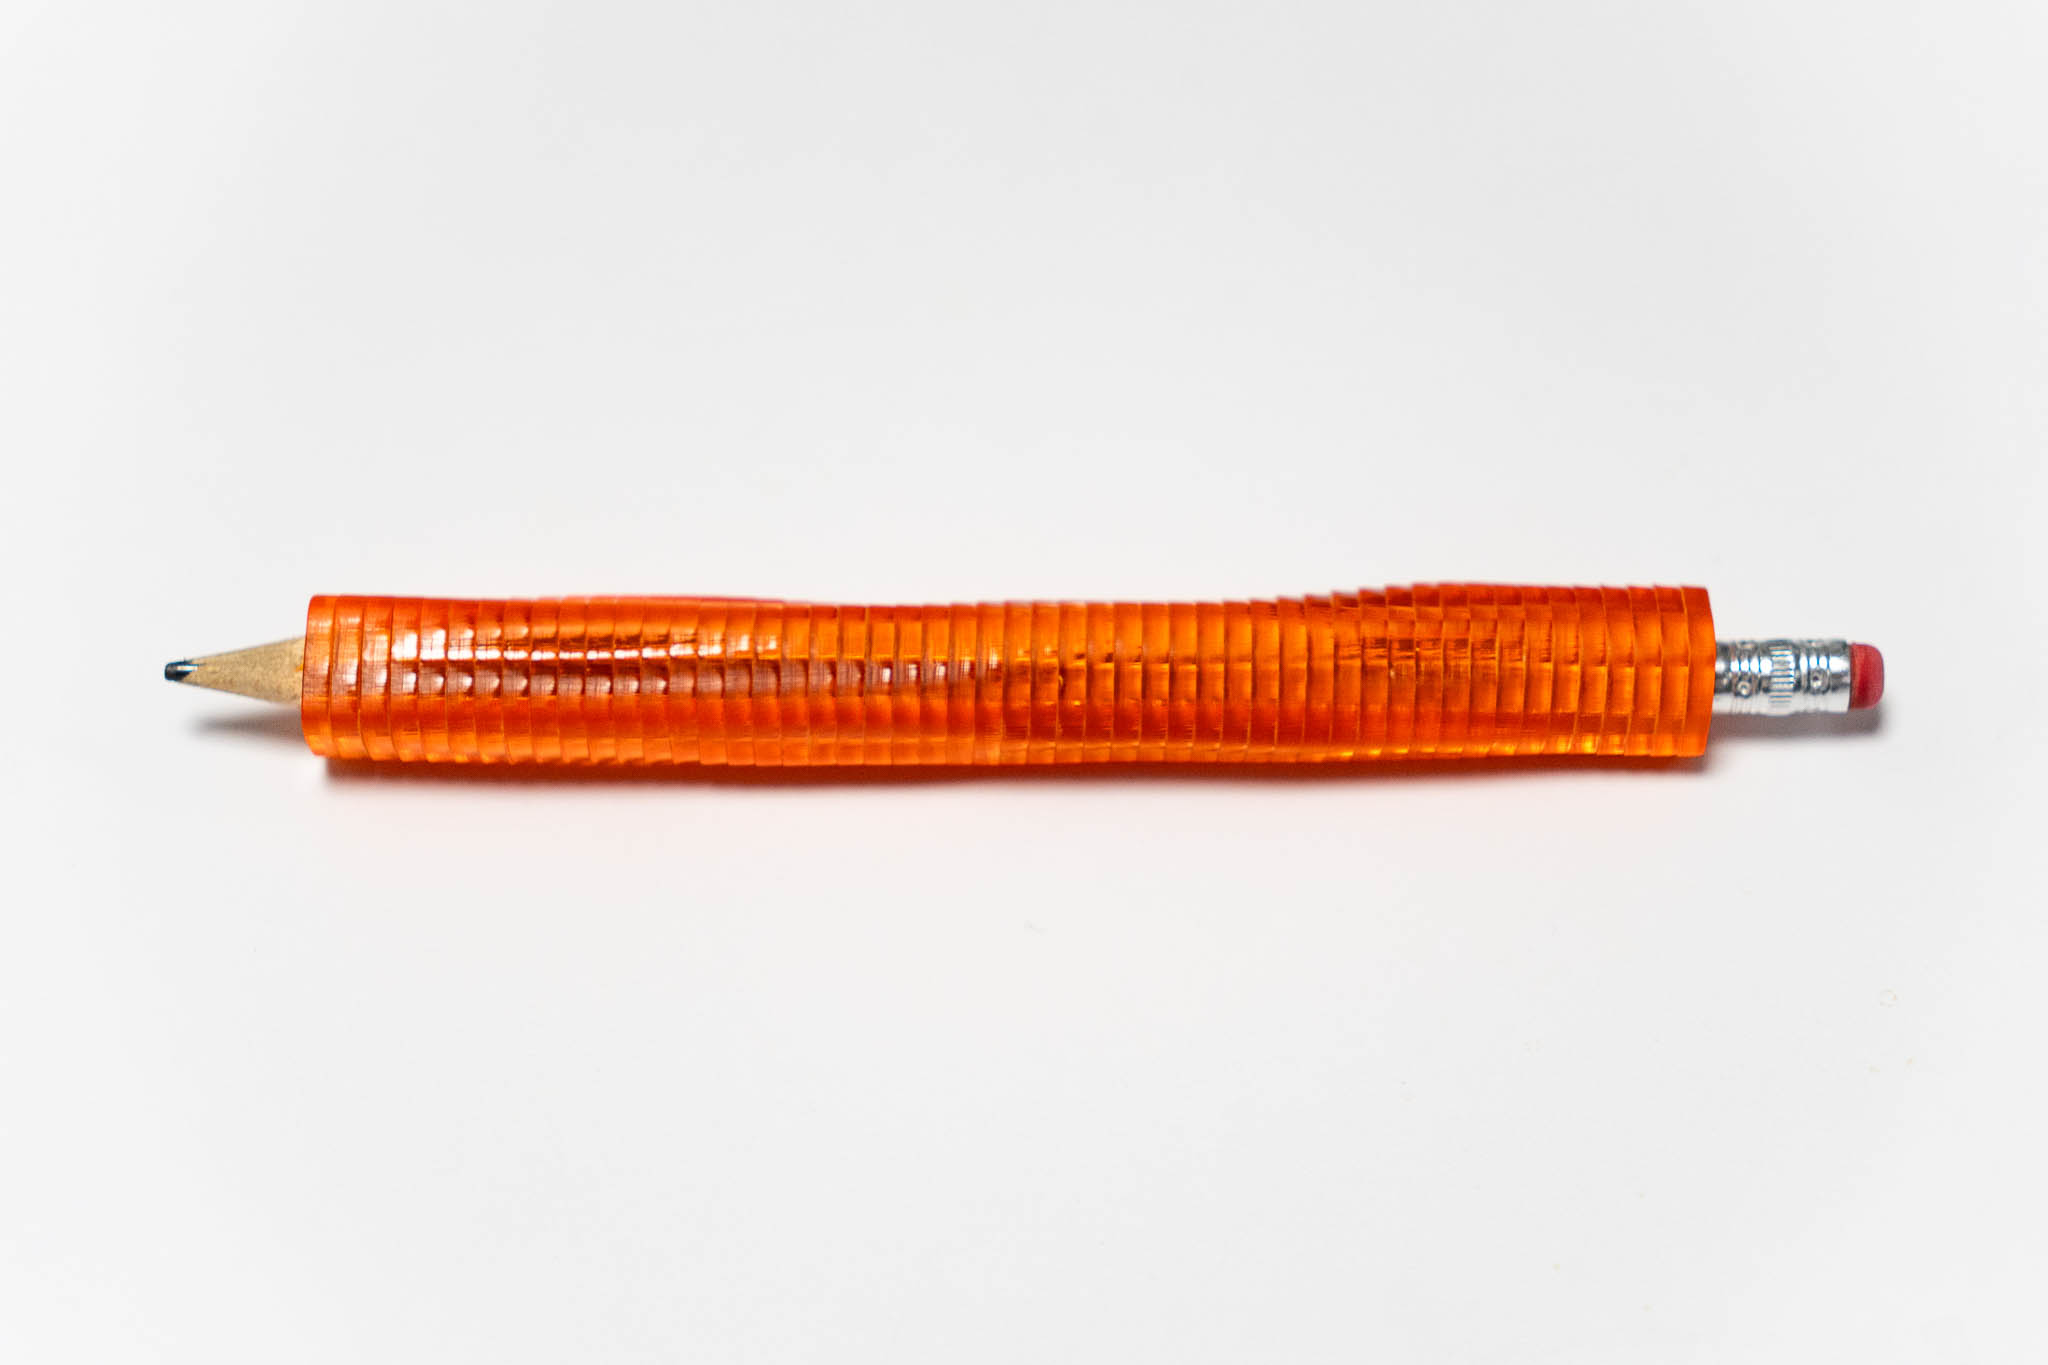
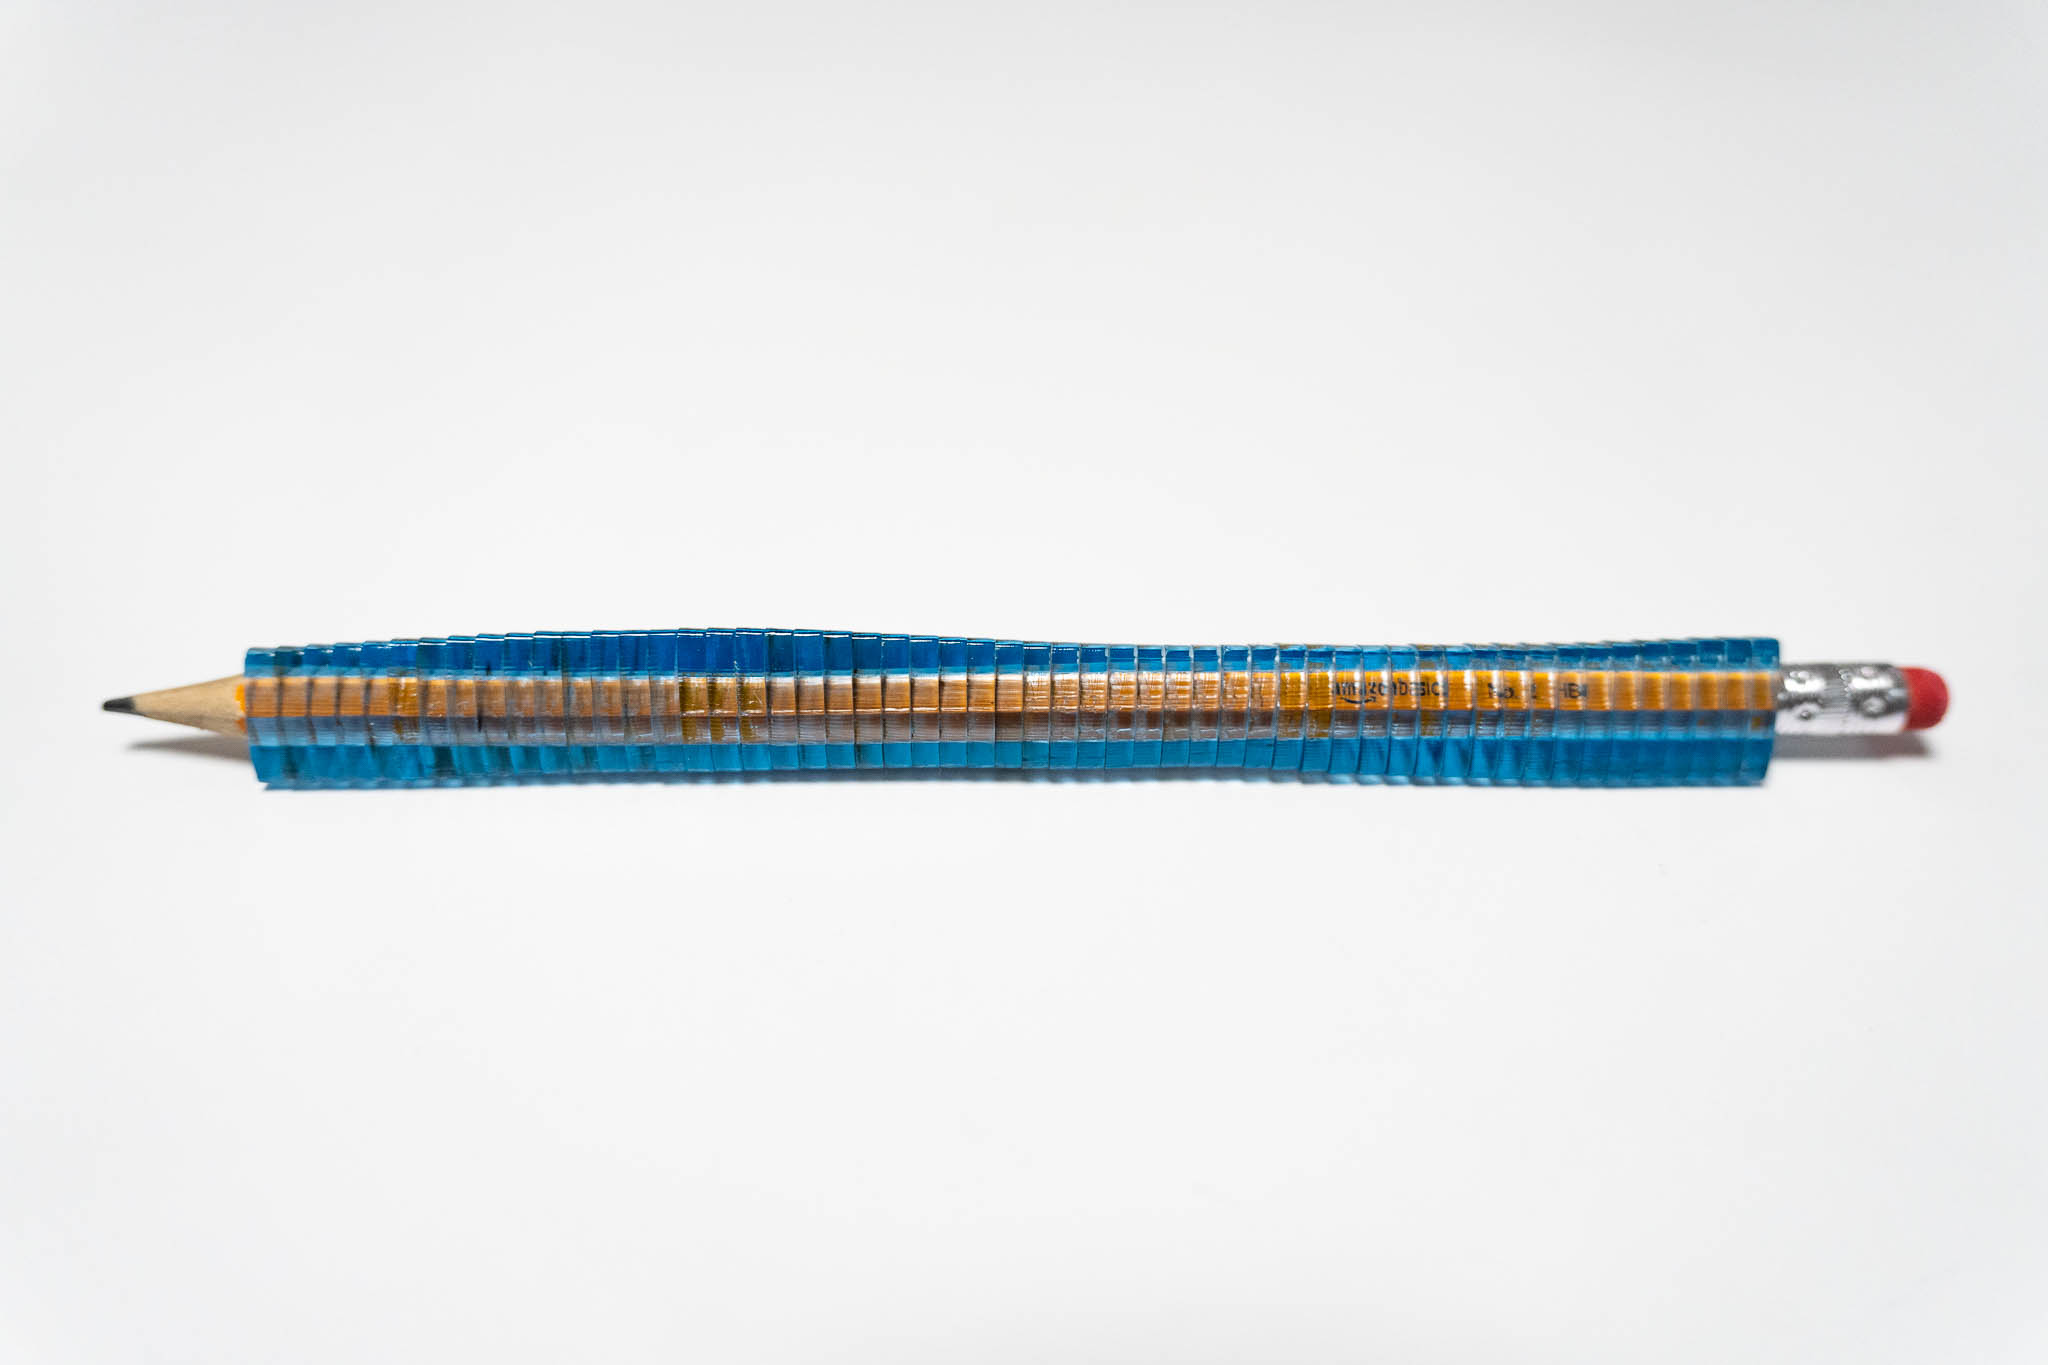
Here are what enclosure looked like when fully assembled:
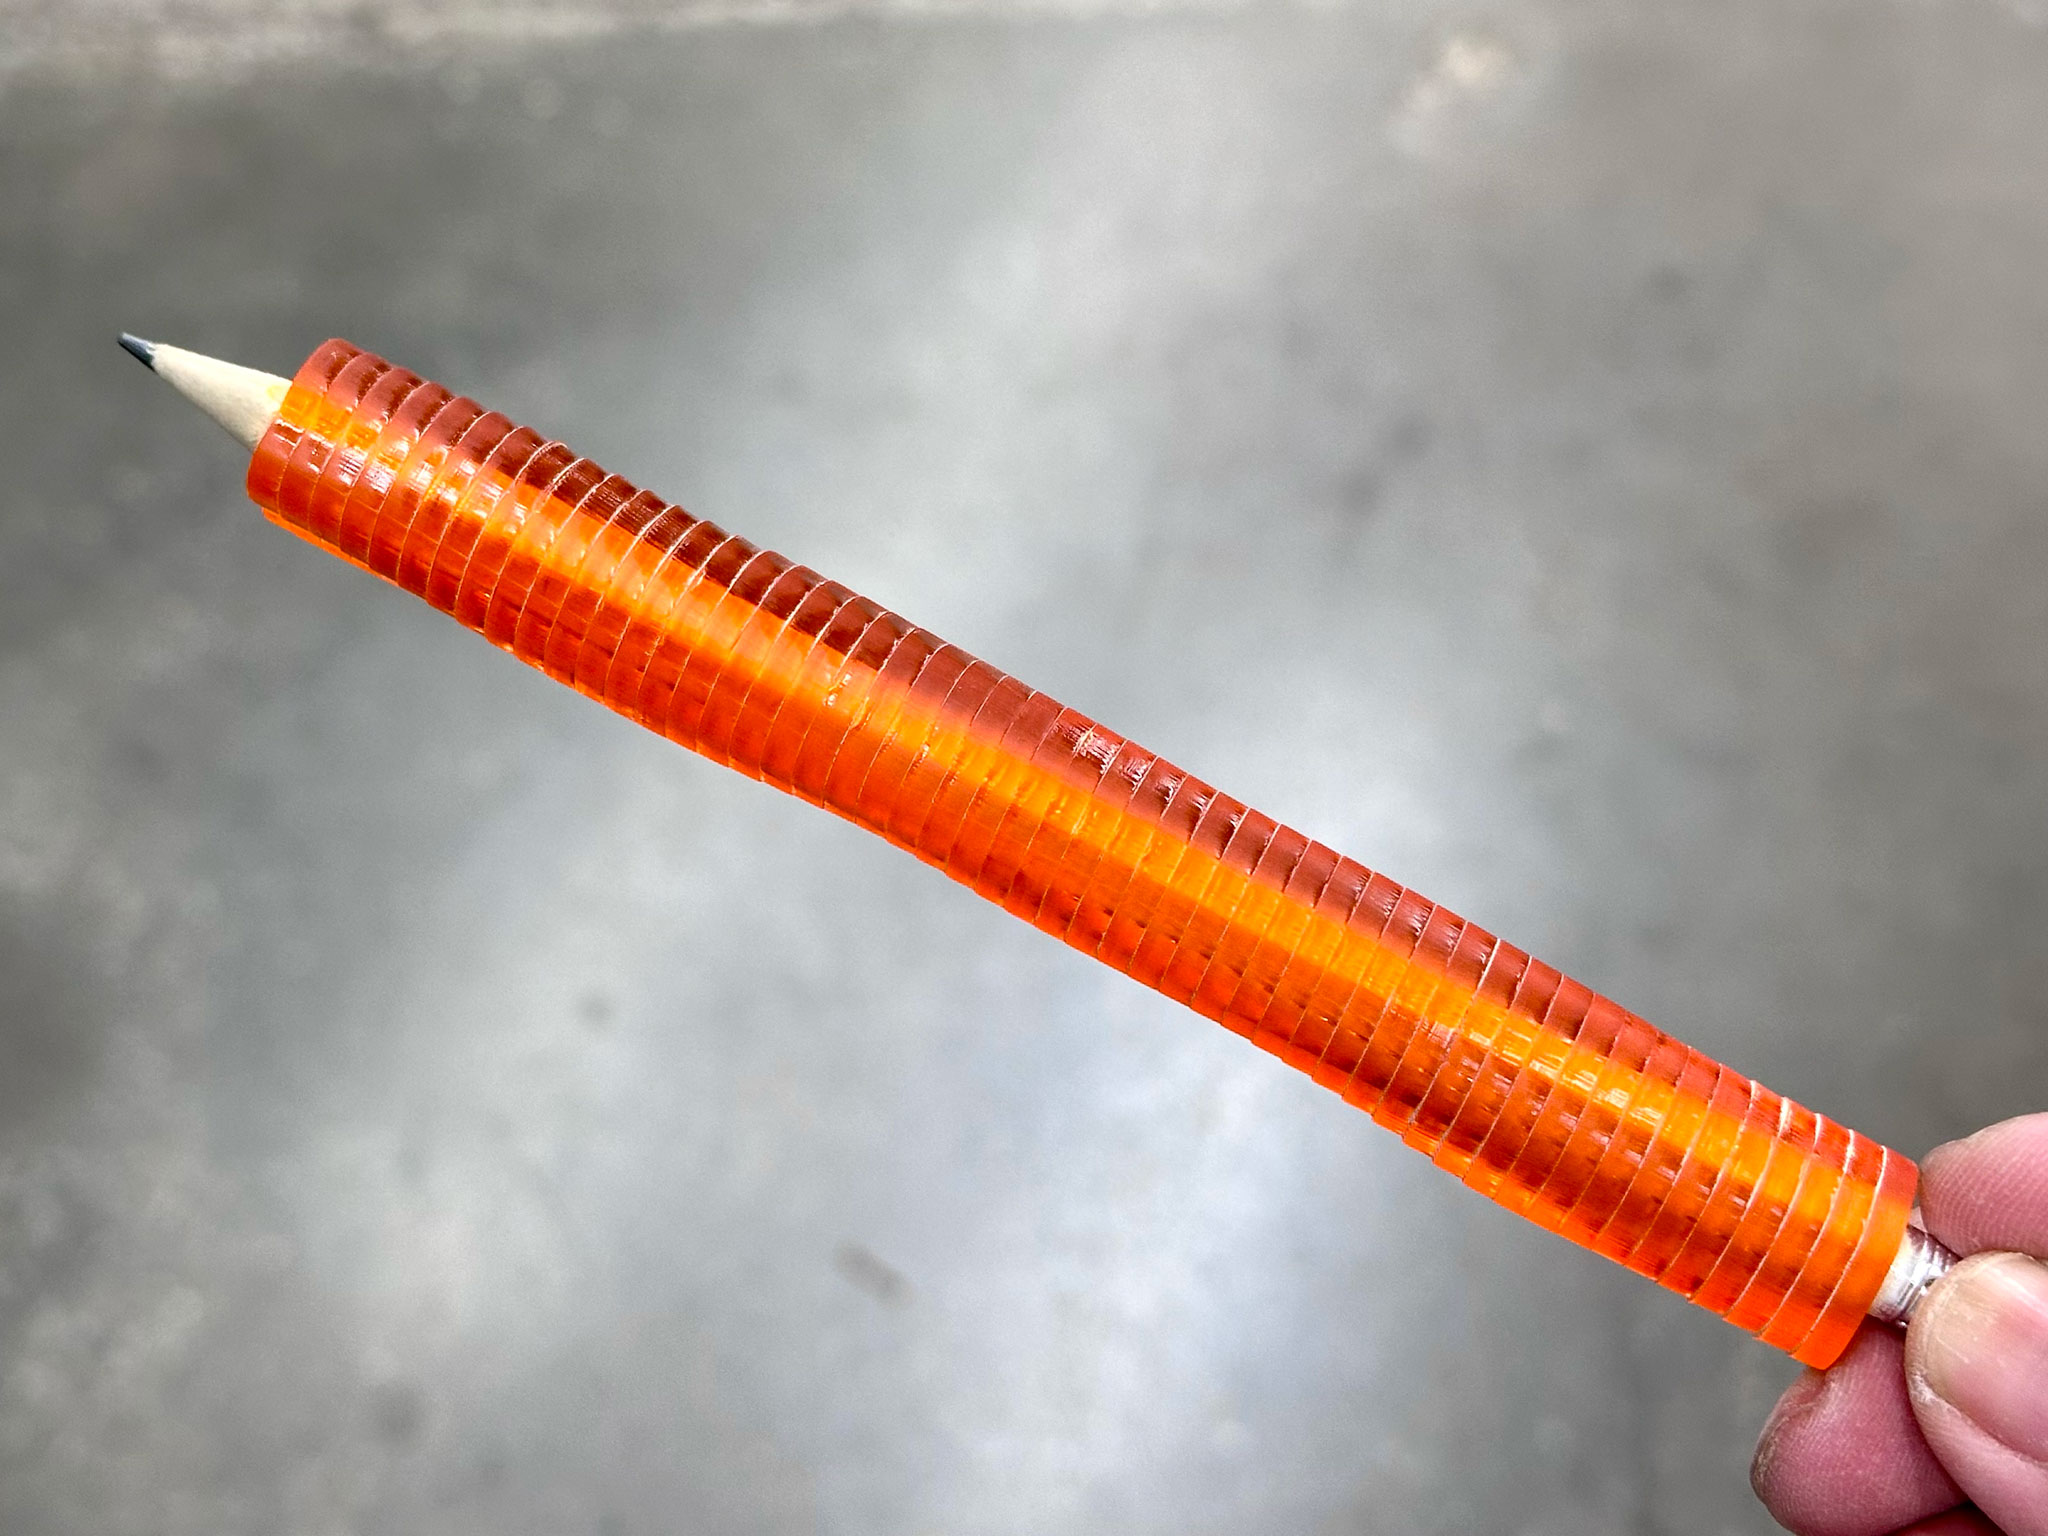
Since the orientations and the order of the pieces are crucial for the design, I found it quite challenging to keep everything organized. I had to keep assemble the pieces one by one right from the laser cutter to avoid mixing them up.
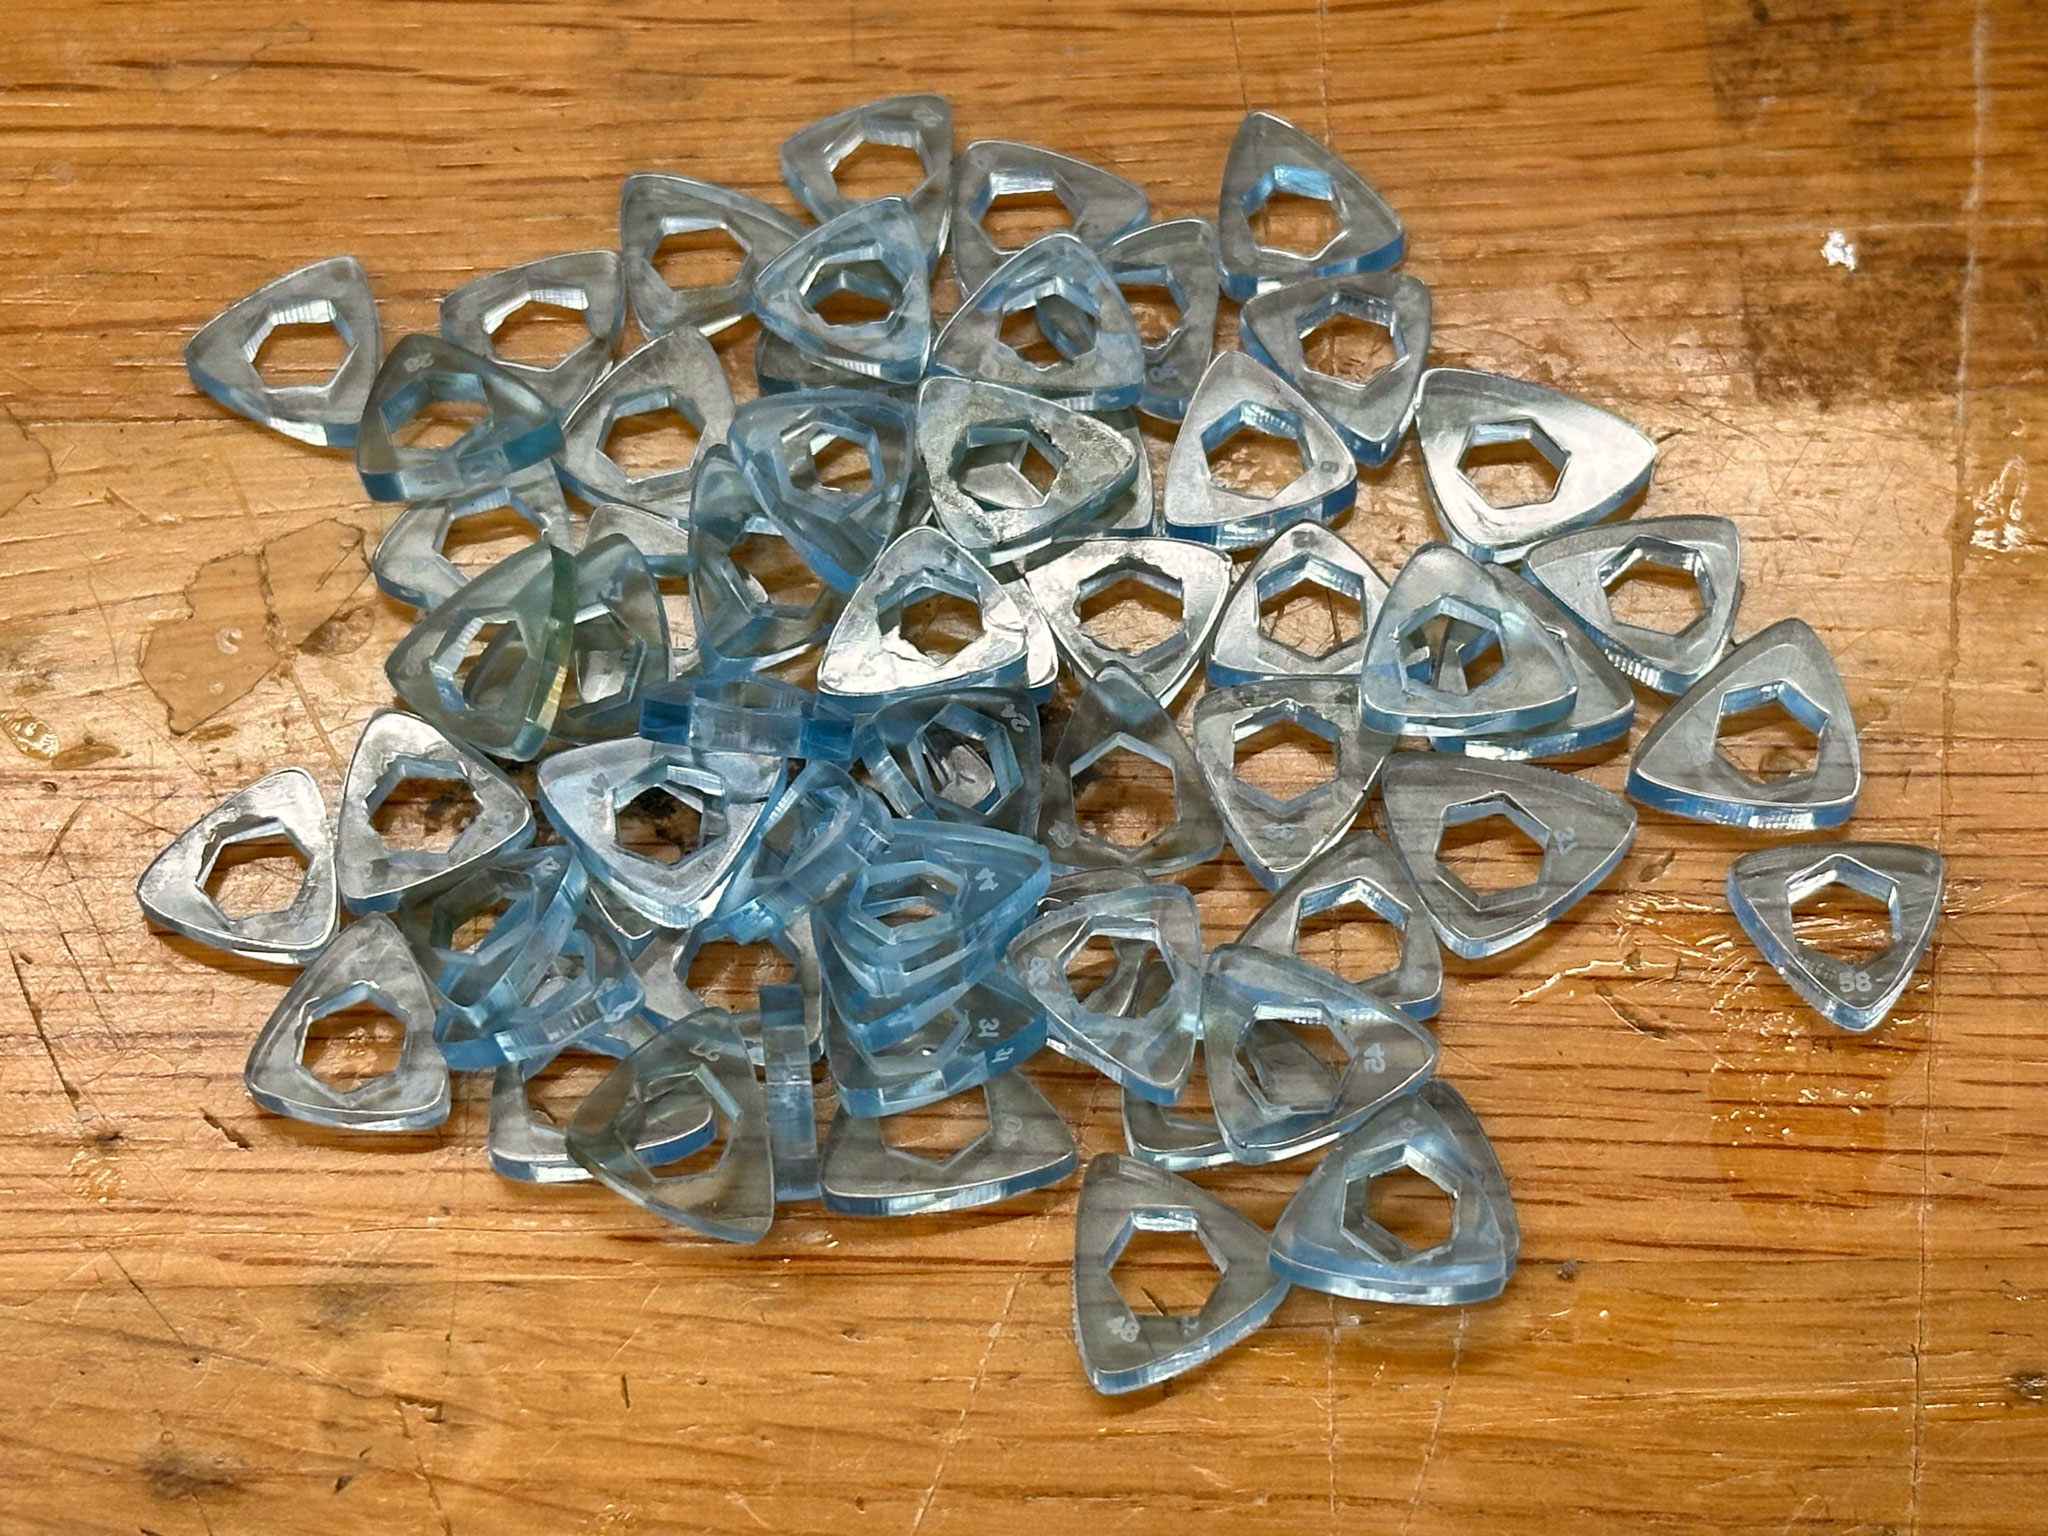
For the second iteration, I decided to add numbers to the design, which could be used to track both the order and the orientations.
Again, I carefully arranged them on the material that I was using.
Here is a timelapse of the cutting process:
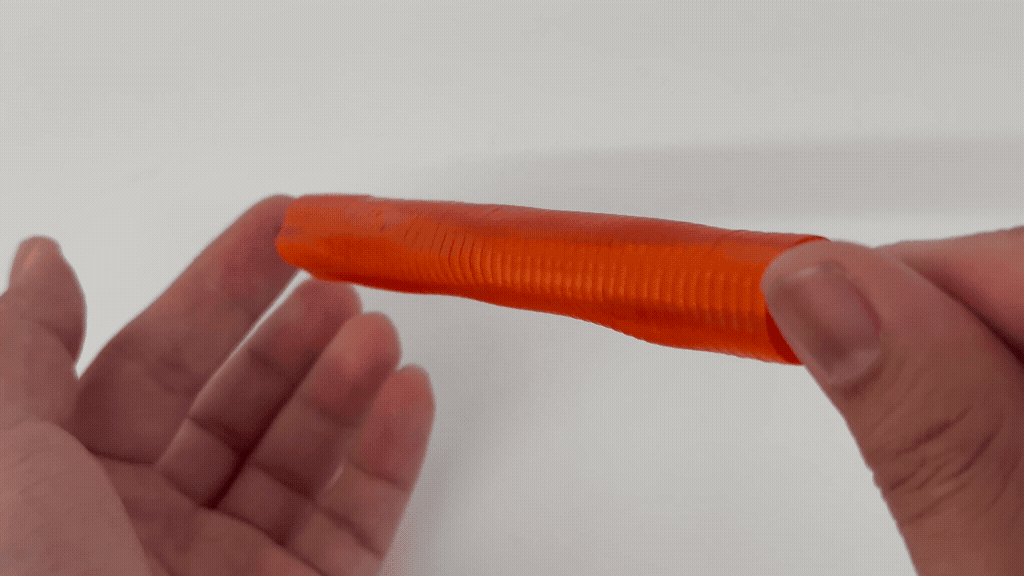
This time, even though I did not need to worry about the order, I faced a new challenge. With this triangular exterior, some of the edges were very thin, which were prone to break. I think the pencil and the material might have potentially been slightly different too. The good thing was that, with the pieces being numbered, I could easily identify and recut the pieces needed.
After it was fully assembled, I realized that the transition of the edges was a bit too subtle for this one, as there were only three vertices. If I were to make this again, I might either increase the differences between layers, or add rotation so that the edges follow a spiral pattern for a more interesting look.
Finally, please enjoy more photos showing these two designs.

 |
 |