Getting Started with Premiere
A workshop on the basics of Adobe Premiere Pro.
Table of Contents
- Step 1: Create New Project
- Step 2: Create New Sequence
- Step 3: Import Media
- Step 4: Save the Project
- Step 5: Learn the Workflow
- Step 6: Export for Sharing
Step 1: Create New Project
We start off by launching the application either in Launchpad or with Spotlight.
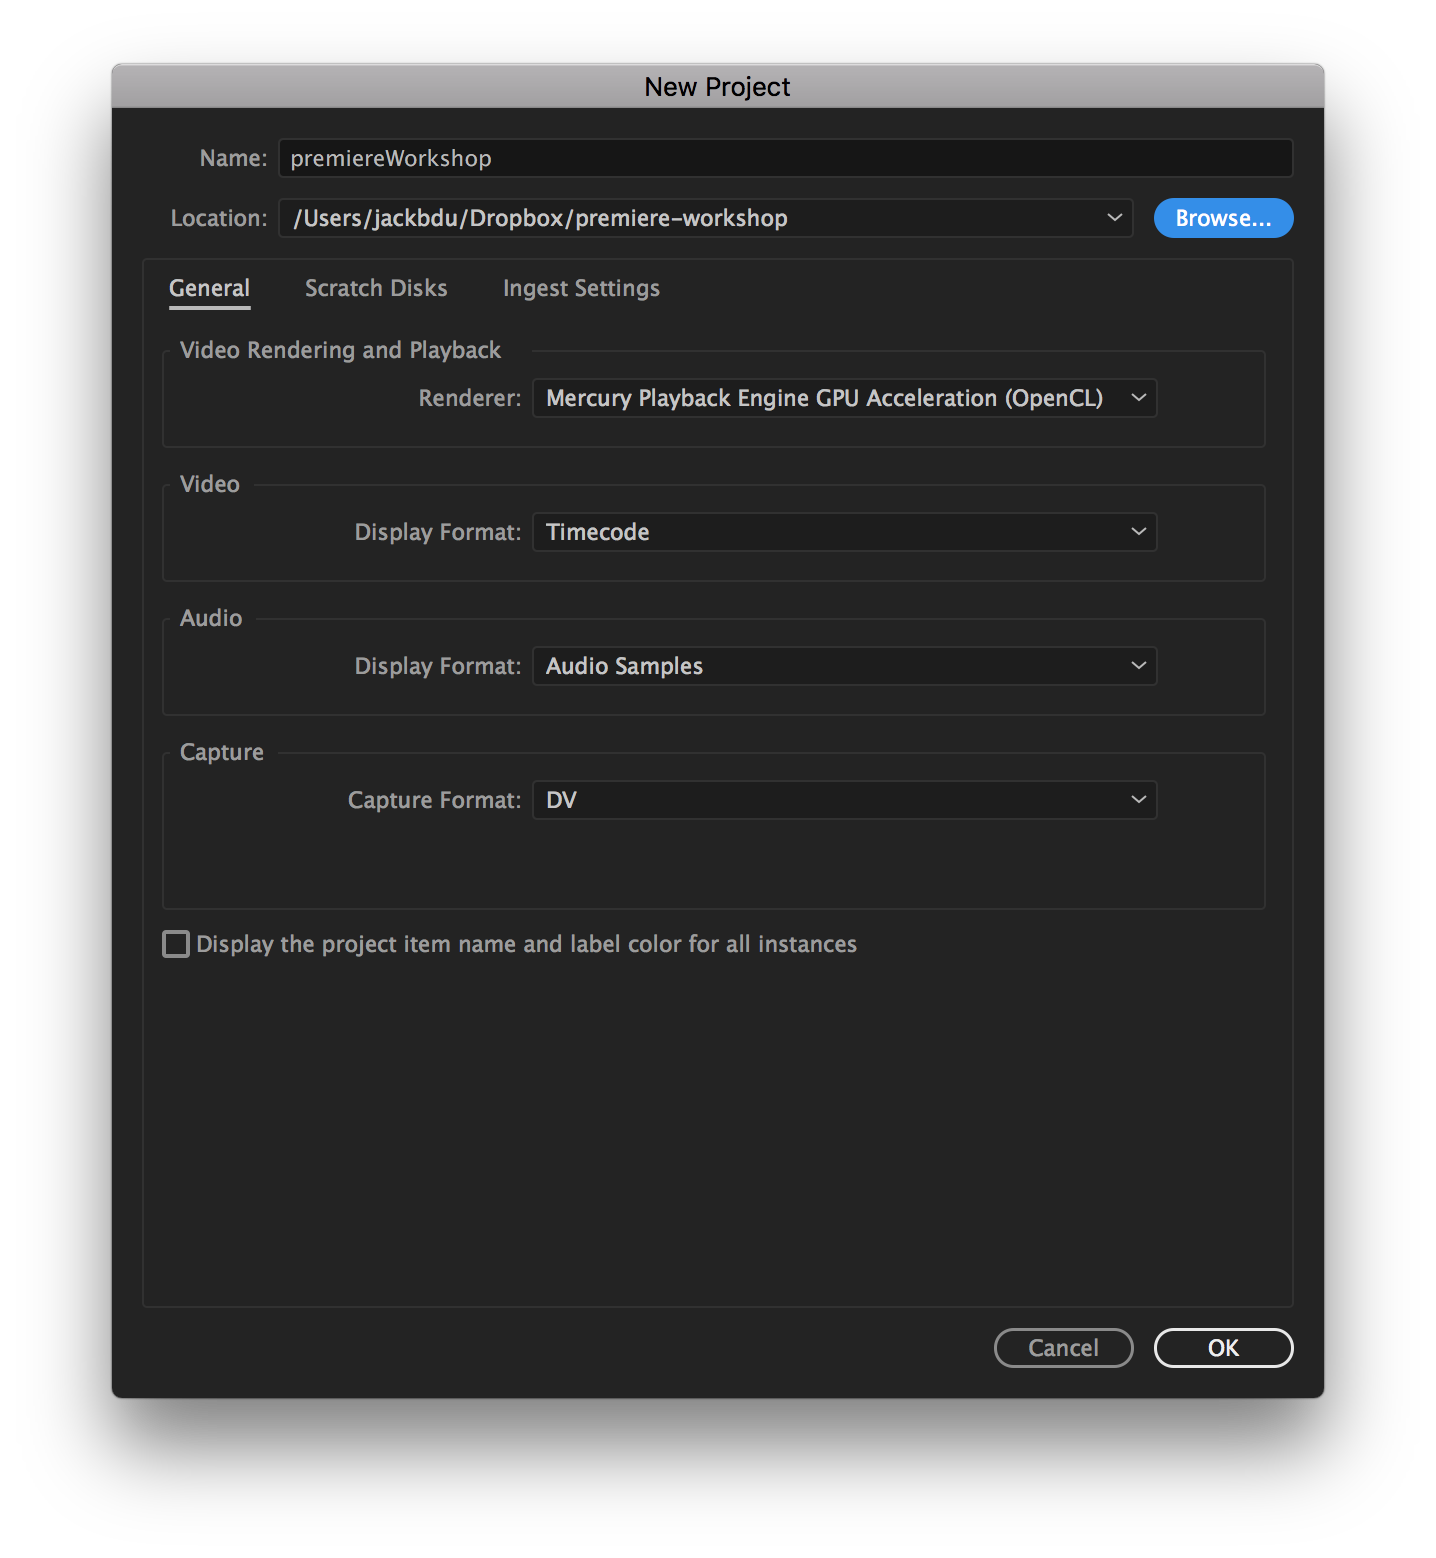
Once Premiere is launched, the first thing we see is the Start window, where we can create a new project by clicking New Project… and we will see the window below. Name and Location are the two fields we need to change based on our needs, and we can leave everything else default for the purpose of this tutorial.
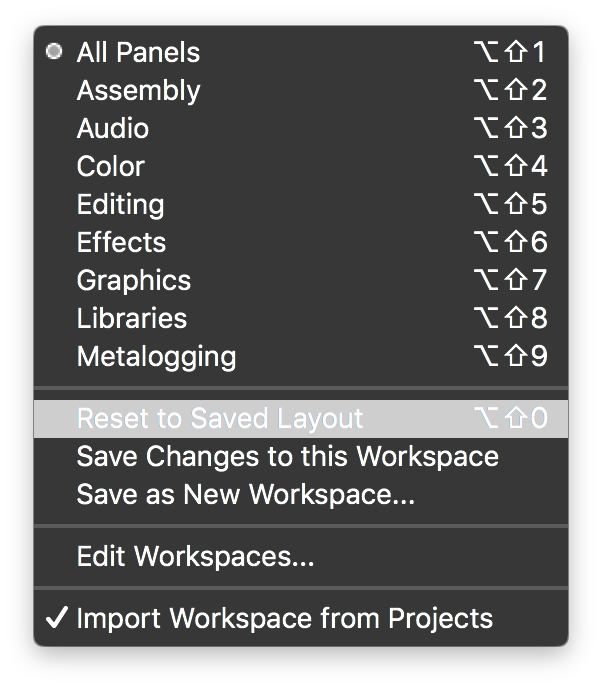
Once our project is created, we may see a different workspace depending on the previous user settings. There are two steps (as illustrated below) we need to do in order to make sure we are on the same workspace. And this is also what we do whenever we get lost (when don’t know where everything is).

- Choose Window > Workspaces > All Panels. This sets the workspace to All Panels.
- Choose Window > Workspaces > Reset to Saved Layout. This resets All Panels to default.
 |
 |
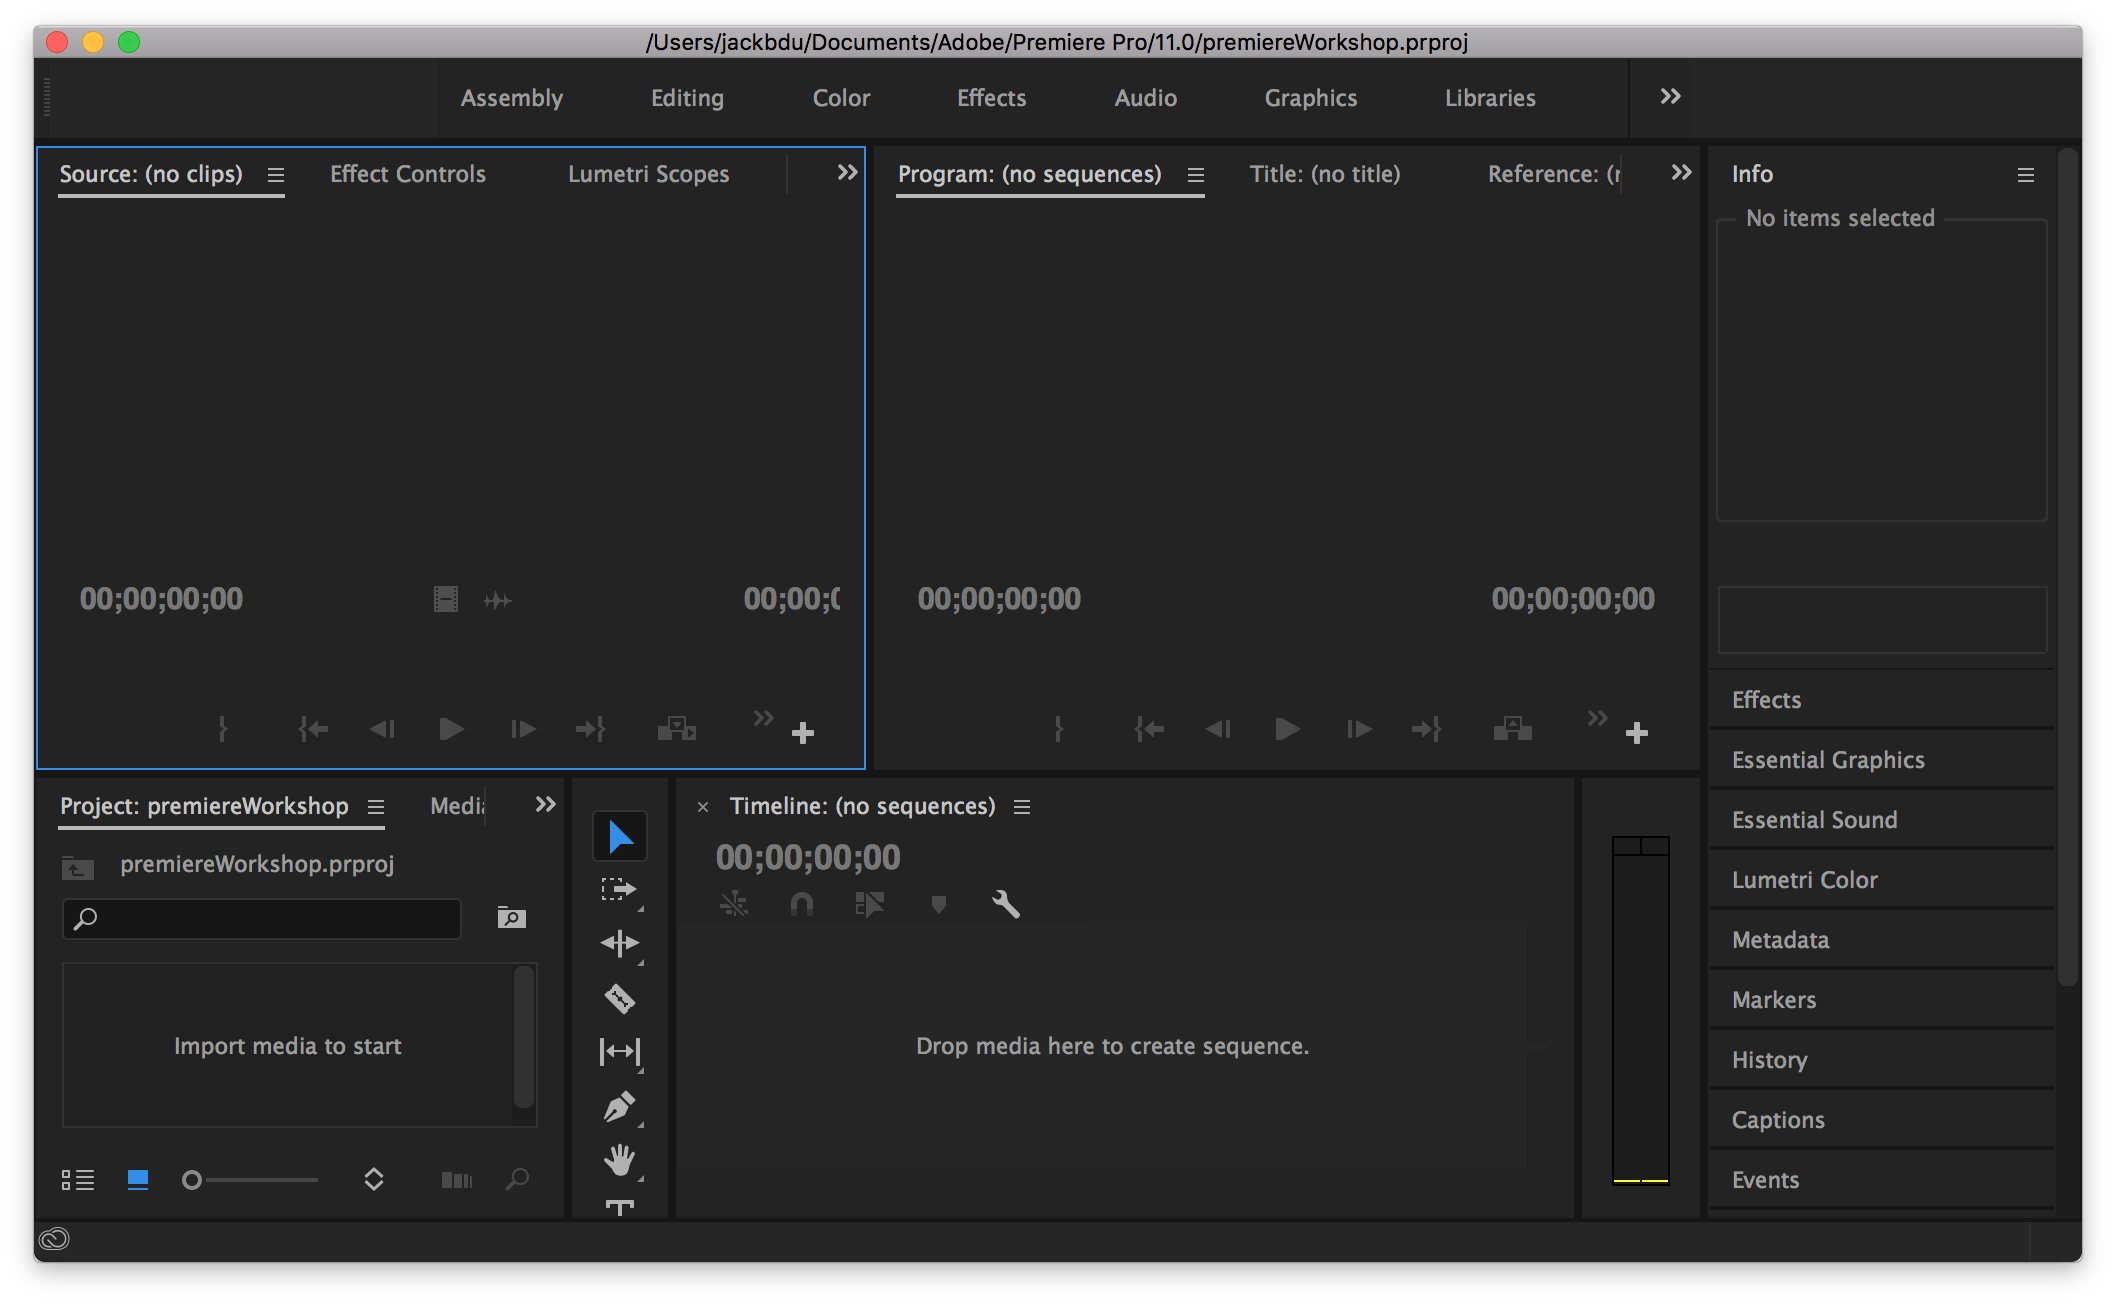
Here’s what the workspace should look like after the reset.
Step 2: Create New Sequence
Now that we have created our project and we are on the same workspace, let’s create a new squence.
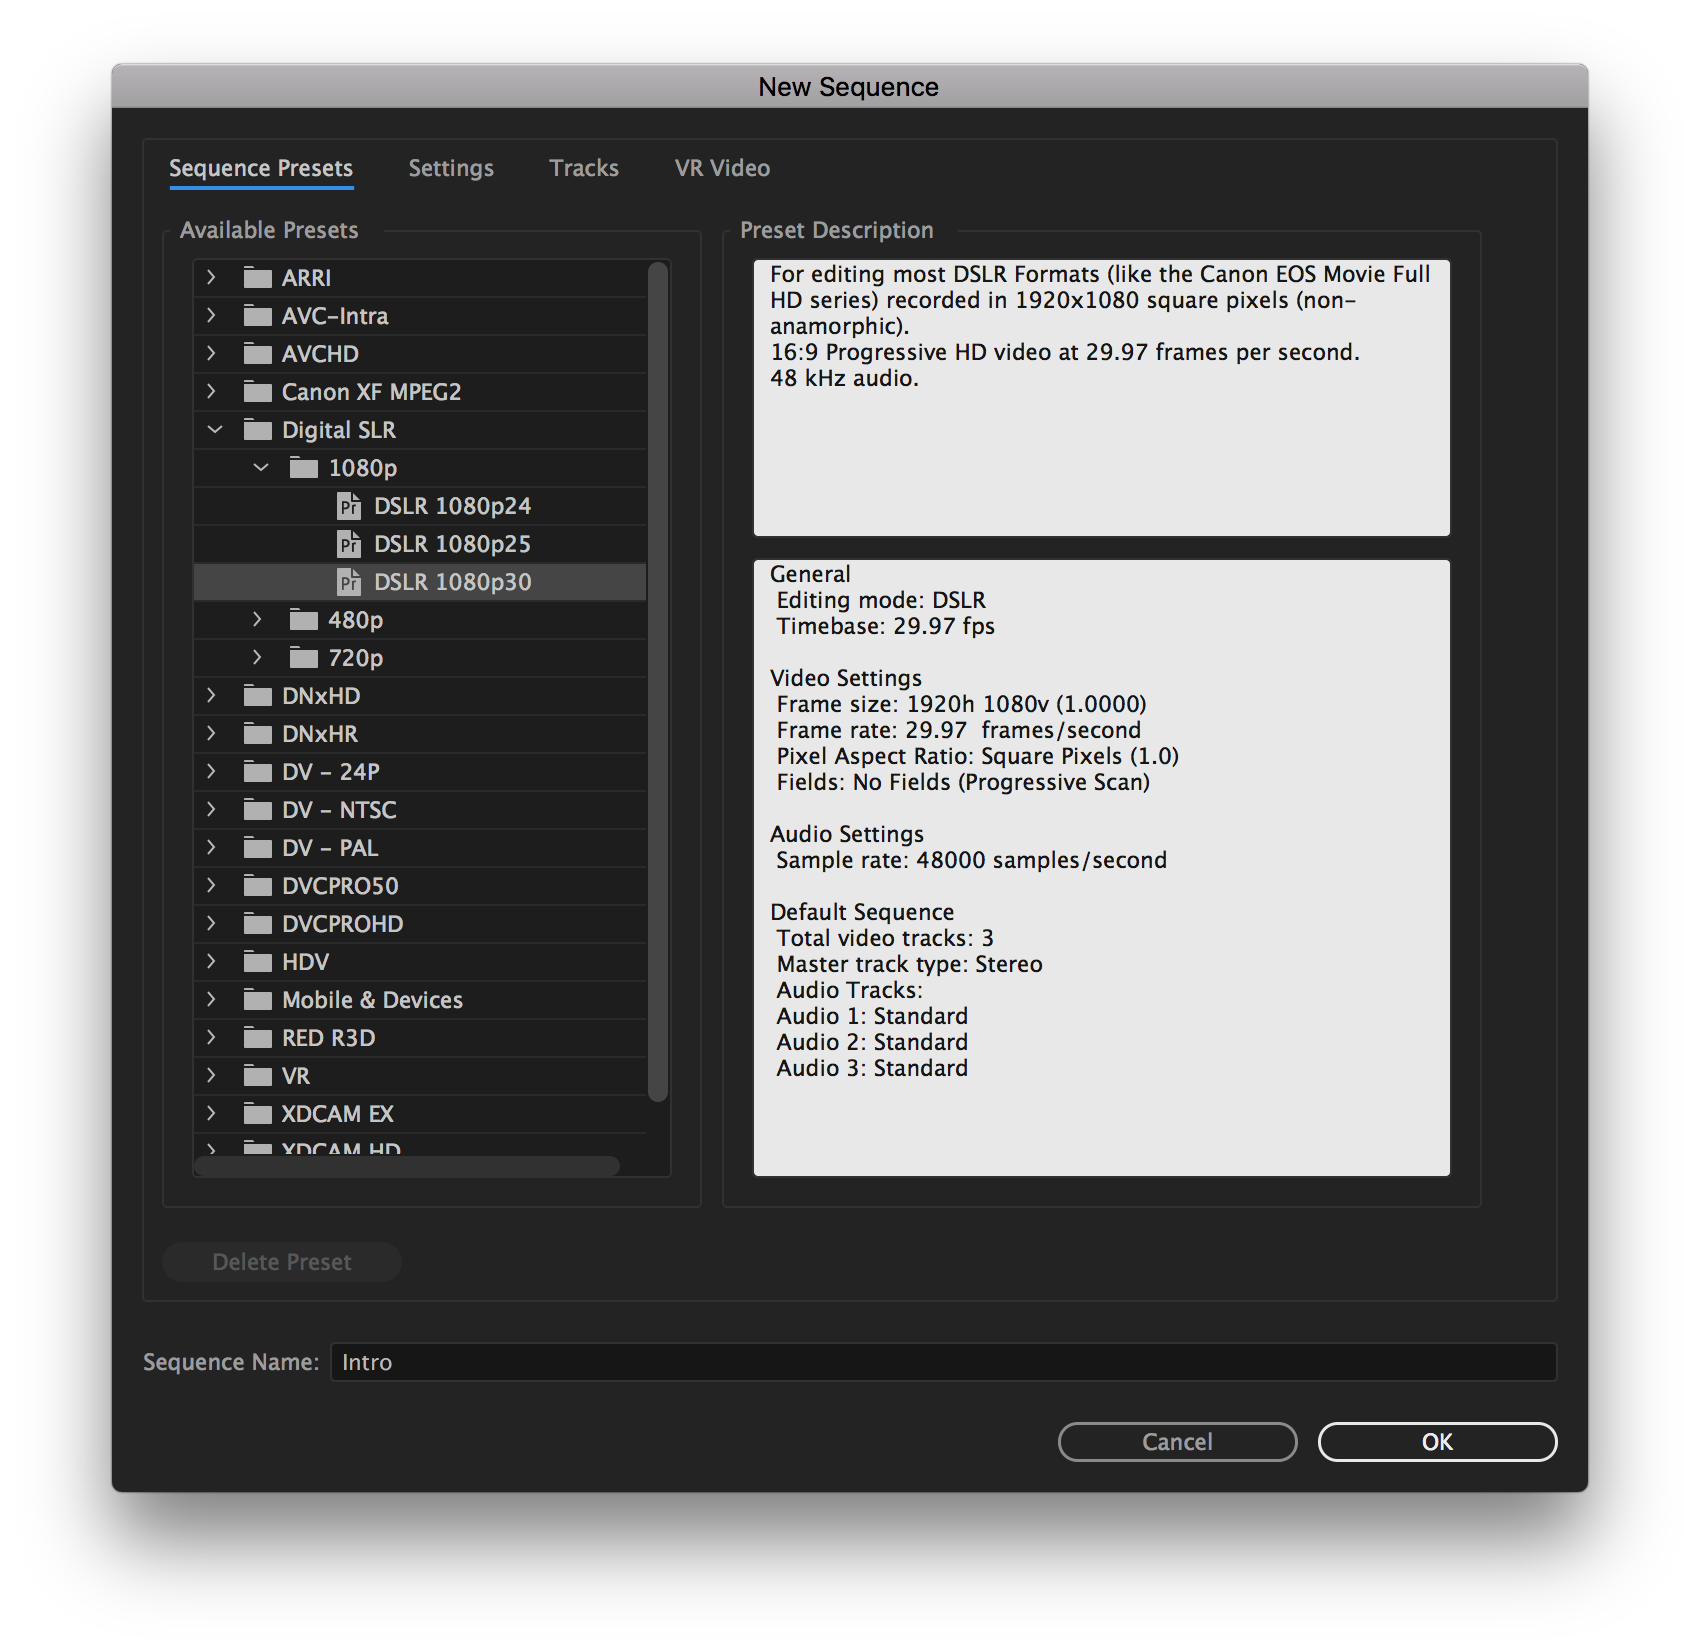
As we can see in the above image, we need to choose a Seqence Preset, which should be based on the footage we will be using. Here, I will be using Digital SLR > 1080p > DSLR 1080p30. We can also name the sequence at the bottom of the window, and then we click OK to create the sequence.
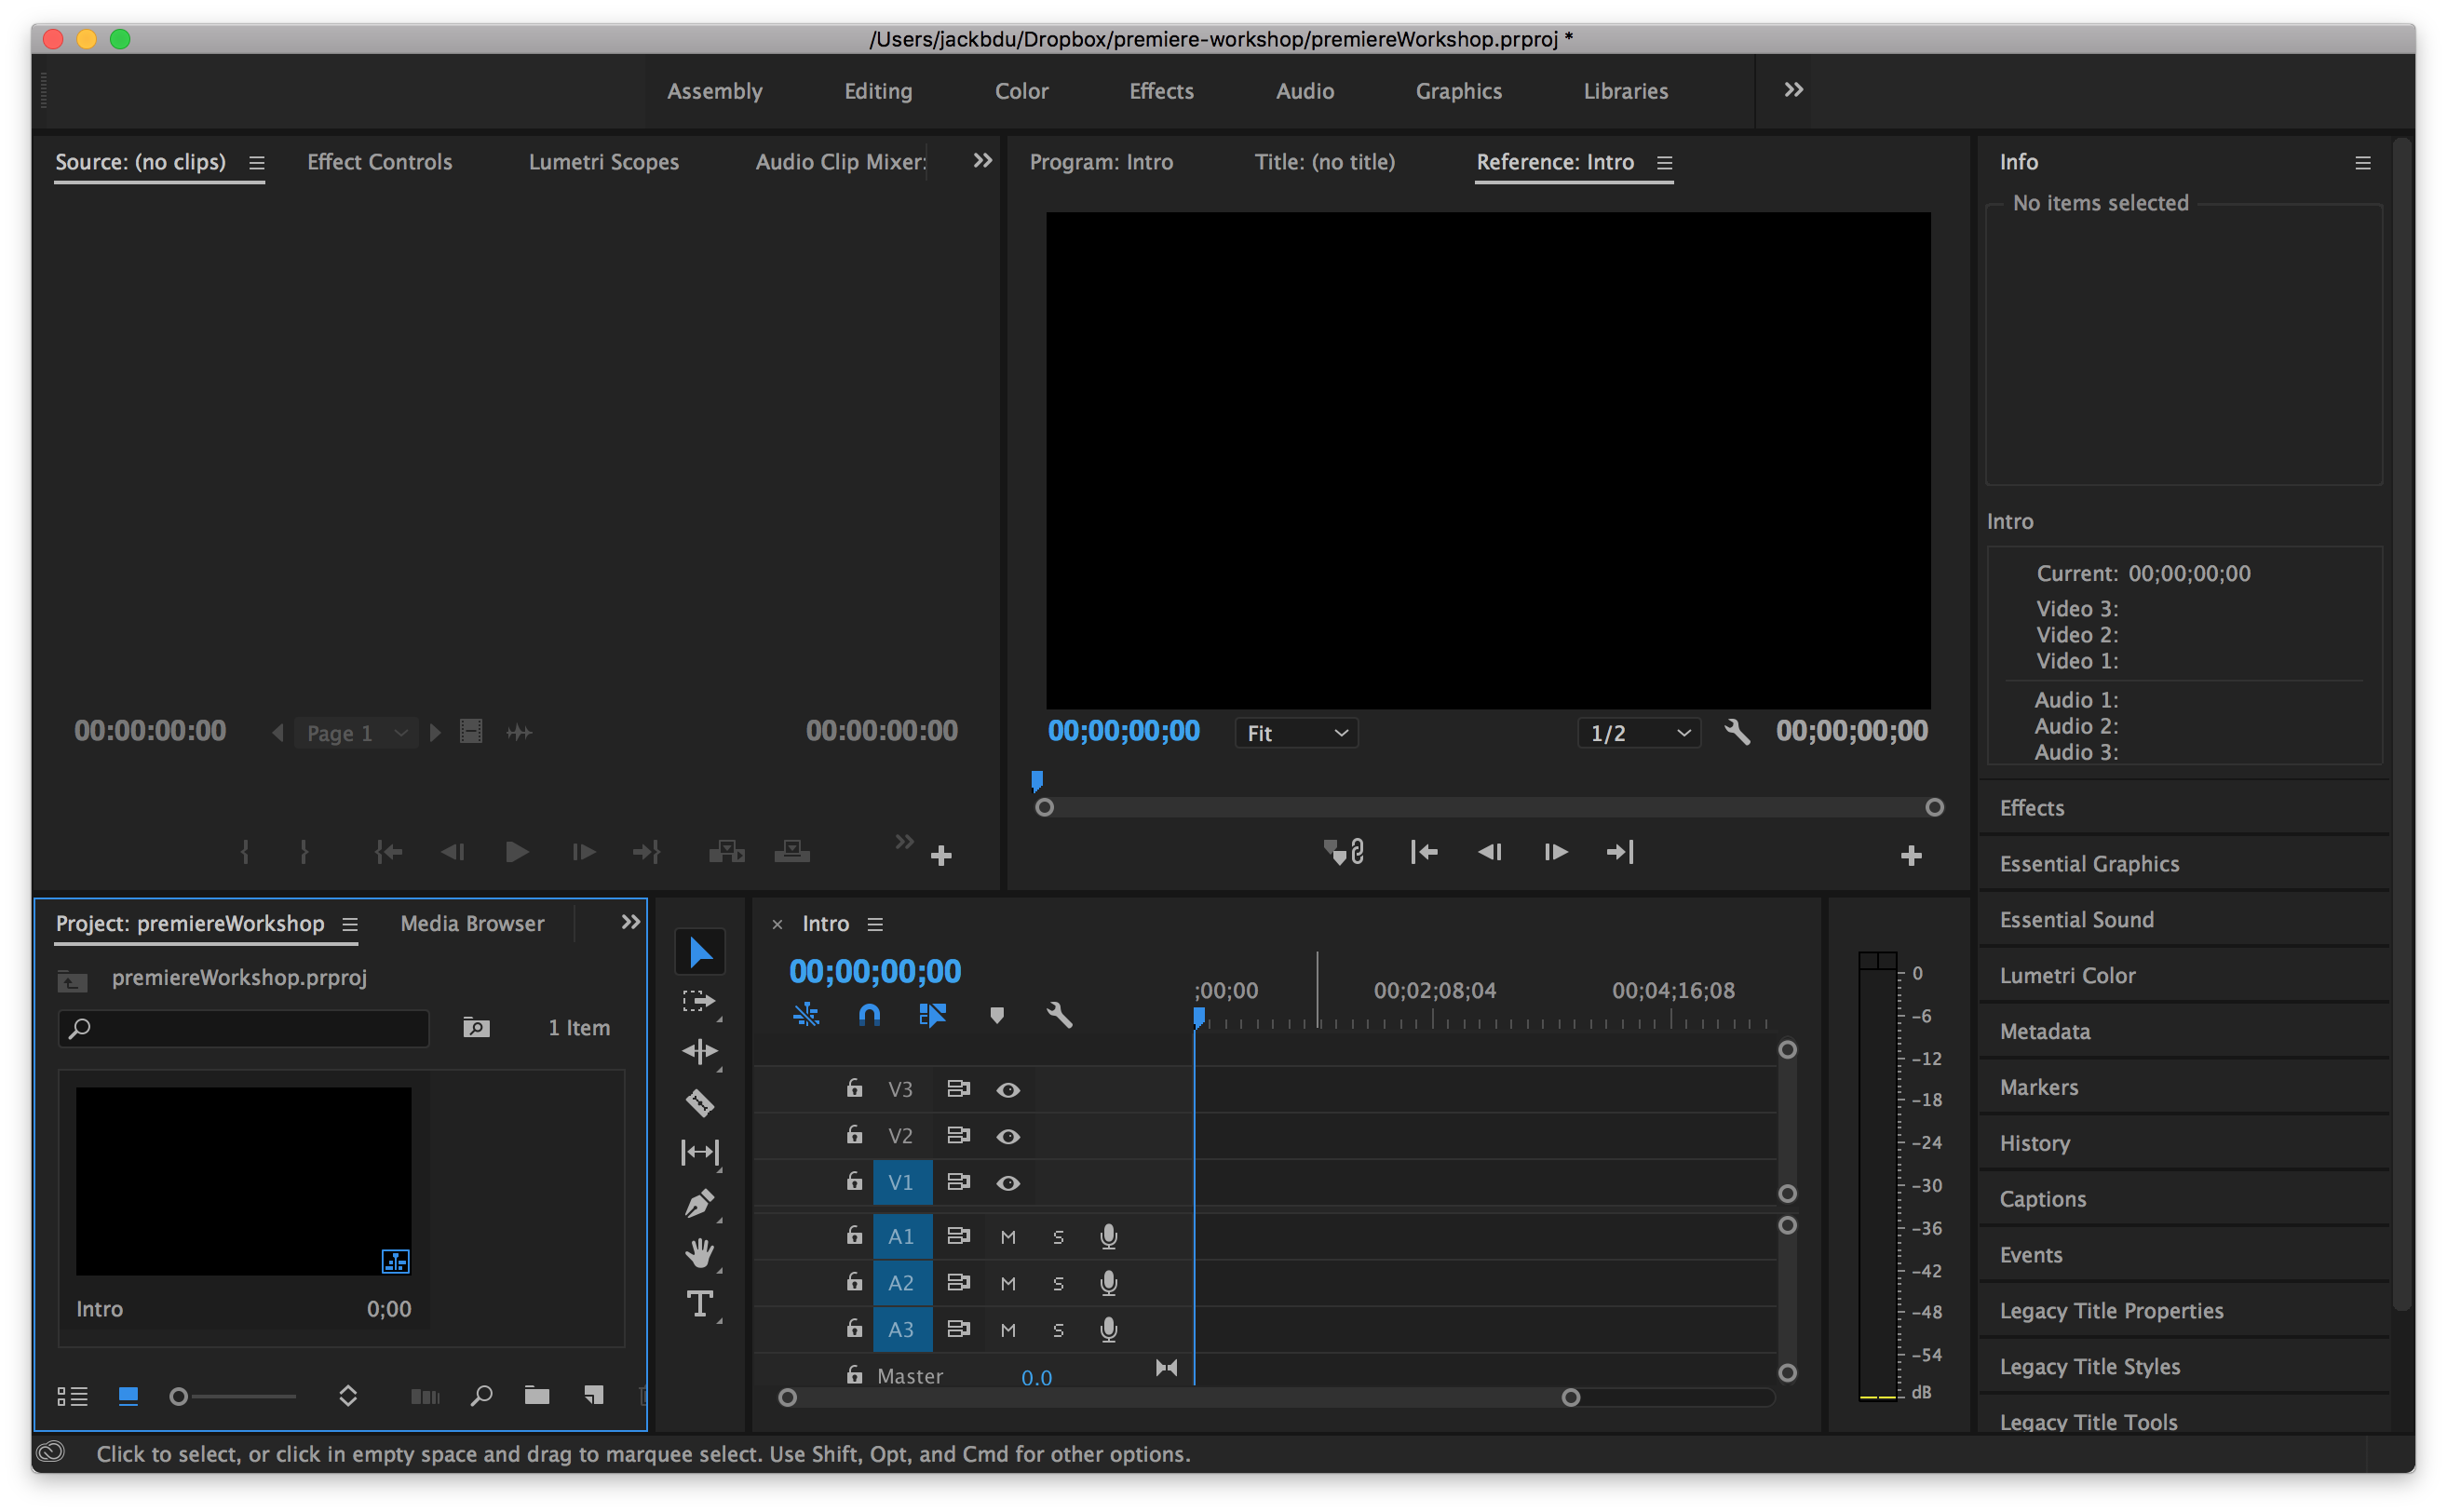
We can manage our sequences in the bottom-left panel, and we can see that the sequence is automatically opened in the bottom-middle panel and a preview of the sequence can be seen on the top-middle panel.
Step 3: Import Media
Now let’s import some media, a.k.a., footage, audios, etc.
- Go to File > Import…
- Choose the files we want to import and click import.
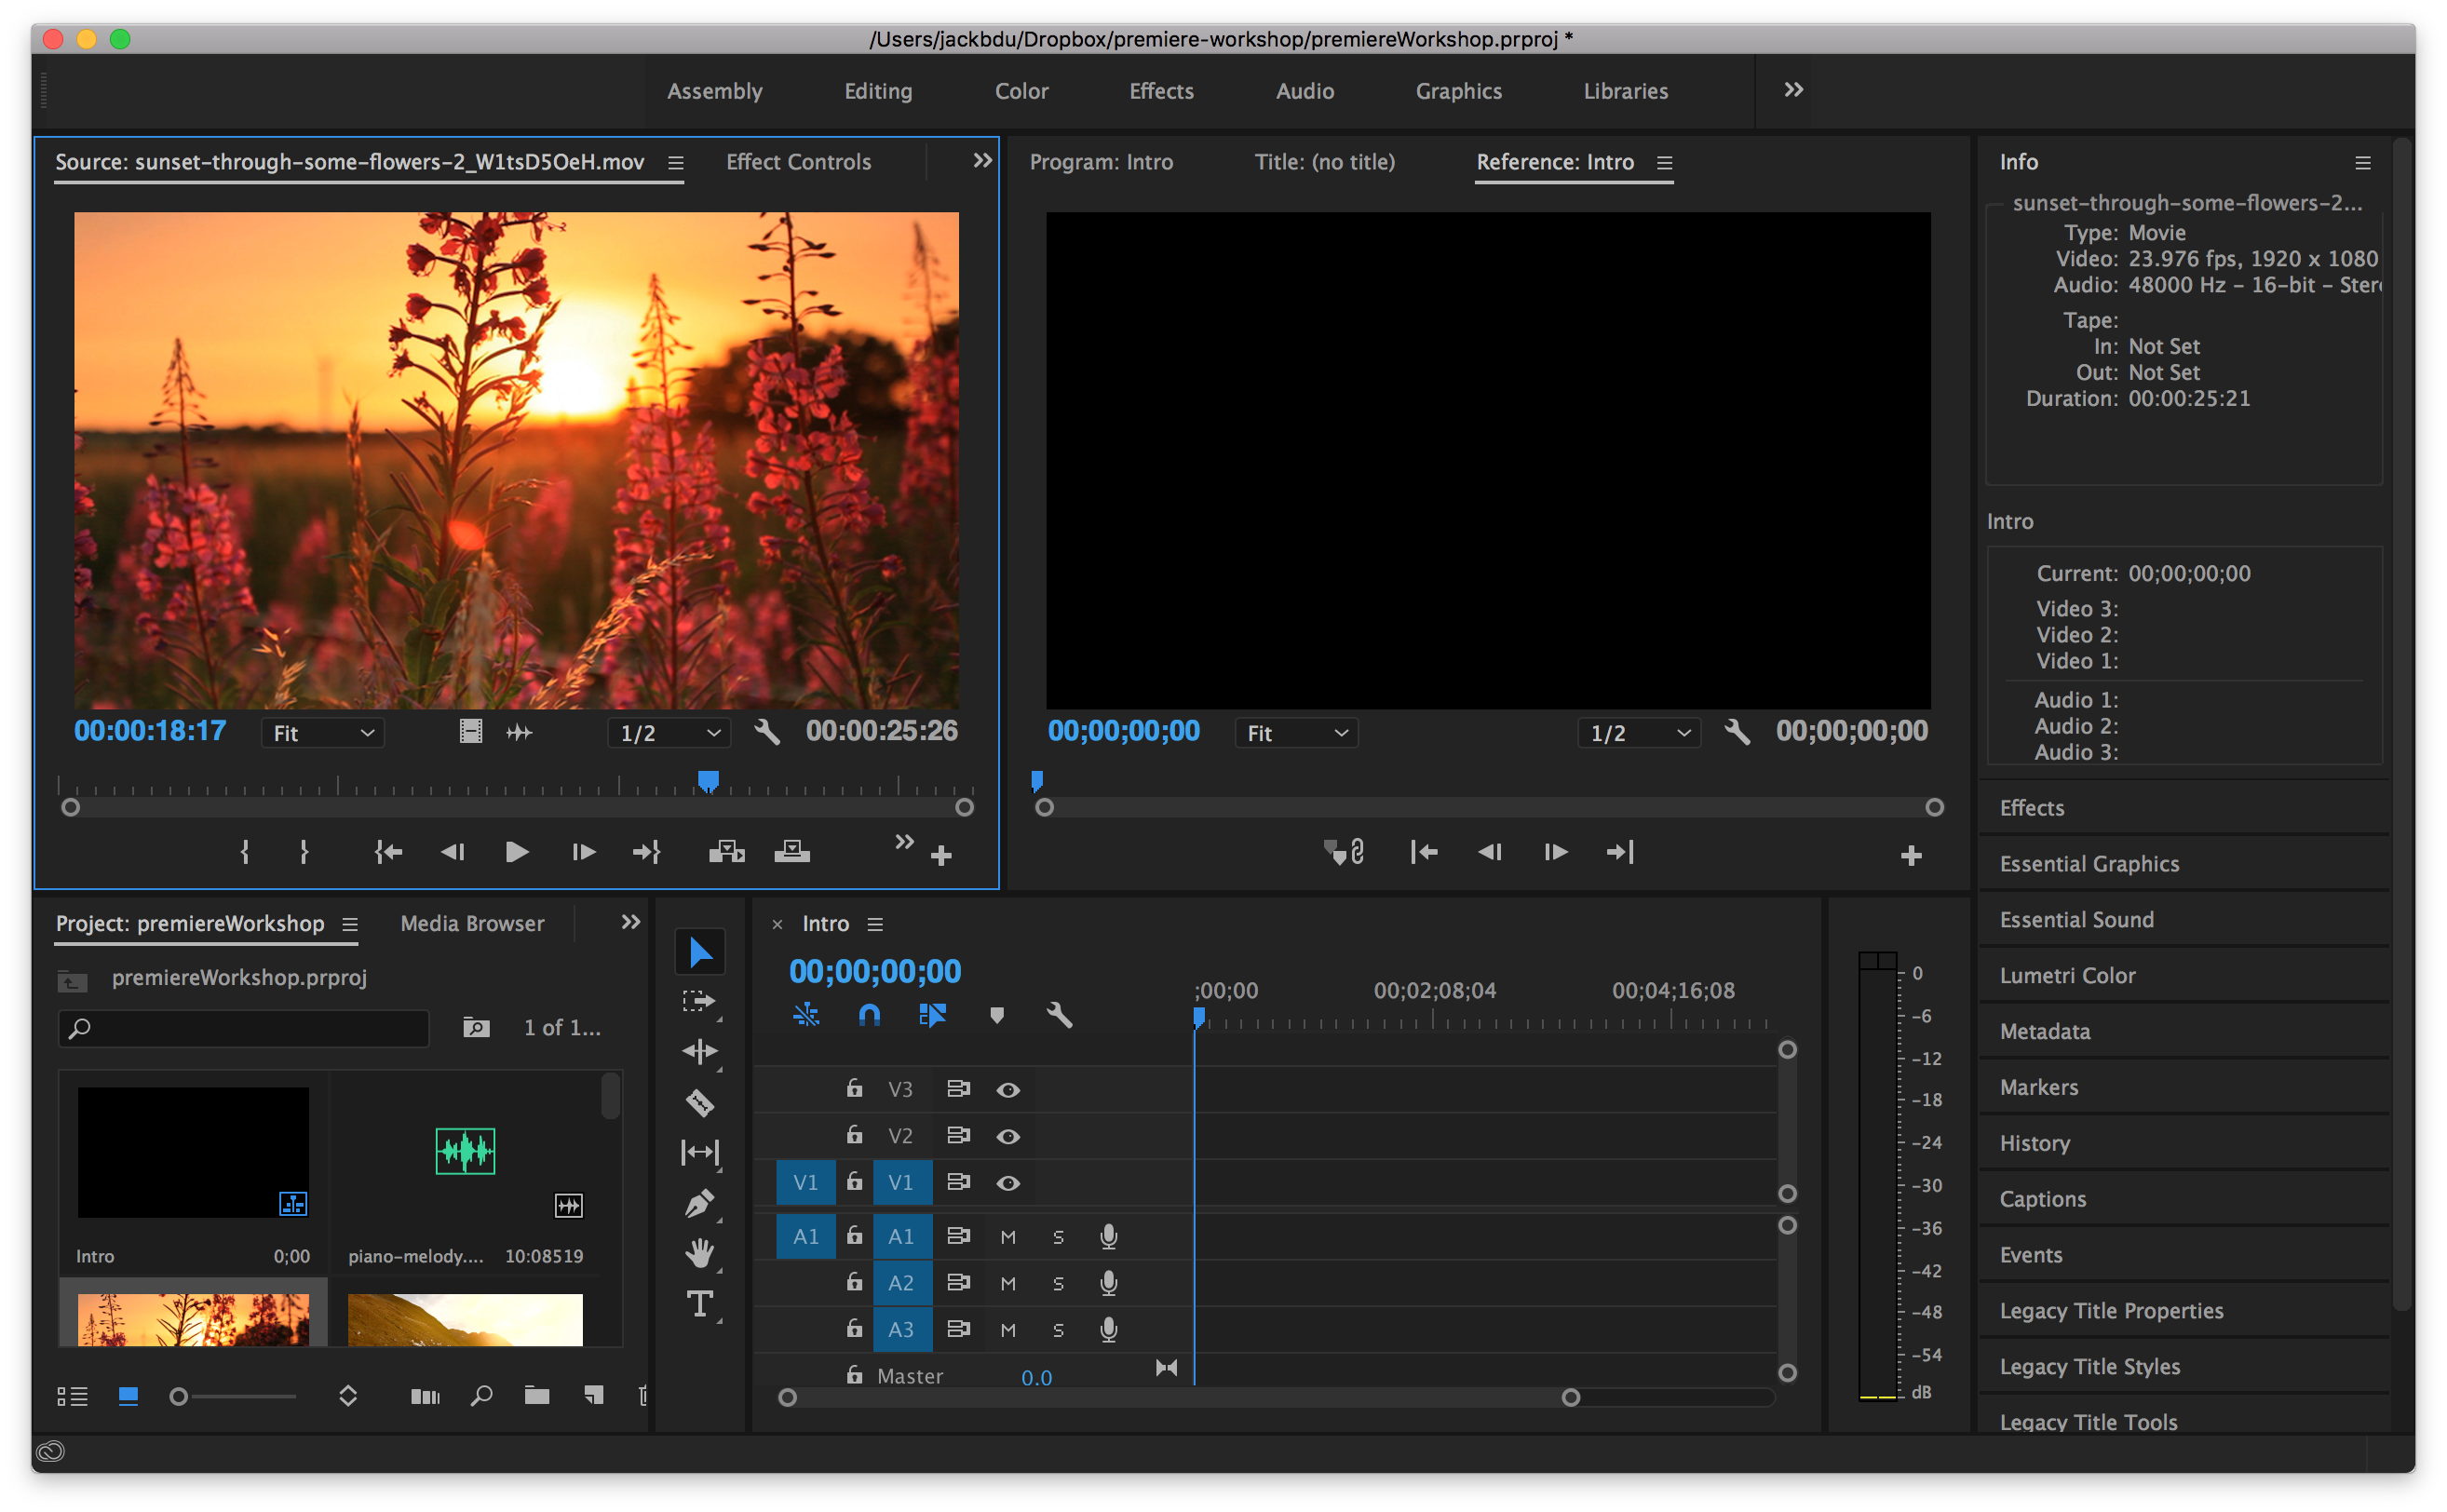
Similar to sequences, the imported media can also be managed in the bottom-left panel, and if we double click one of them, we will be seeing a preview in the top-left panel. Alternatively, we can also import media through Media Browser, which is also located at the bottom-left corner.
Step 4: Save the Project
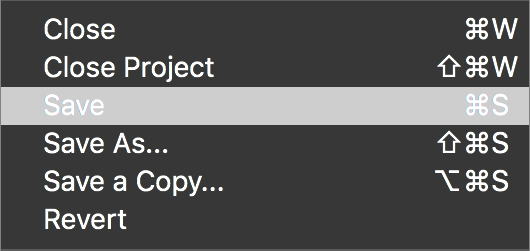
It is never too early to save our project. Since we’ve chosen the location at the beginning, the project is actually already saved at that location. What we need to do now is constantly go to File > Save, or press CMD + S on a Mac or Ctrl + S on a PC.
Similar to Photoshop, if we simply click on save, the project is saved in a format that Premiere can still read and edit, just like the moment we save it.
Step 5: Learn the Workflow
We have prepared all the ingredients, but now we need to start cooking.
Marking in & out
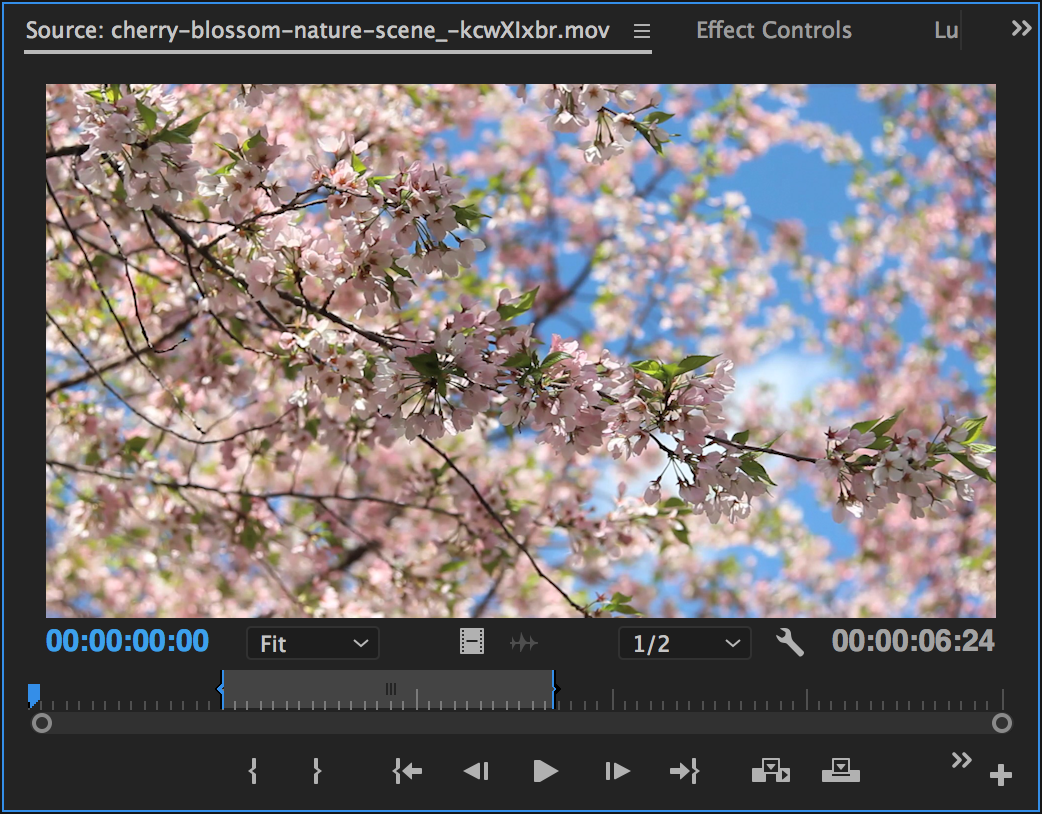
As is just mentioned, media can be previewed by double clicking on the media. In the top-left viewer, we can click “{” to mark in, which means to mark the beginning of the clip to be used in timeline. And we click “}” to mark out, which means to mark the end of the clip to be used in timeline.
Adding & moving clips
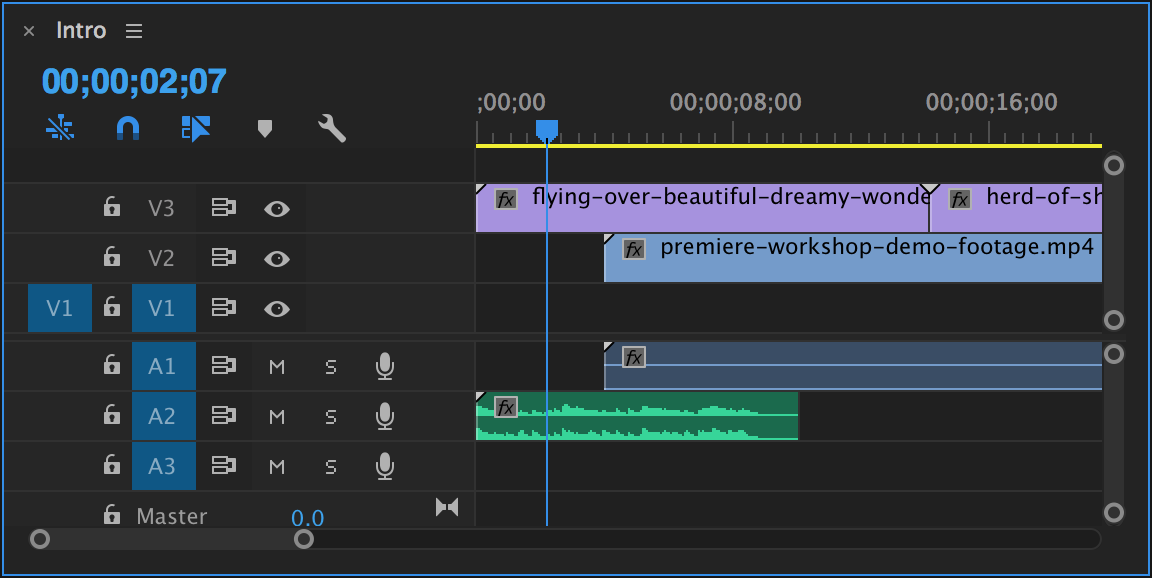
After marking, we can drag and drop the clips to the timeline of the sequence we created. Note that there are two different types of tracks in timeline, one for video and one for audio. And the larger the video track number is, the closer the clip is to us. In other words, the clips on a video track with larger track number blocks the clips on a video track with smaller track number. In contrary, all audio plays together.

We can move those clips around with the Selection Tool, which is chosen by default.
Enabling & disabling clips
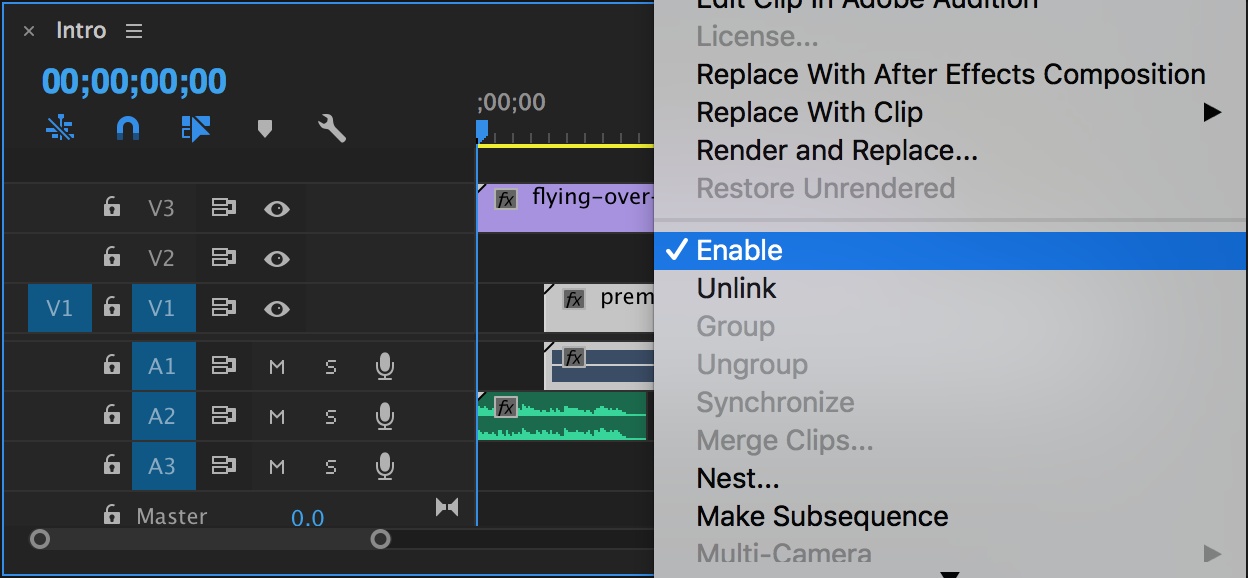
1) To enable/disable the selected clips, right click on selected clips and check/uncheck Enable.


2) To enable/disable a track, click on the eye icon for the track.
Cutting clips

With the Razor Tool, we can split one clip into two, and move edit them separately.
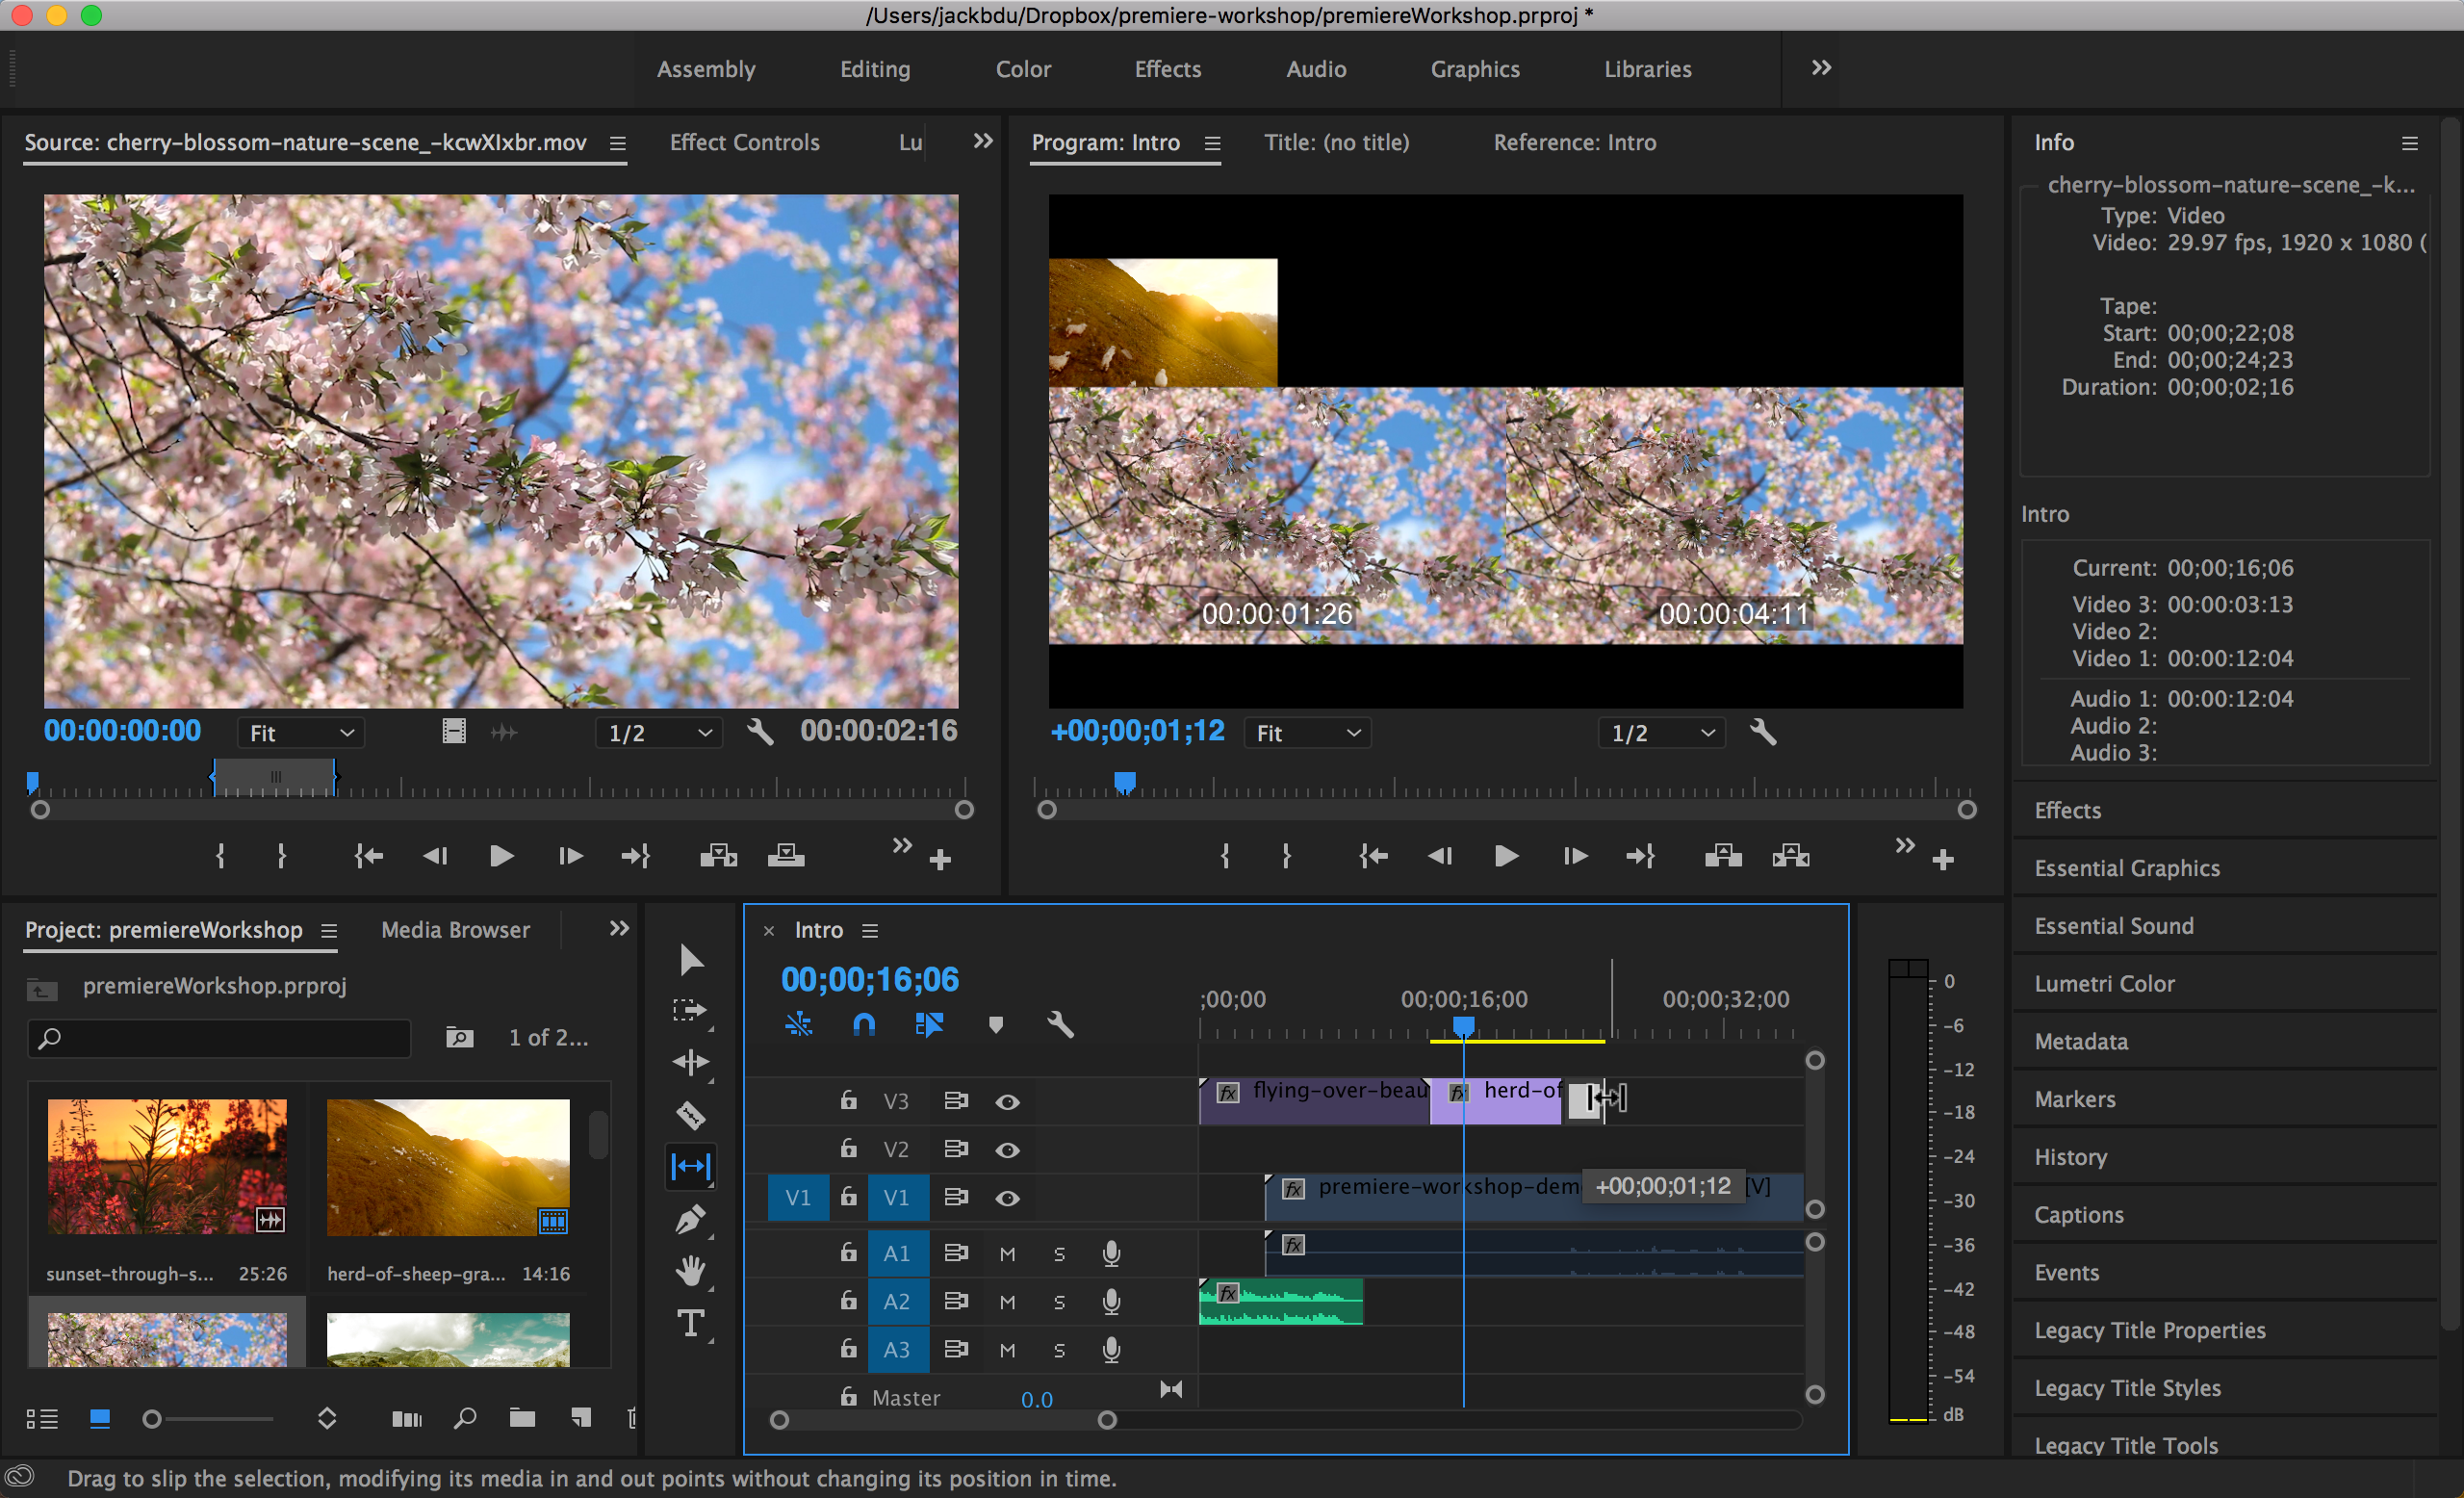
Slipping

This tool adjusts the in and out points of a clip without changing its position in the timeline.
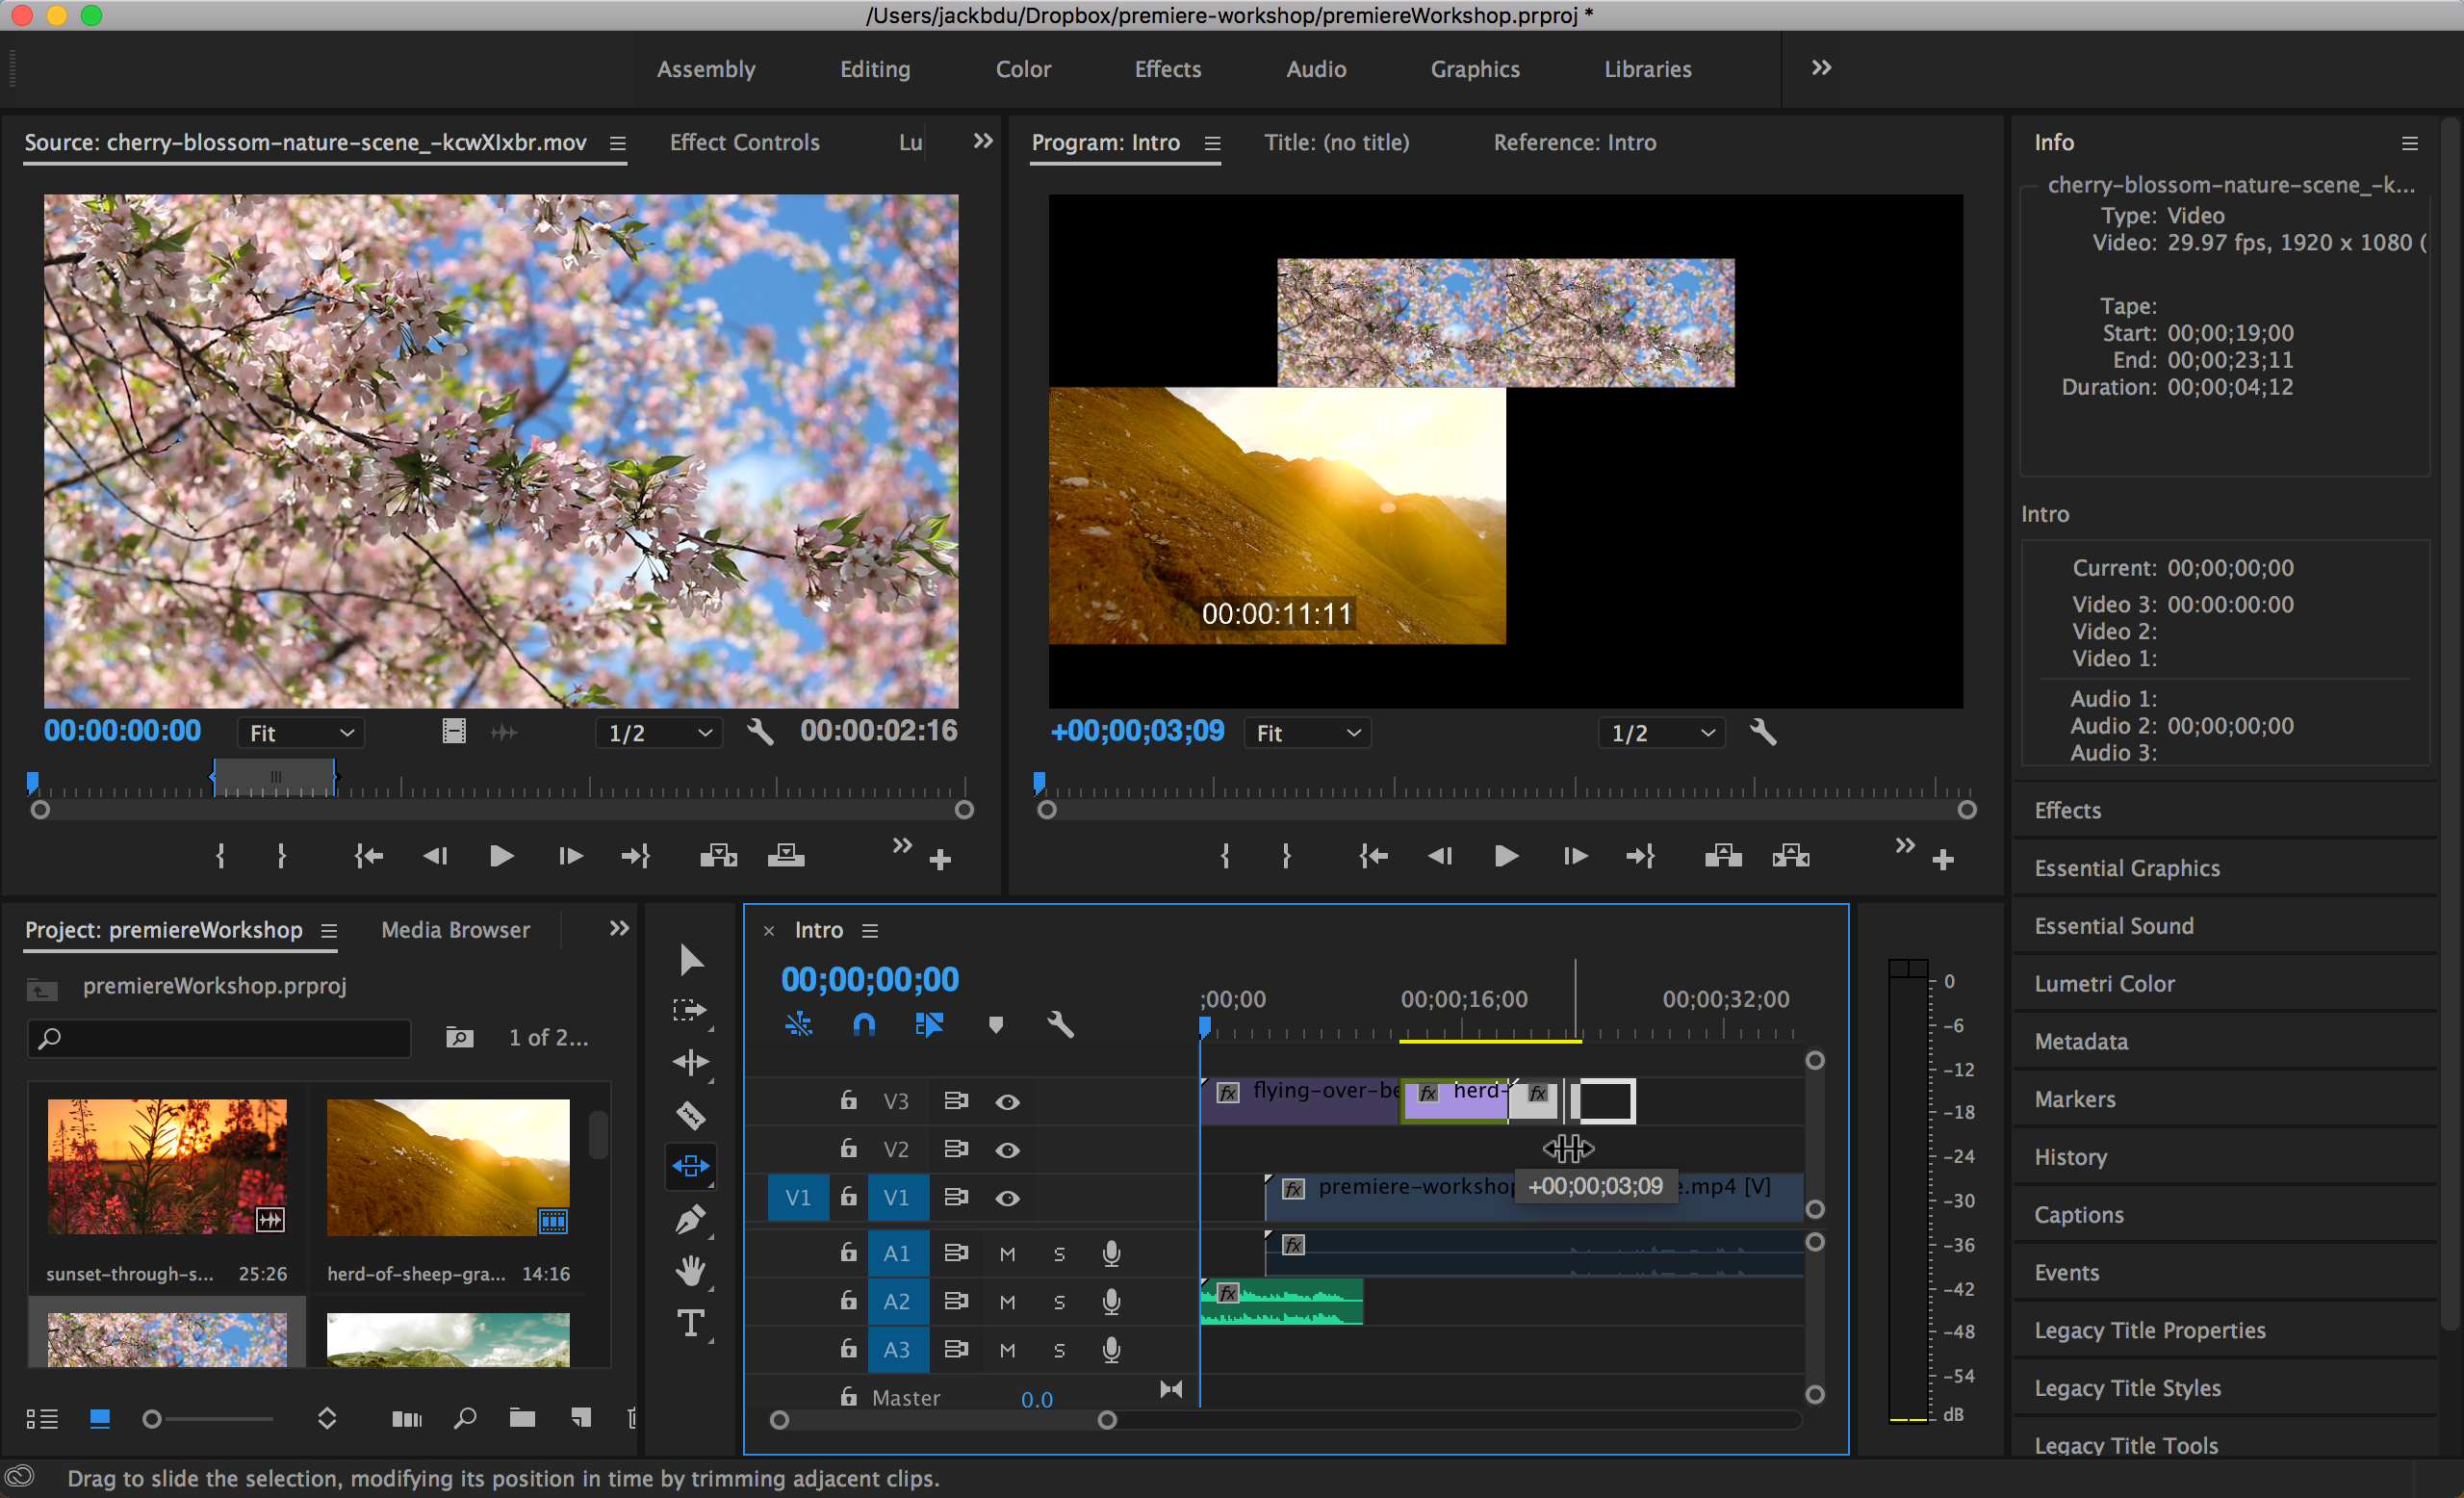
Sliding

This tool adjusts the clip’s position in time by changing the ins and outs of adjacent clips.
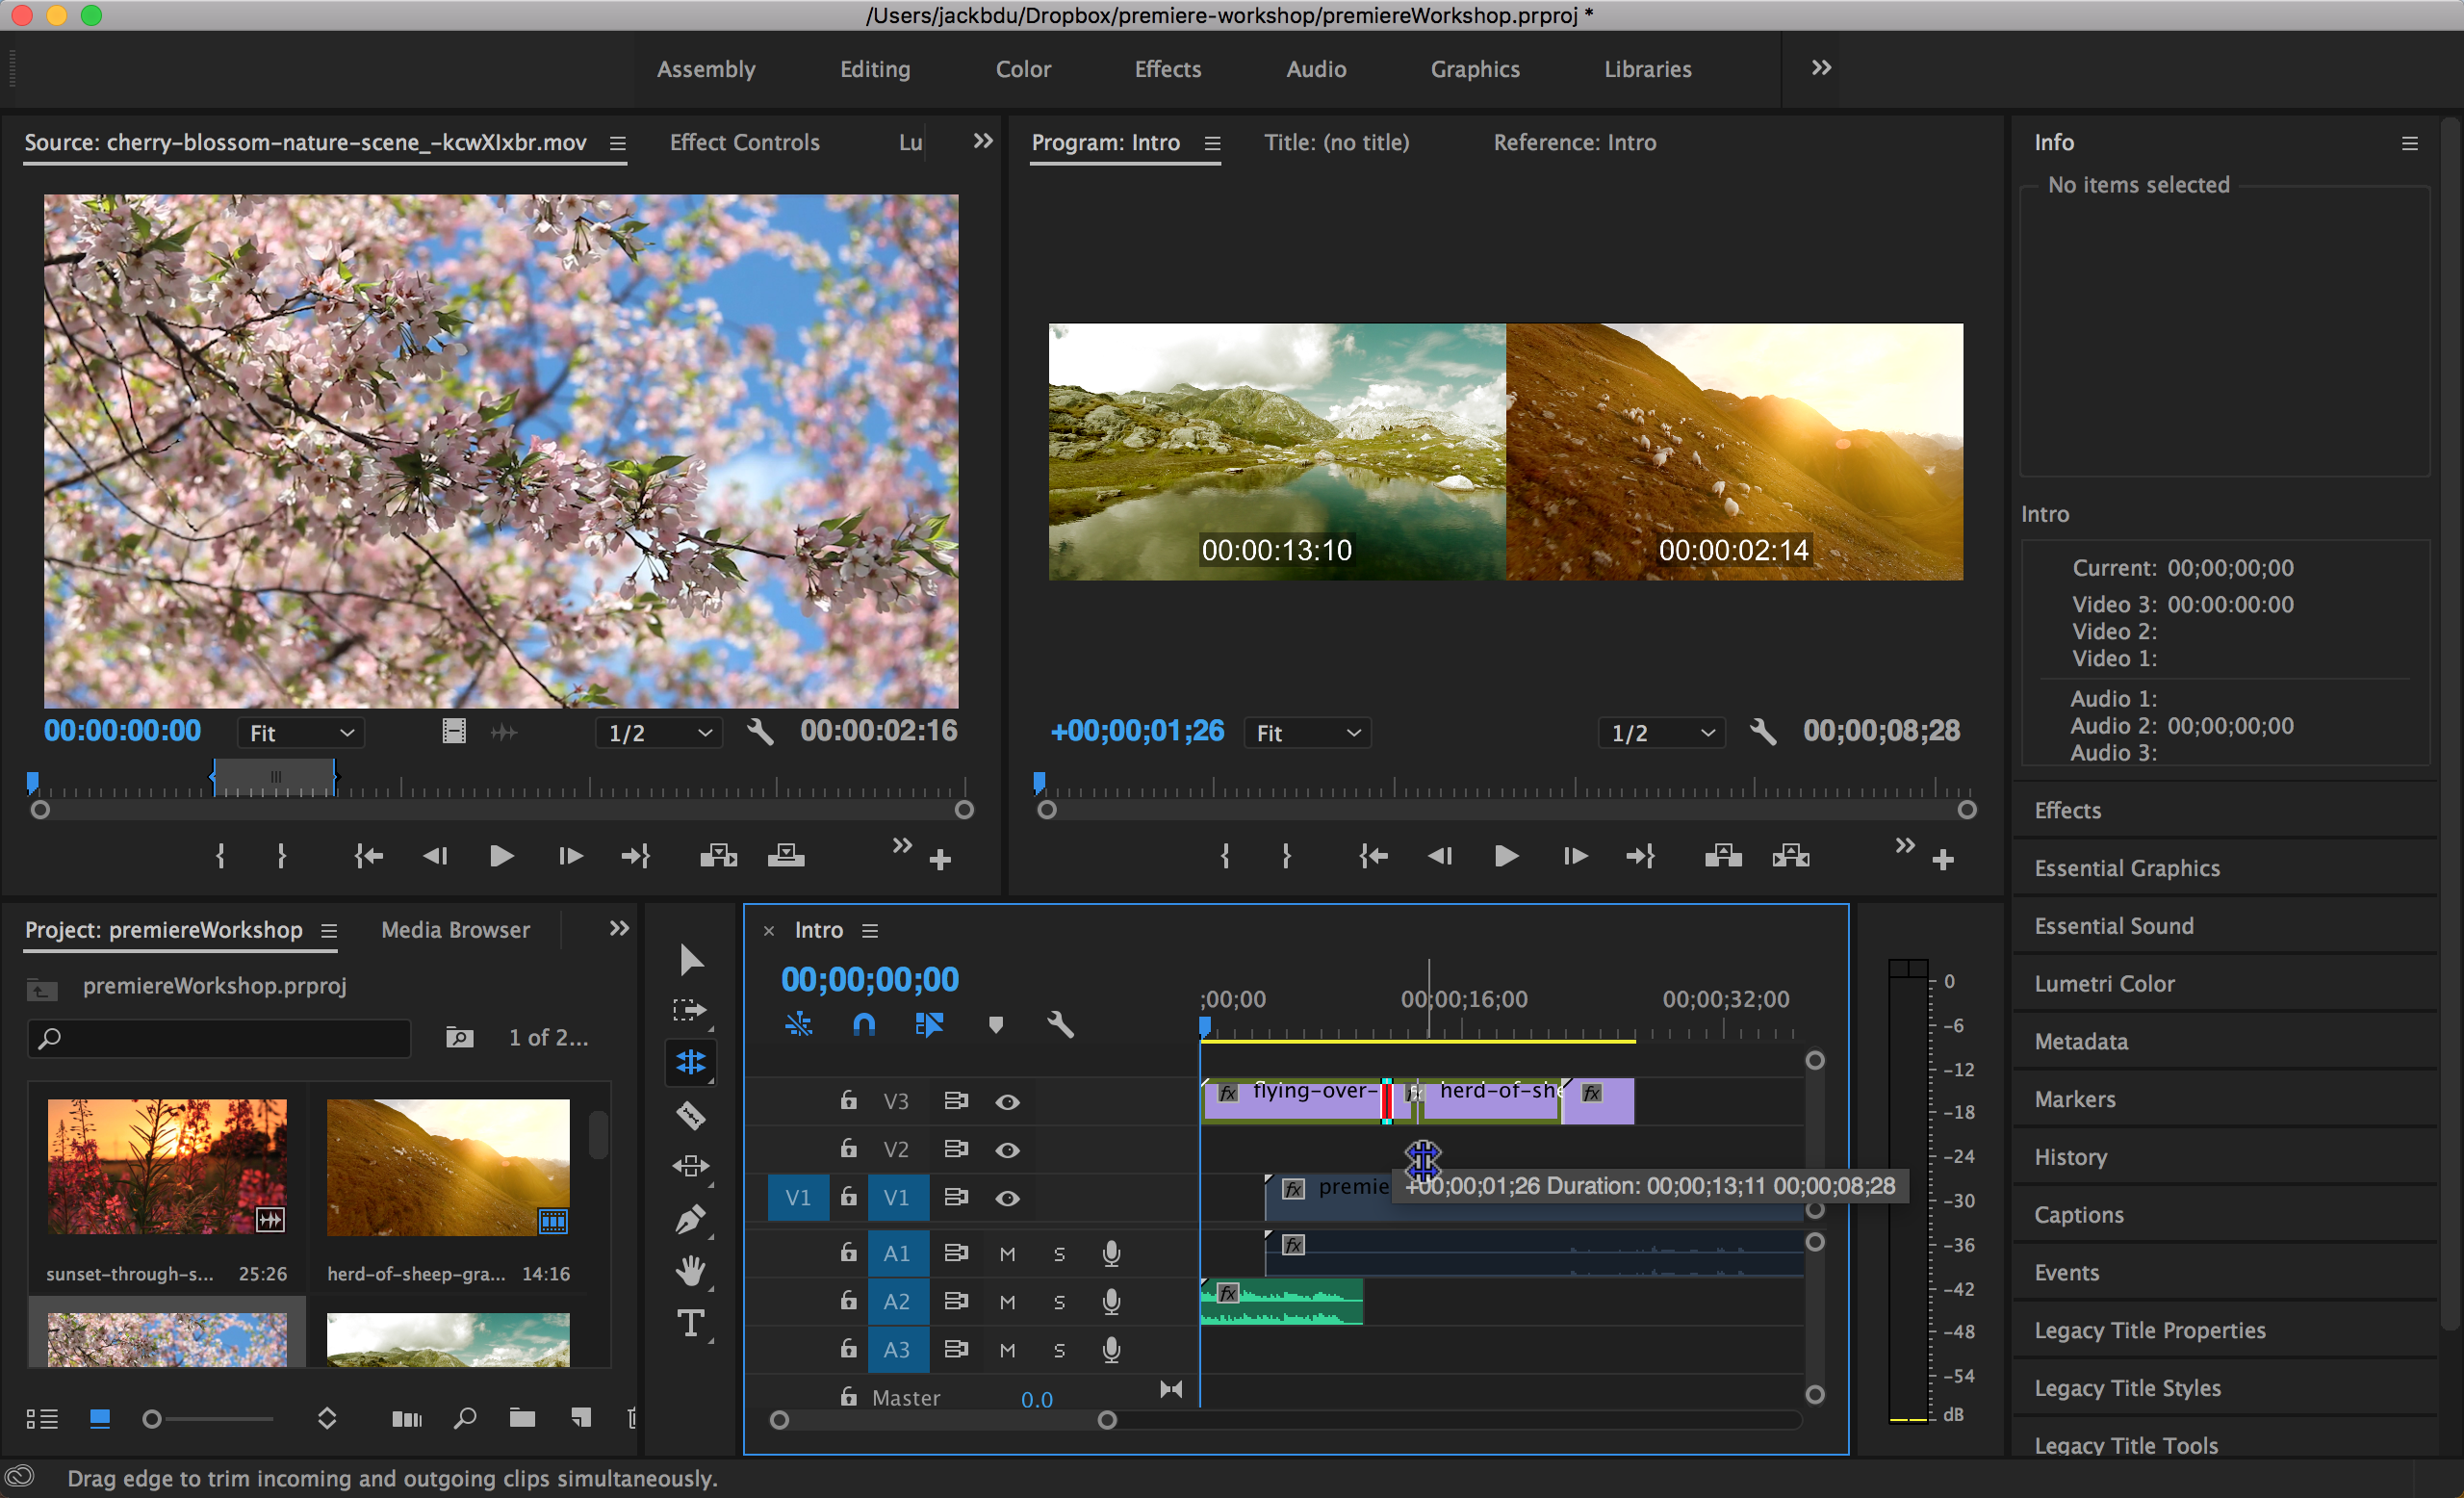
Rolling

This tool adjusts the ins, outs, and durations of two adjacent clips.
Linking & Unlinking
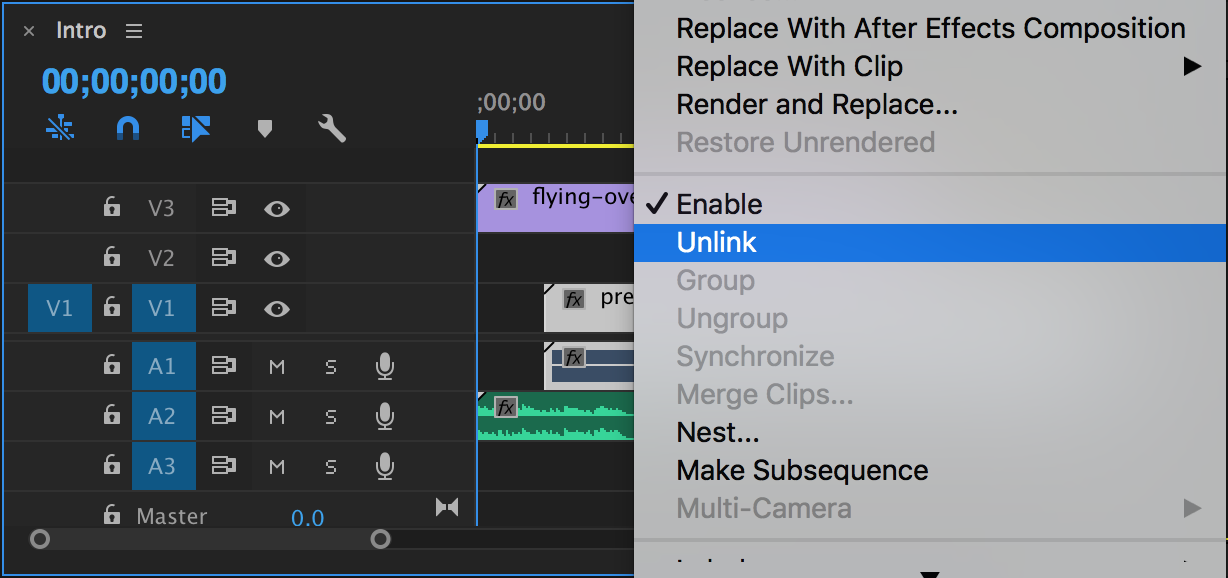
If we select a video clip that comes with audio, we’ll notice that both the video track and audio track will be selected. If we right click on the video track and choose unlink, we’ll be able to manipulate the audio and video independently.
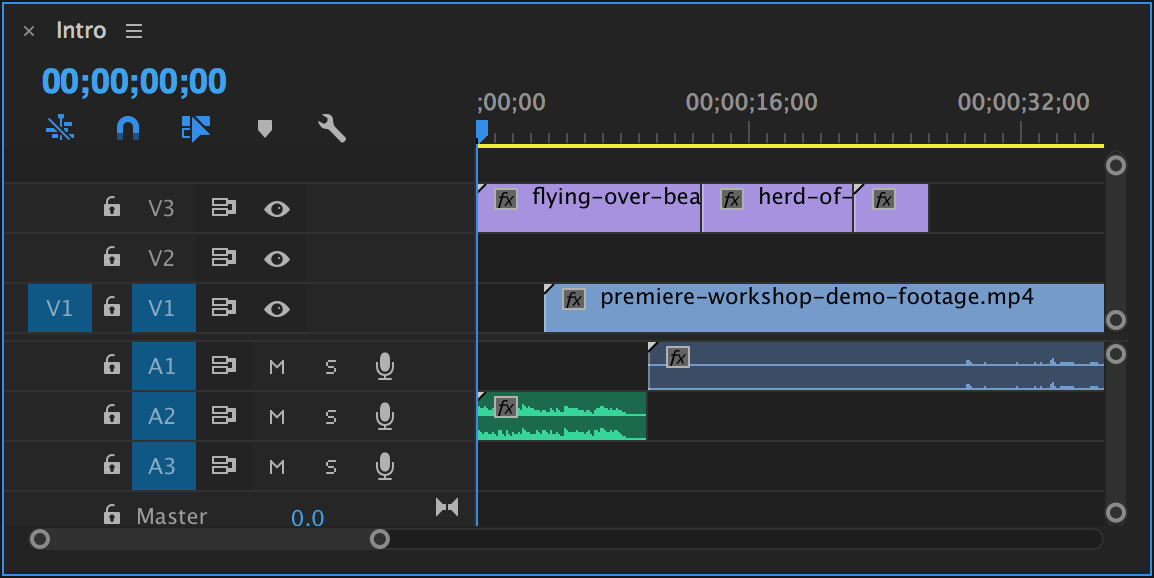
Similar, we can link a video clip and a audio clip by selecting both of them, right clicking and choosing link.
Snapping
![]()
If we want ends of clips to snap to the playhead or ends of other clips as we move them, we need to make sure the magnet icon is highlighted. And unhighlight it if we don’t want to snap.
Effects
To apply a video effect, we need to do the following:
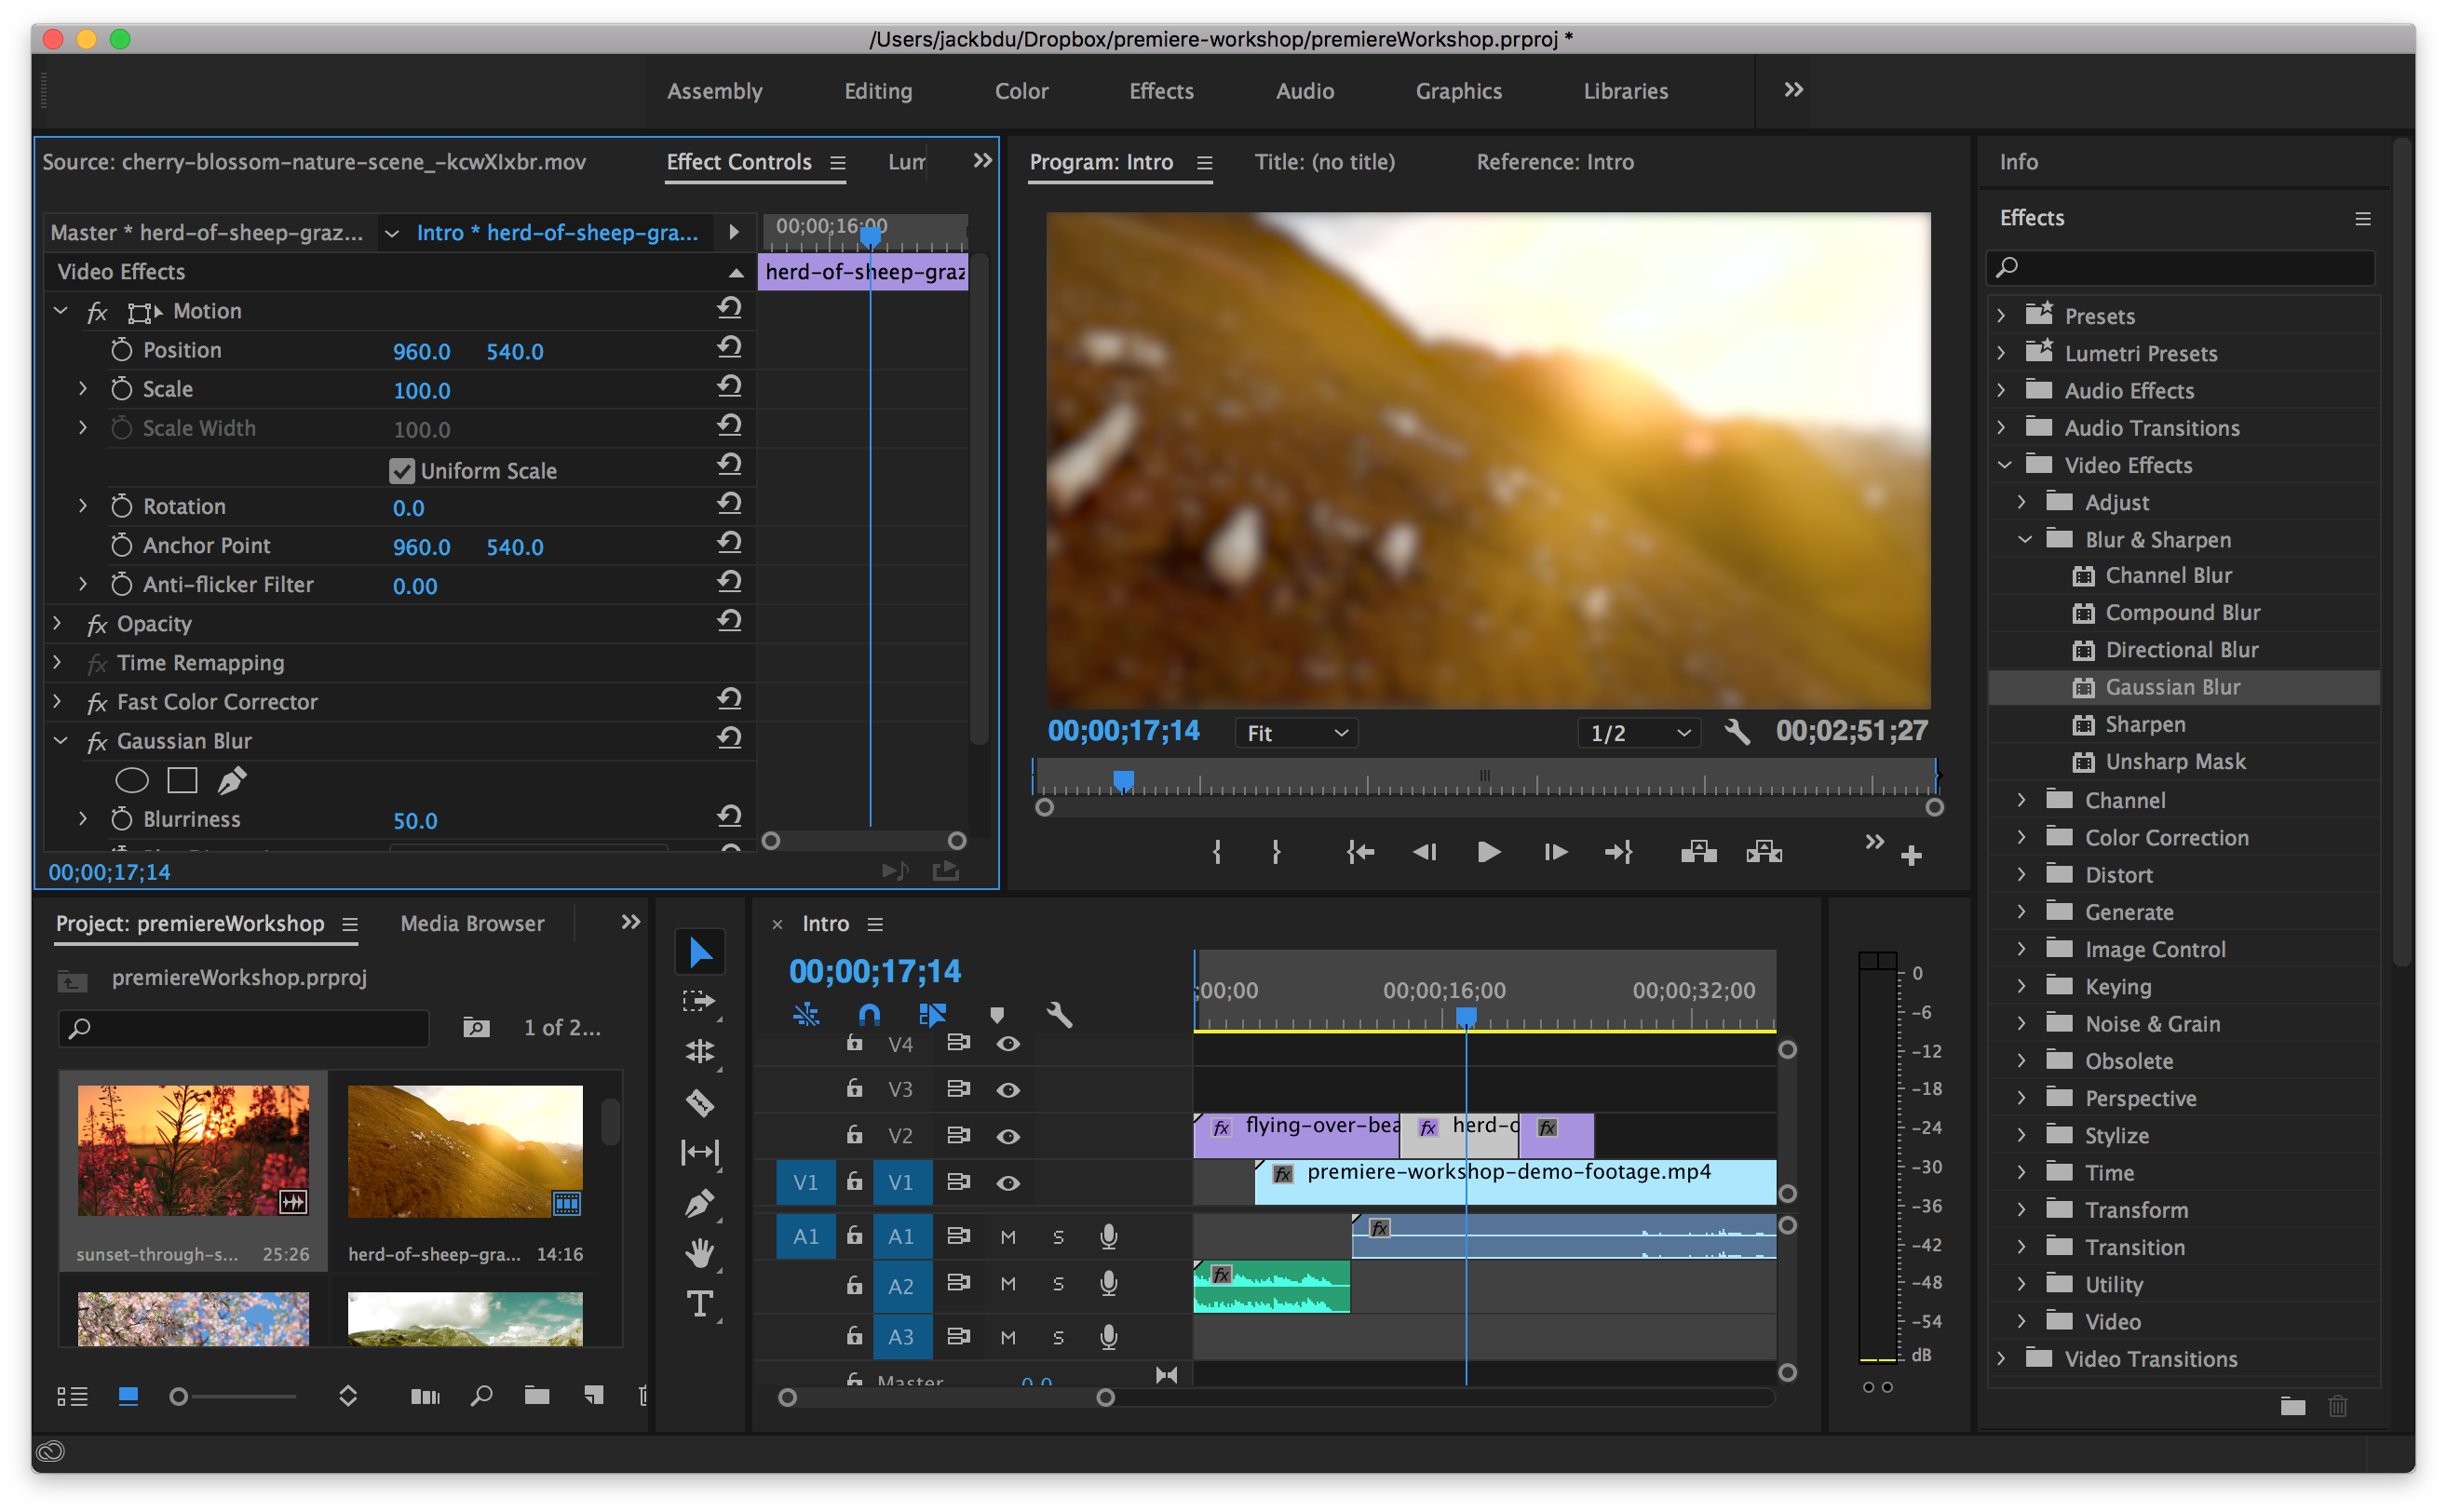
1) In the right-most panel, navigate to Effects > Video Effects, and then expand any of the sub-category.
2) Drag and drop any effect onto any clip we want to apply effect to.
3) We can adjust the effect by going to Effect Controls tab in the top-left panel.
We can see that in Effects Control, we can also change the position, scale, rotation, etc. of the video clip.
In particular, to correct the white balance, we can do the following:
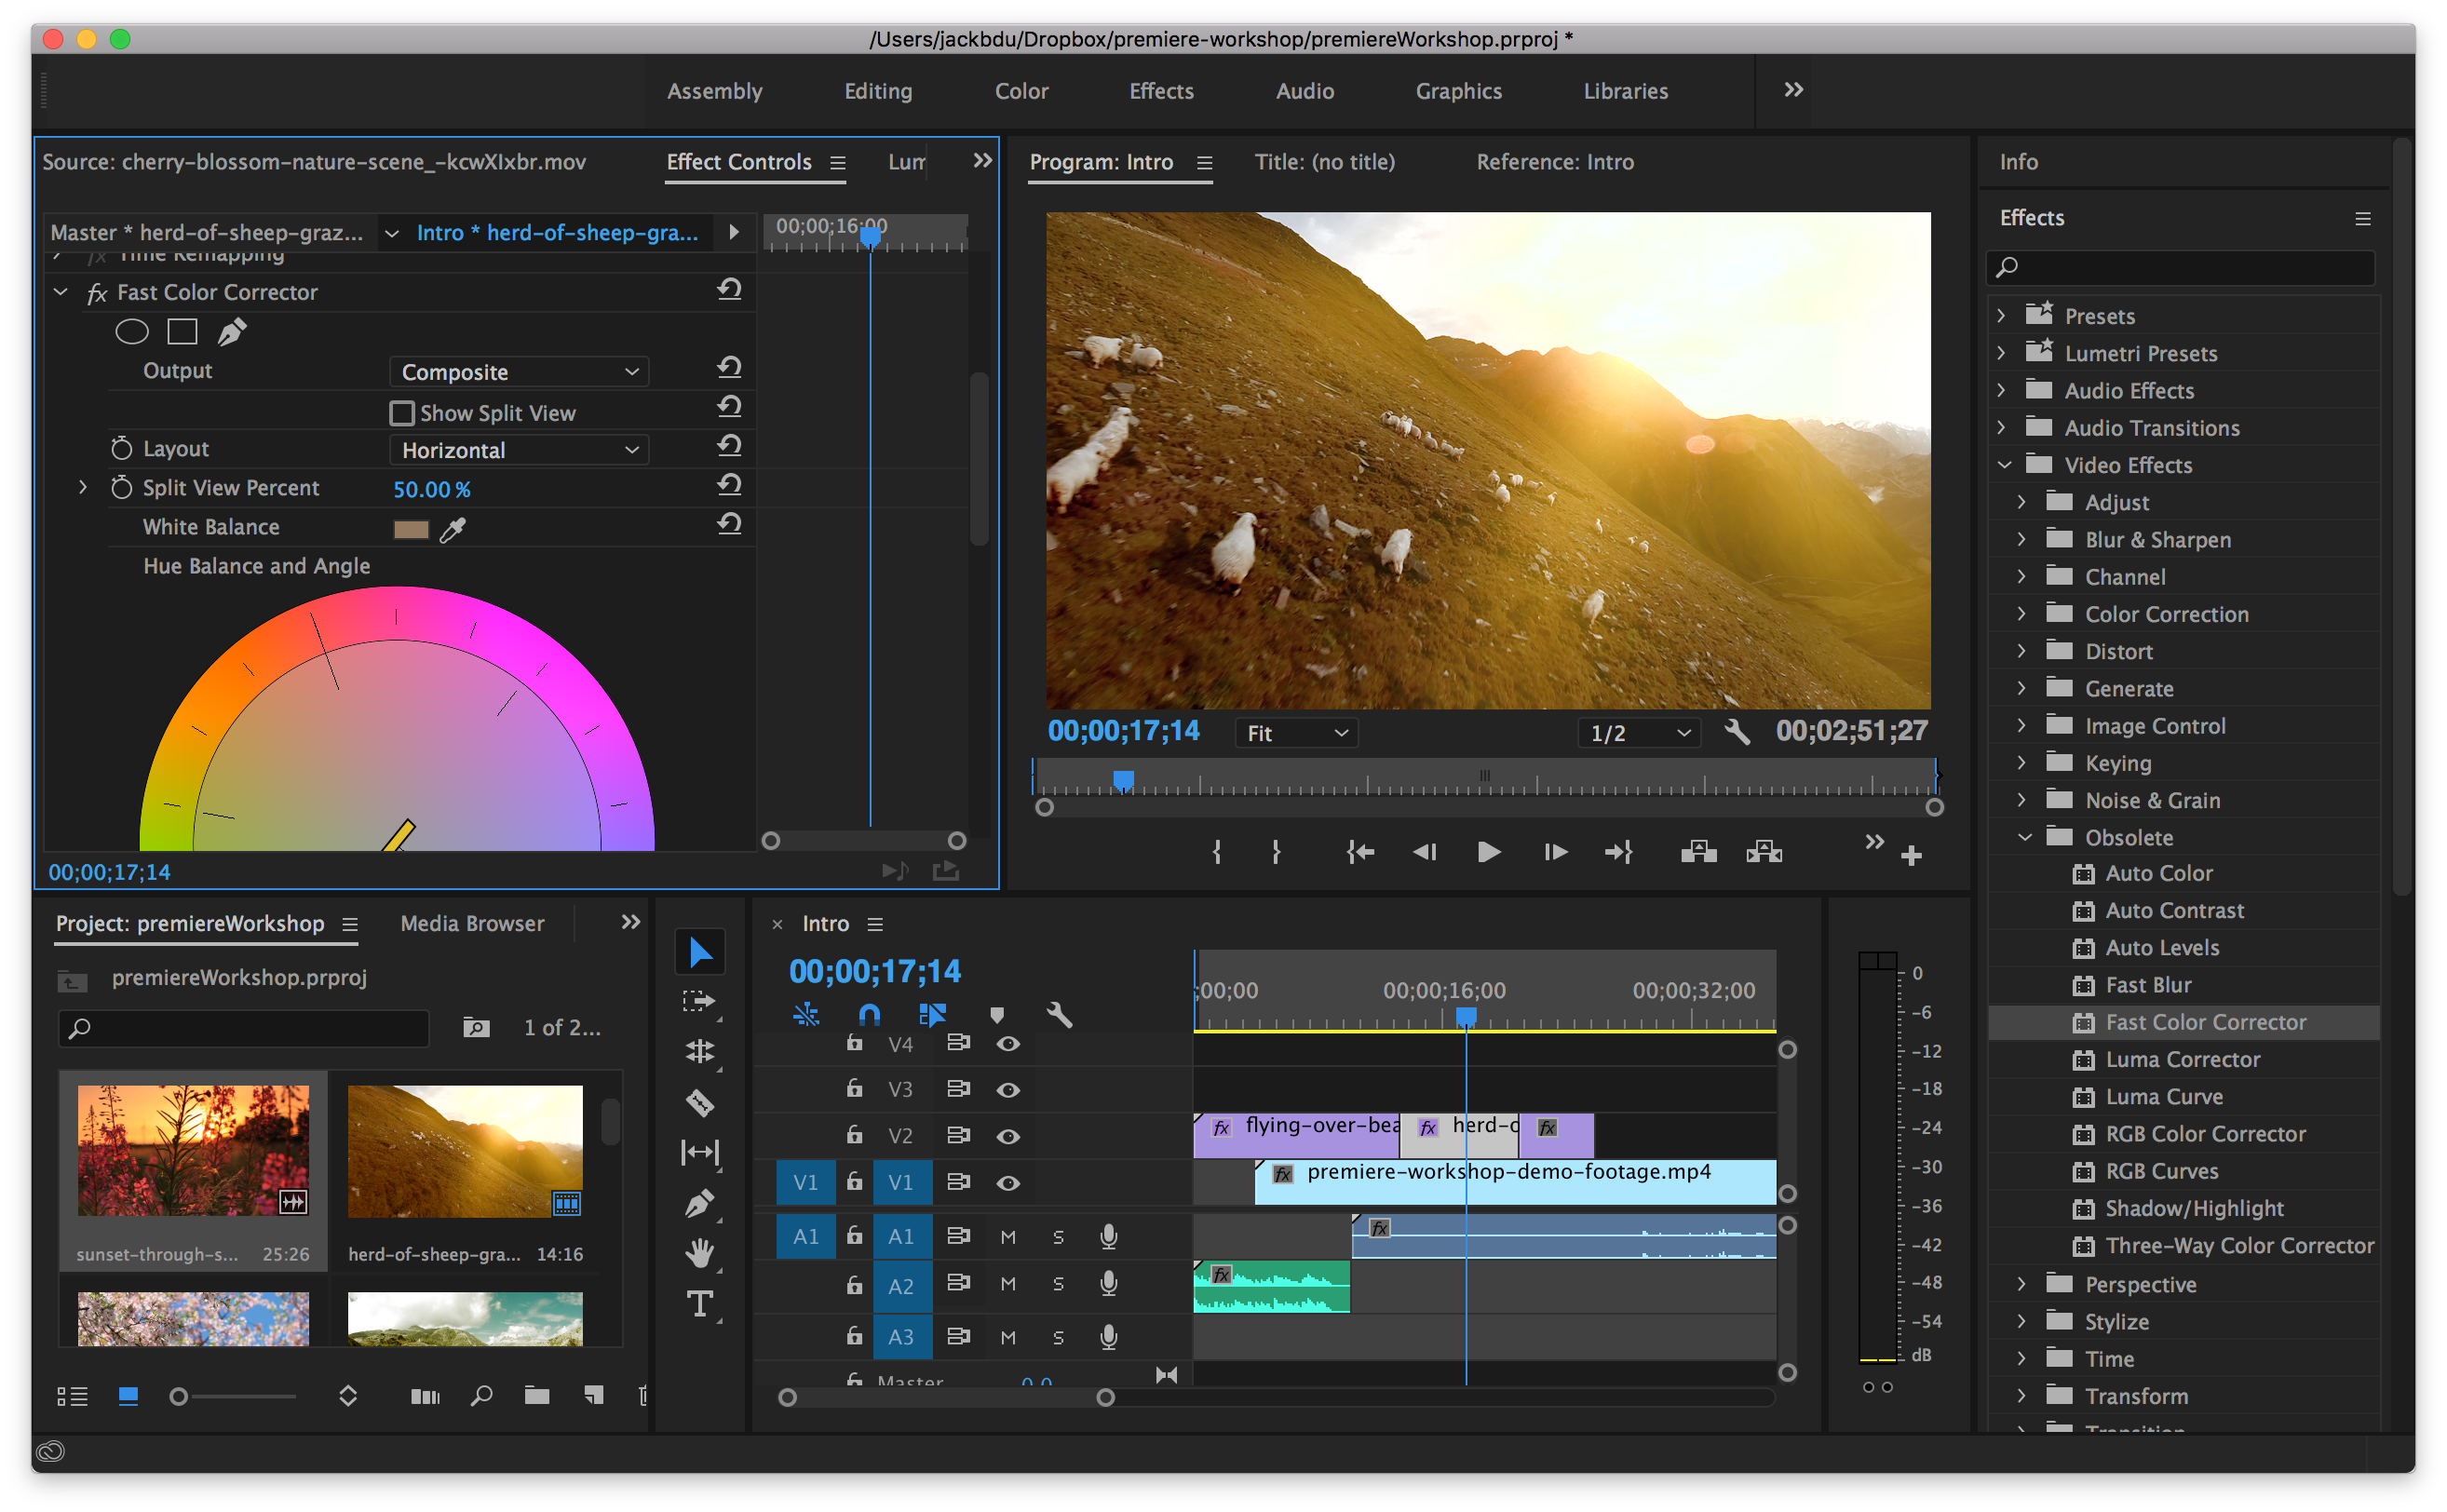
1) Apply Effects > Obsolete > Fast Color Corrector to the video clip we want to correct white balance of.
2) In Effects Controls, click on the eyedropper next to White Balance
3) Click at any area that is supposed to be white or gray in the top-middle viewer.
Similarly, we can also apply audio effects to audio clips.
Transitions
To apply a video transition between two clips, we need to do the following:
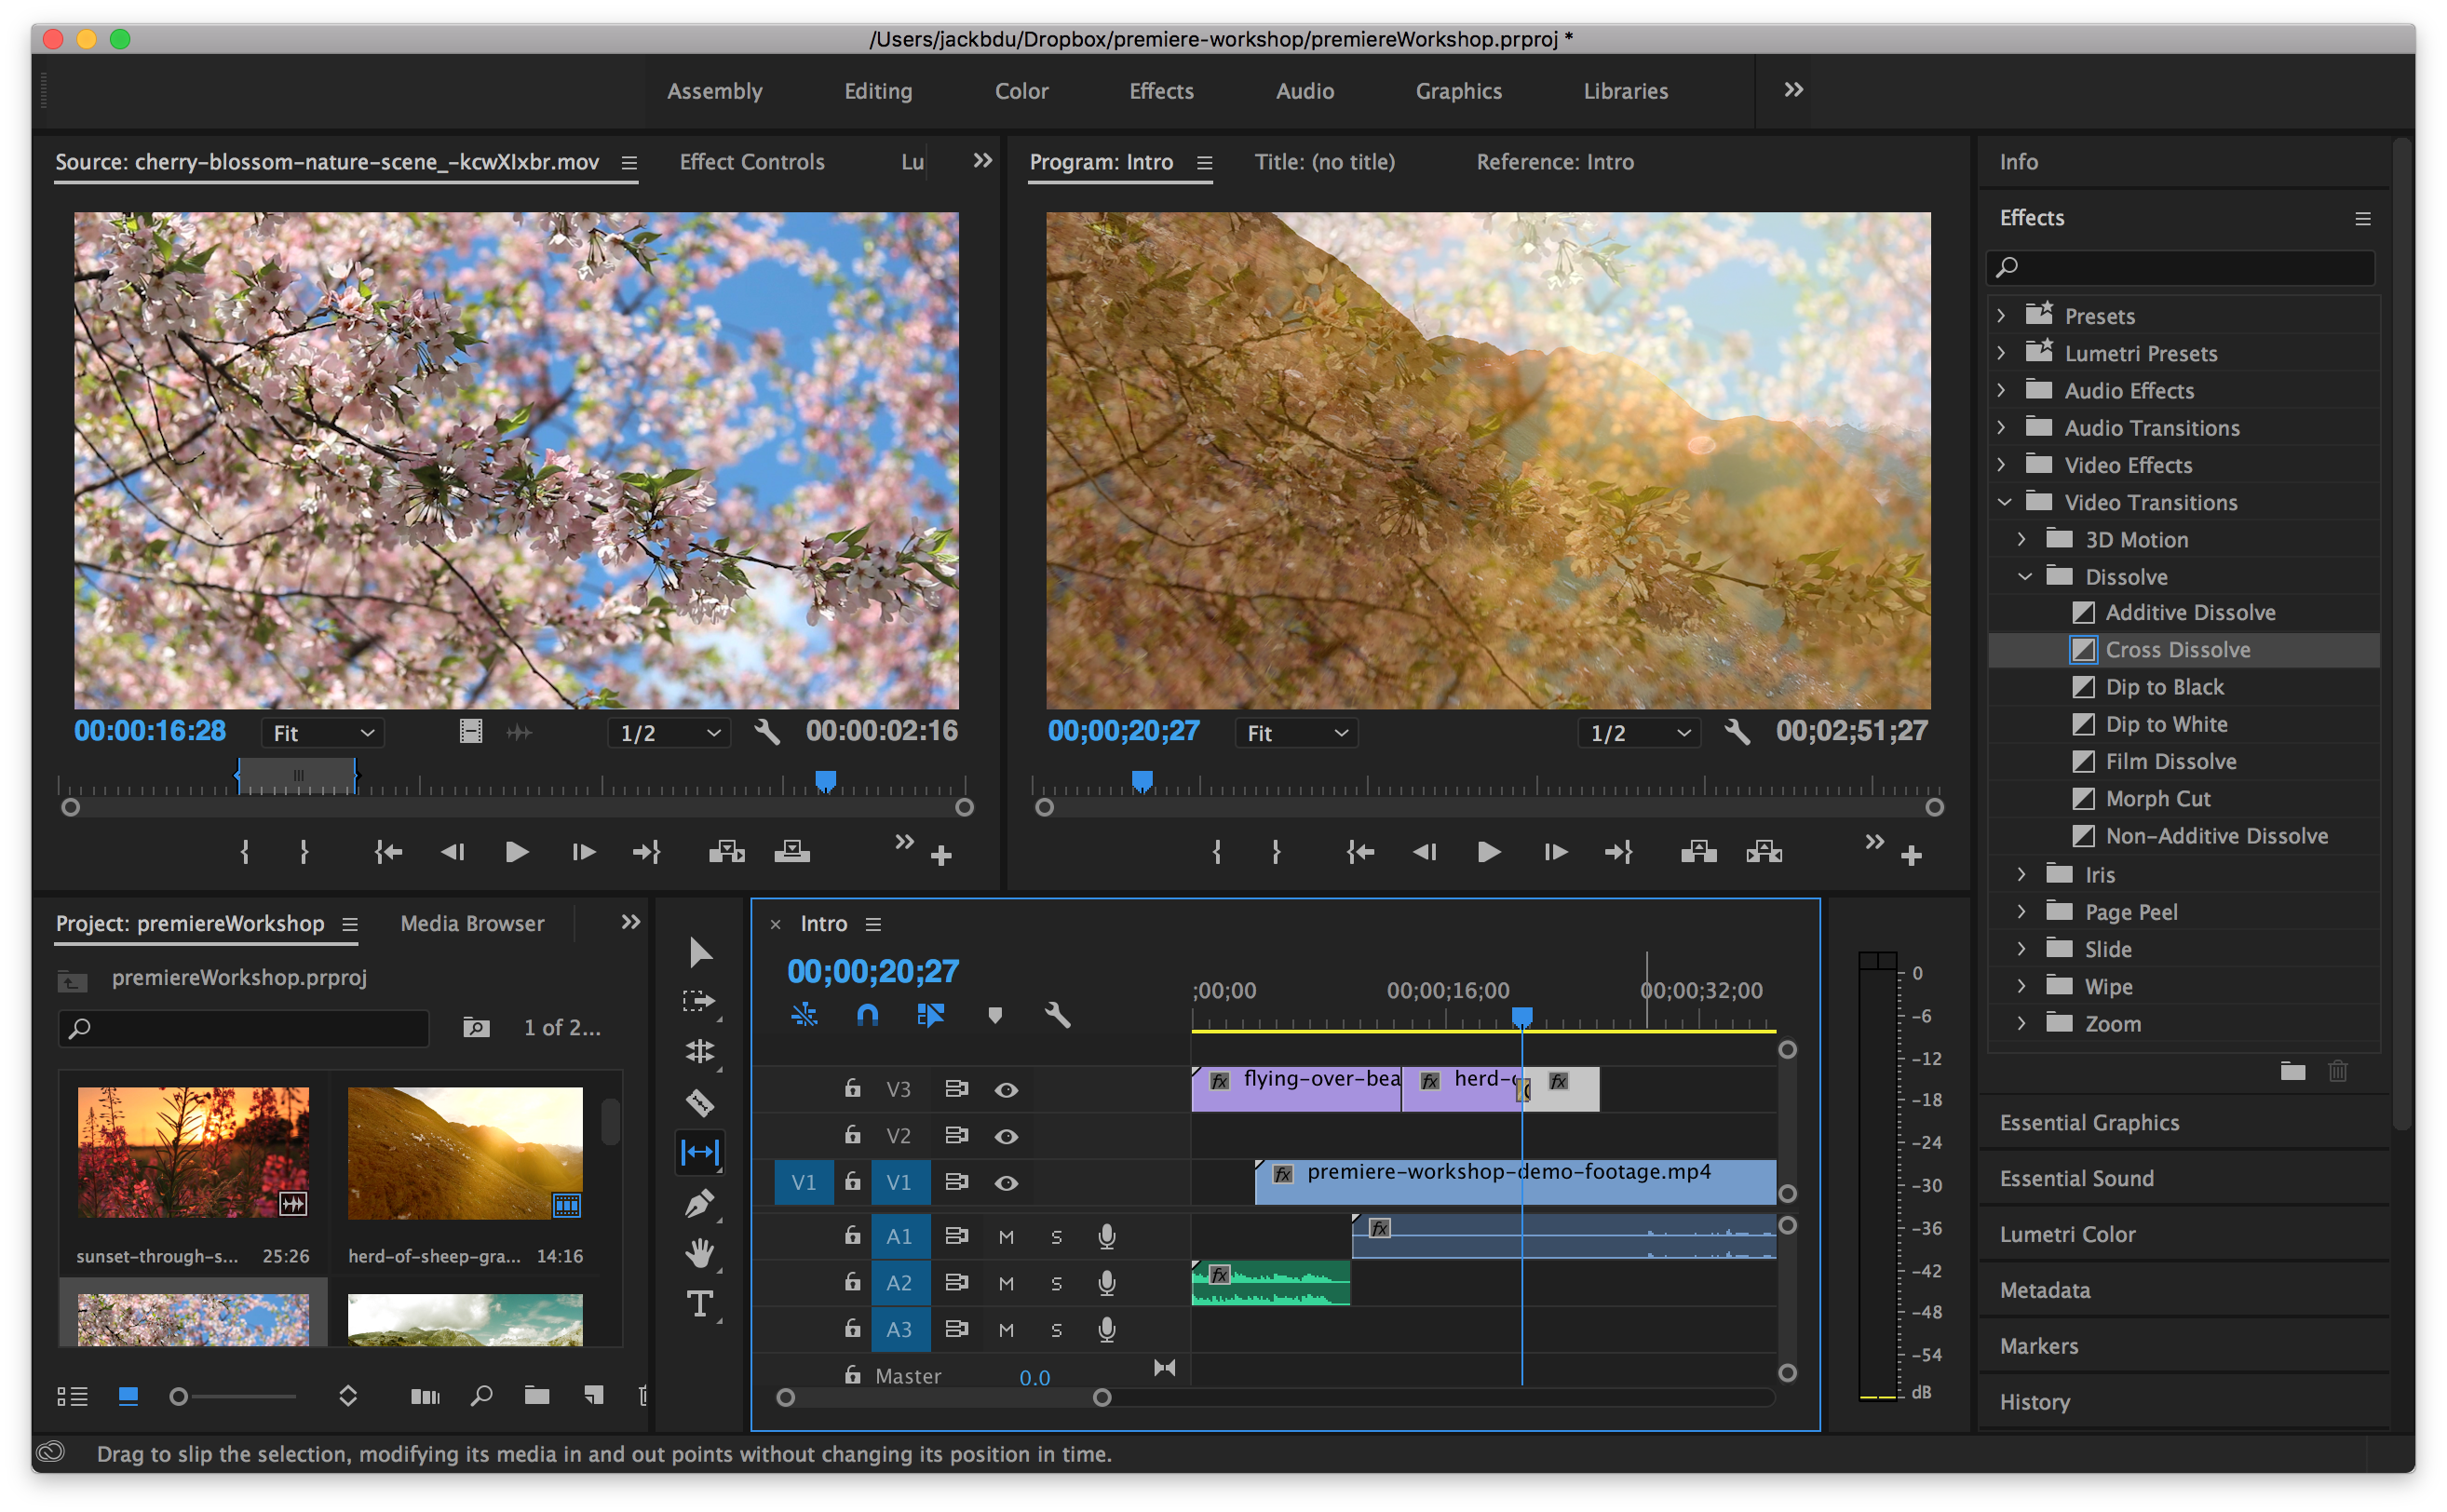
- In the right-most panel, navigate to Effects > Video Transitions, and then expand any of the sub-category.
- Drag and drop any transition onto any clips we want to apply transition to.
- We can adjust the duration by double clicking on the transition we just added on timeline.
Similarly, we can also apply audio transitions to audio clips.
Text

1) Select Type Tool and click anywhere on the top-middle panel to add text.
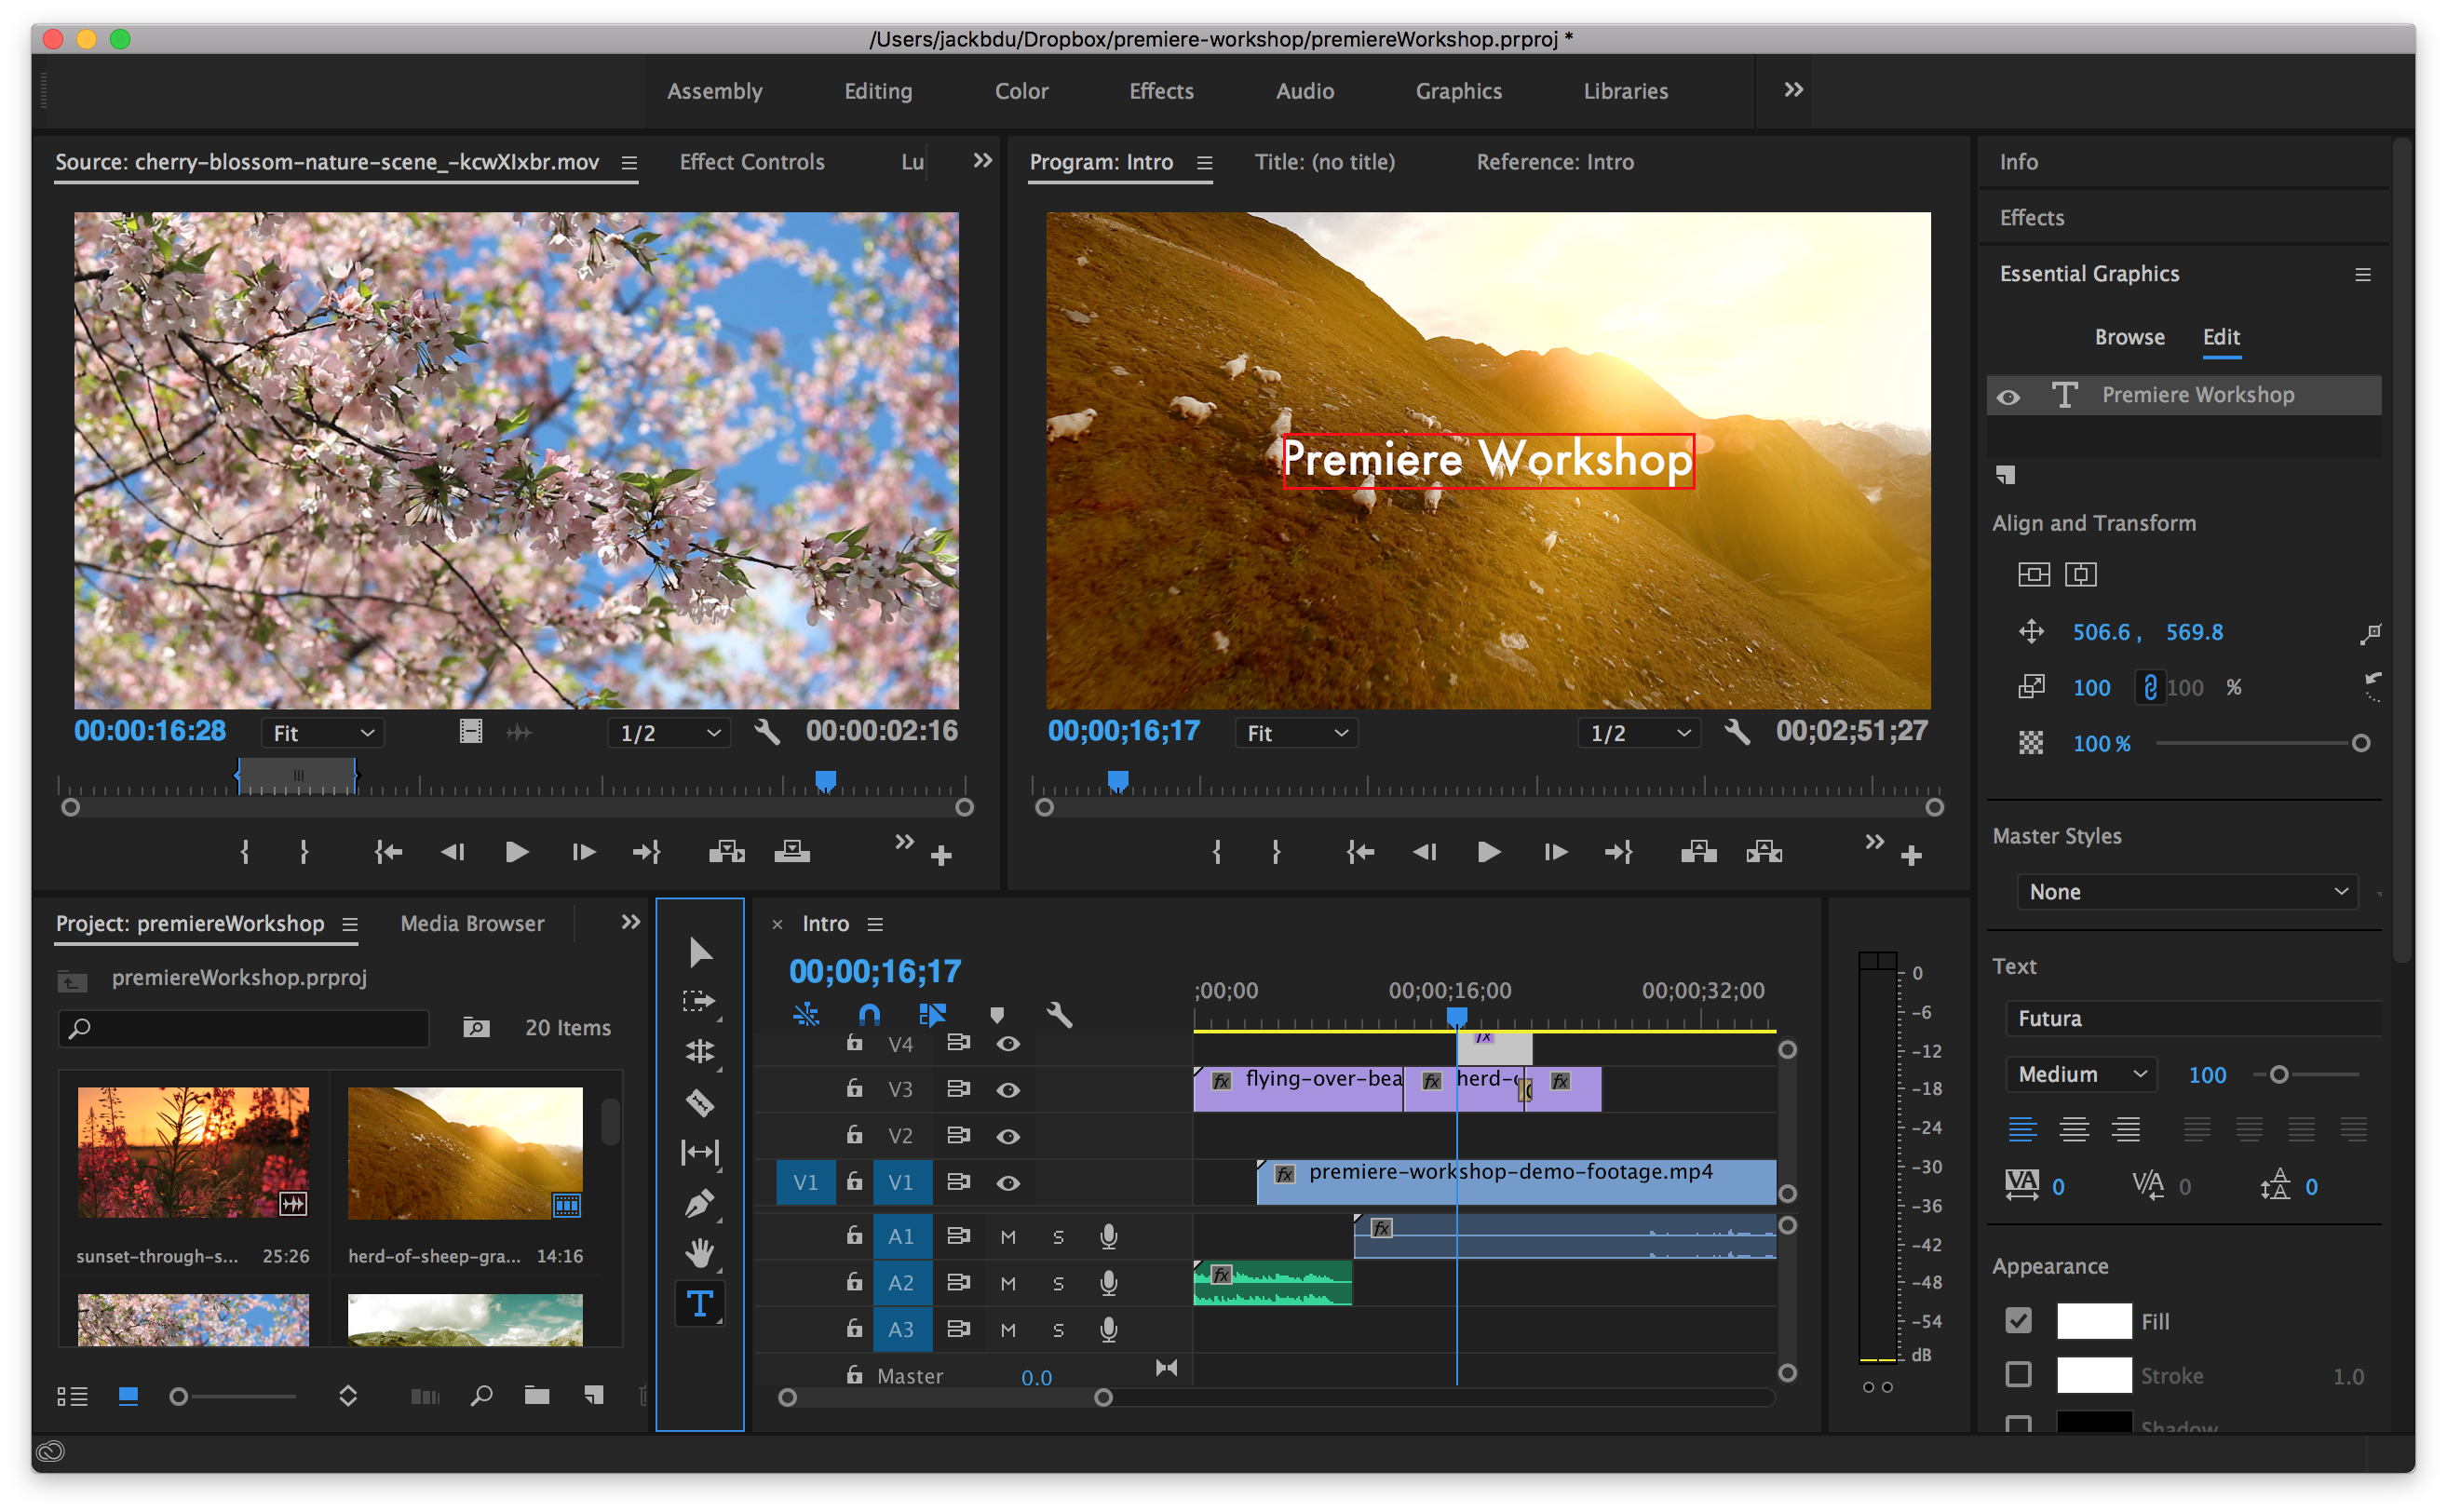
2) In the right-most panel, navigate to Essential Graphics > Edit.
3) Select the text we just created under Edit so we can style it.
4) In the timeline, the created text is shown the same as a video clip so we can edit them in a similar fashion.
Beginner Animation
Now that we have the text, but how do we animate it?
We animate the text by adding keyframes, which marks what the text should be like at specific frames, and the computer will automatically add transition between two keyframes.
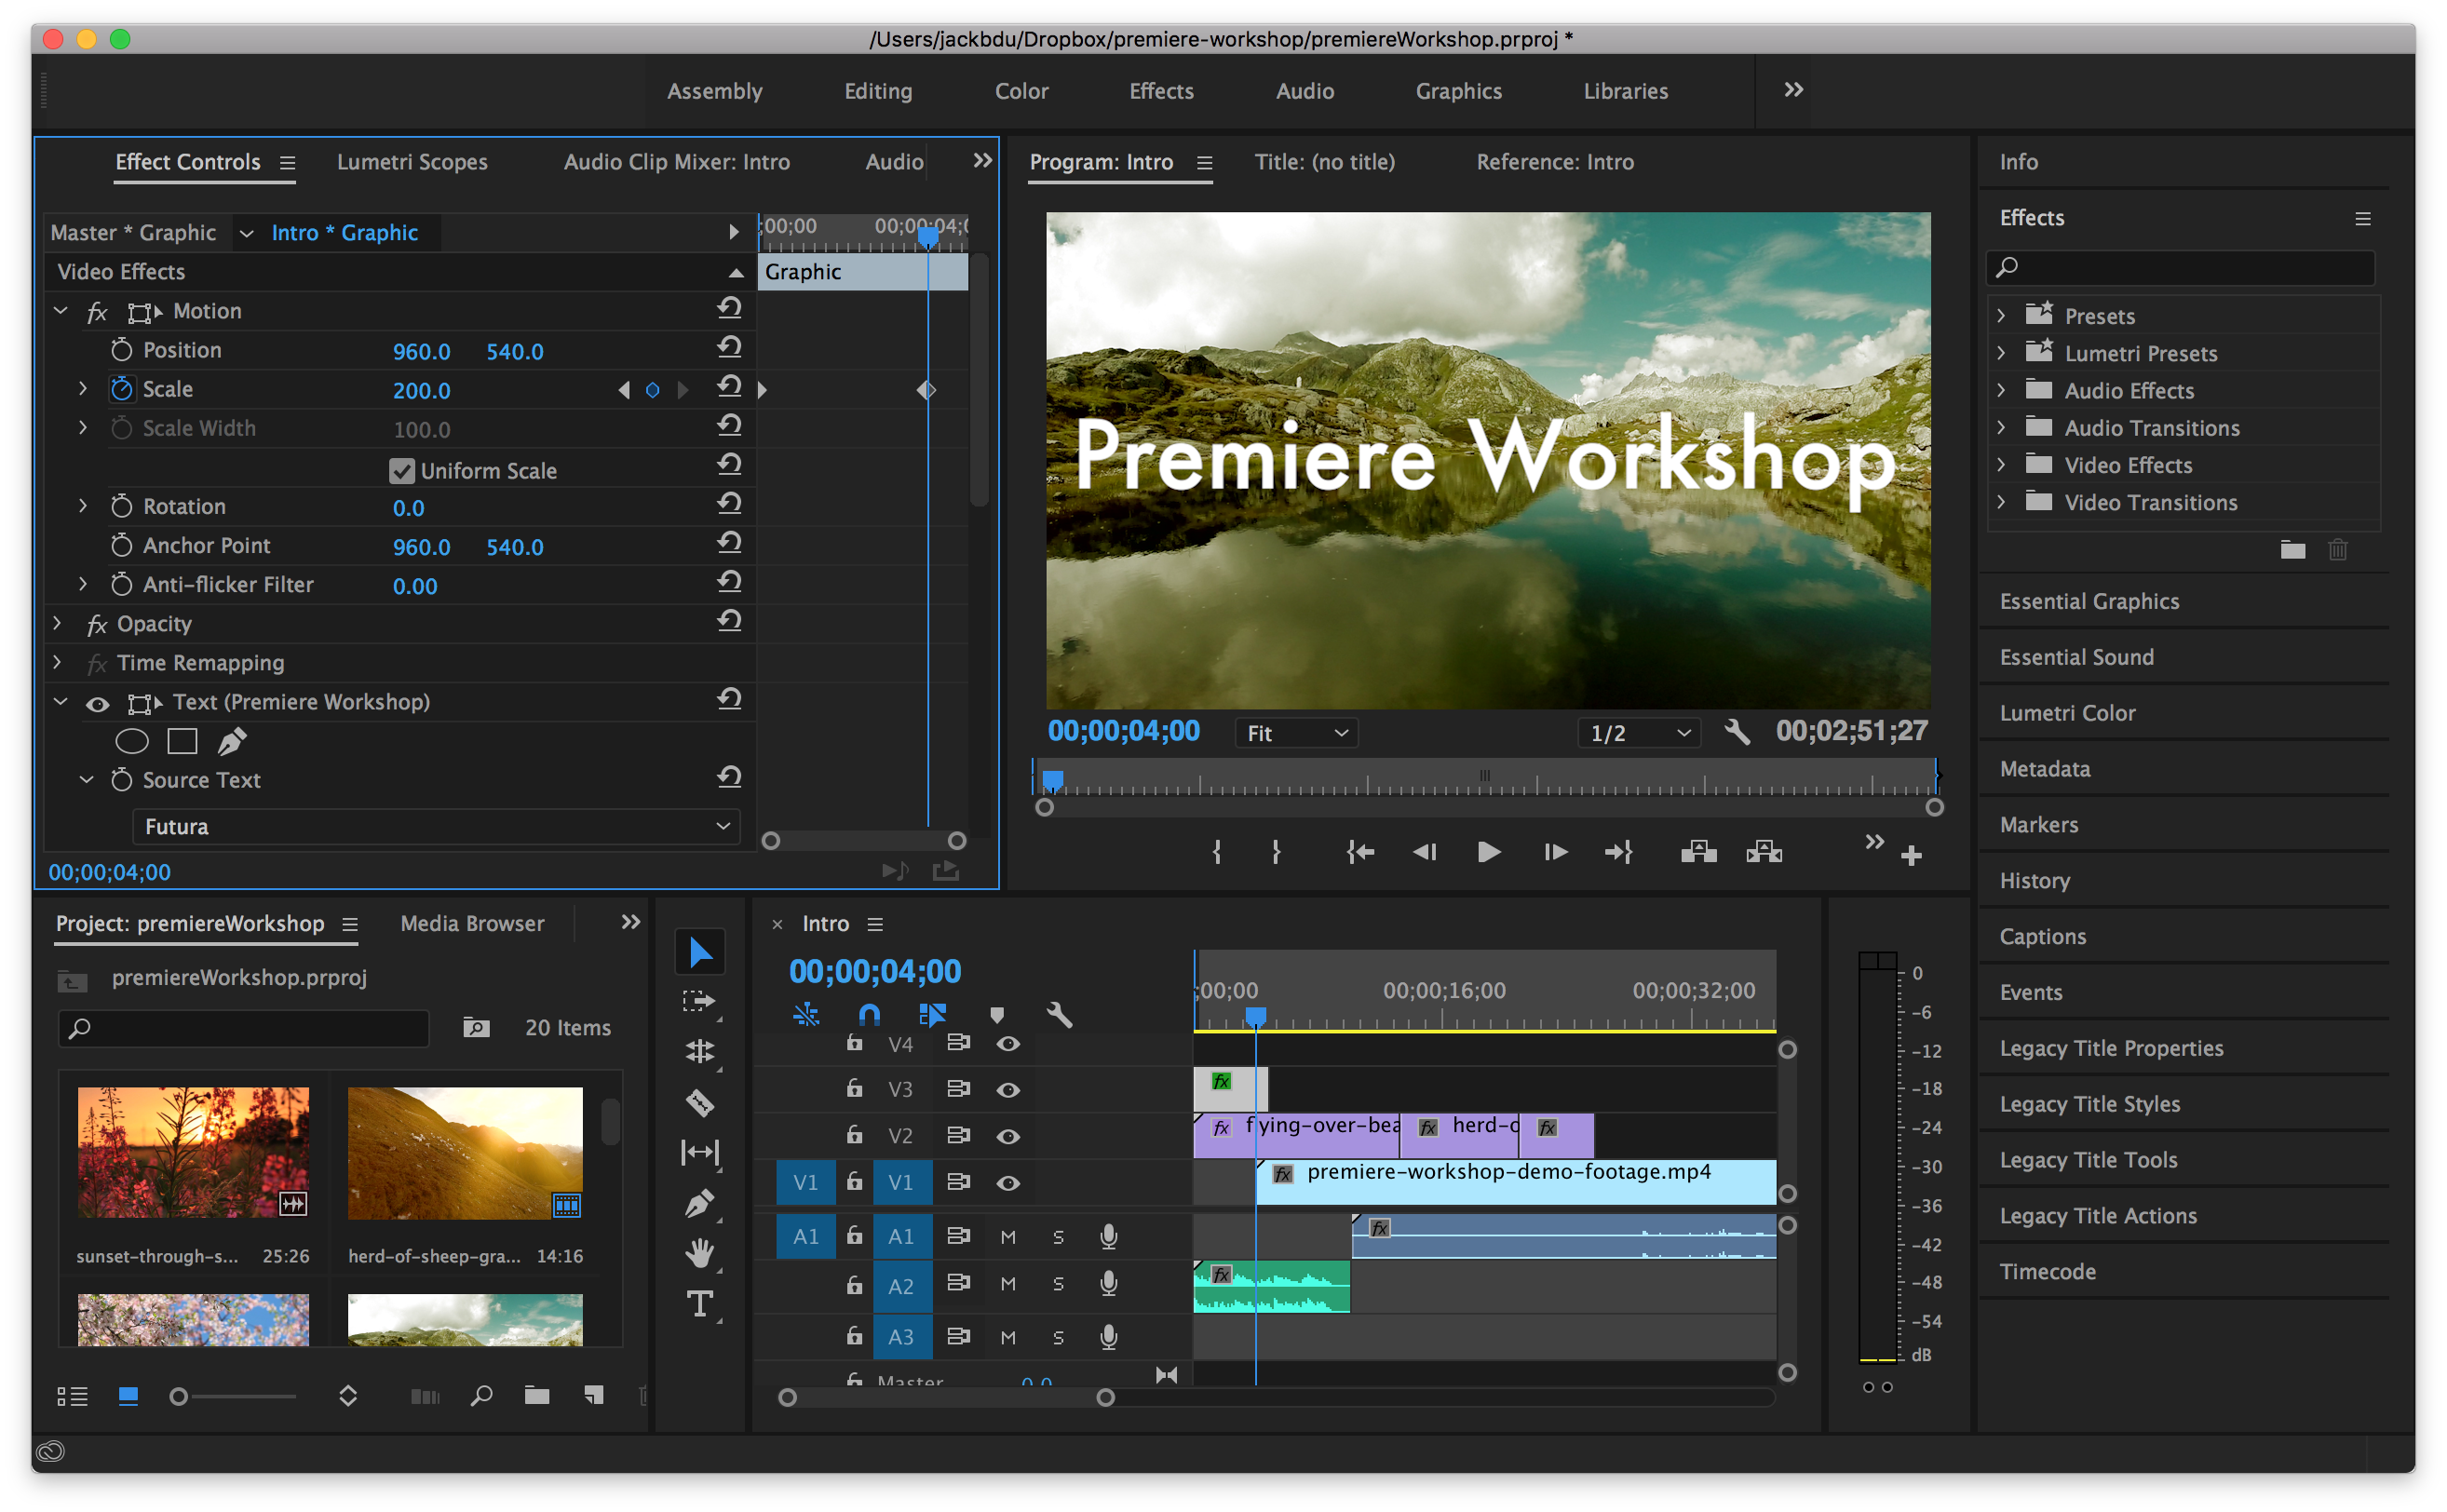
1) Move the playhead to 00:00 and click the clock next to Scale in Effect Controls to set a keyframe (now scale is 100.0)
2) Move playhead to 04:00 and adjust Scale to 200.0, and we’ll see a new keyframe created in Effect Controls
3) Now play from 00:00 to preview the animation
Speed & Duration
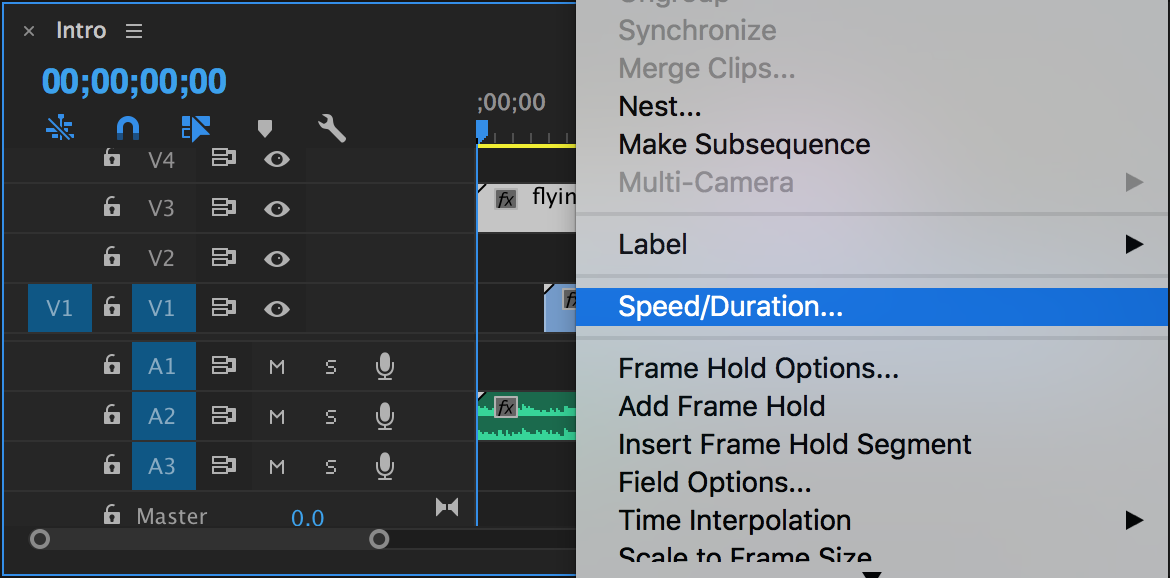
1) Select the clip we want to change speed of, right click and choose Speed/Duration…
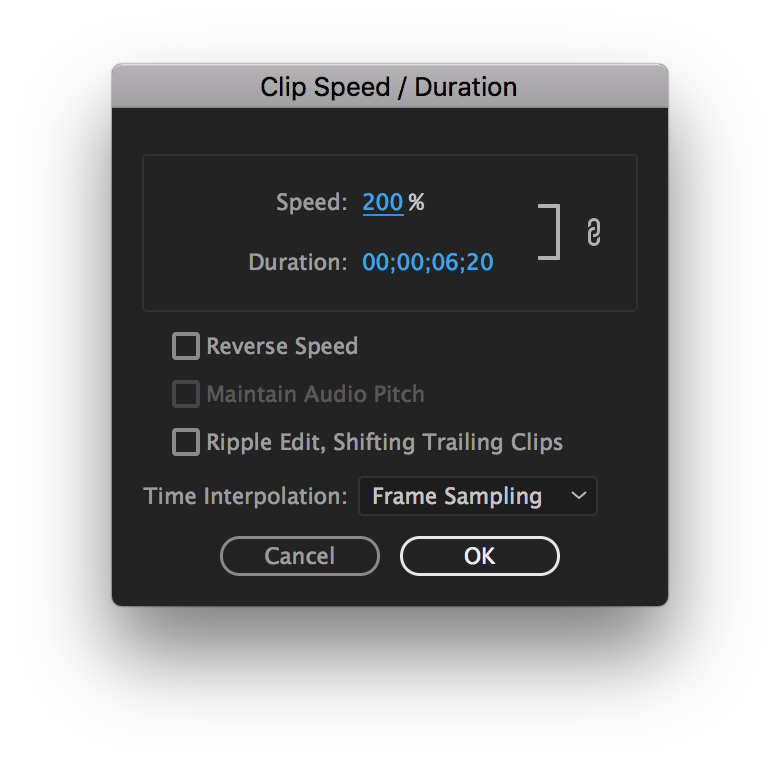
2) Enter a desired speed or duration in the new window and click OK to apply.
Step 6: Export for Sharing
Once we are done editing, we can’t just share the project file, which only Premiere can read, instead, we need to export it as a video file that our media player and broswer can play.
1) If we have multiple sequences, first double click on the sequence we want to export
2) The same way we mark in and out for individual clips, we can also mark in and out for the whole sequence in the top-middle panel.
3) Go to File > Export > Media…
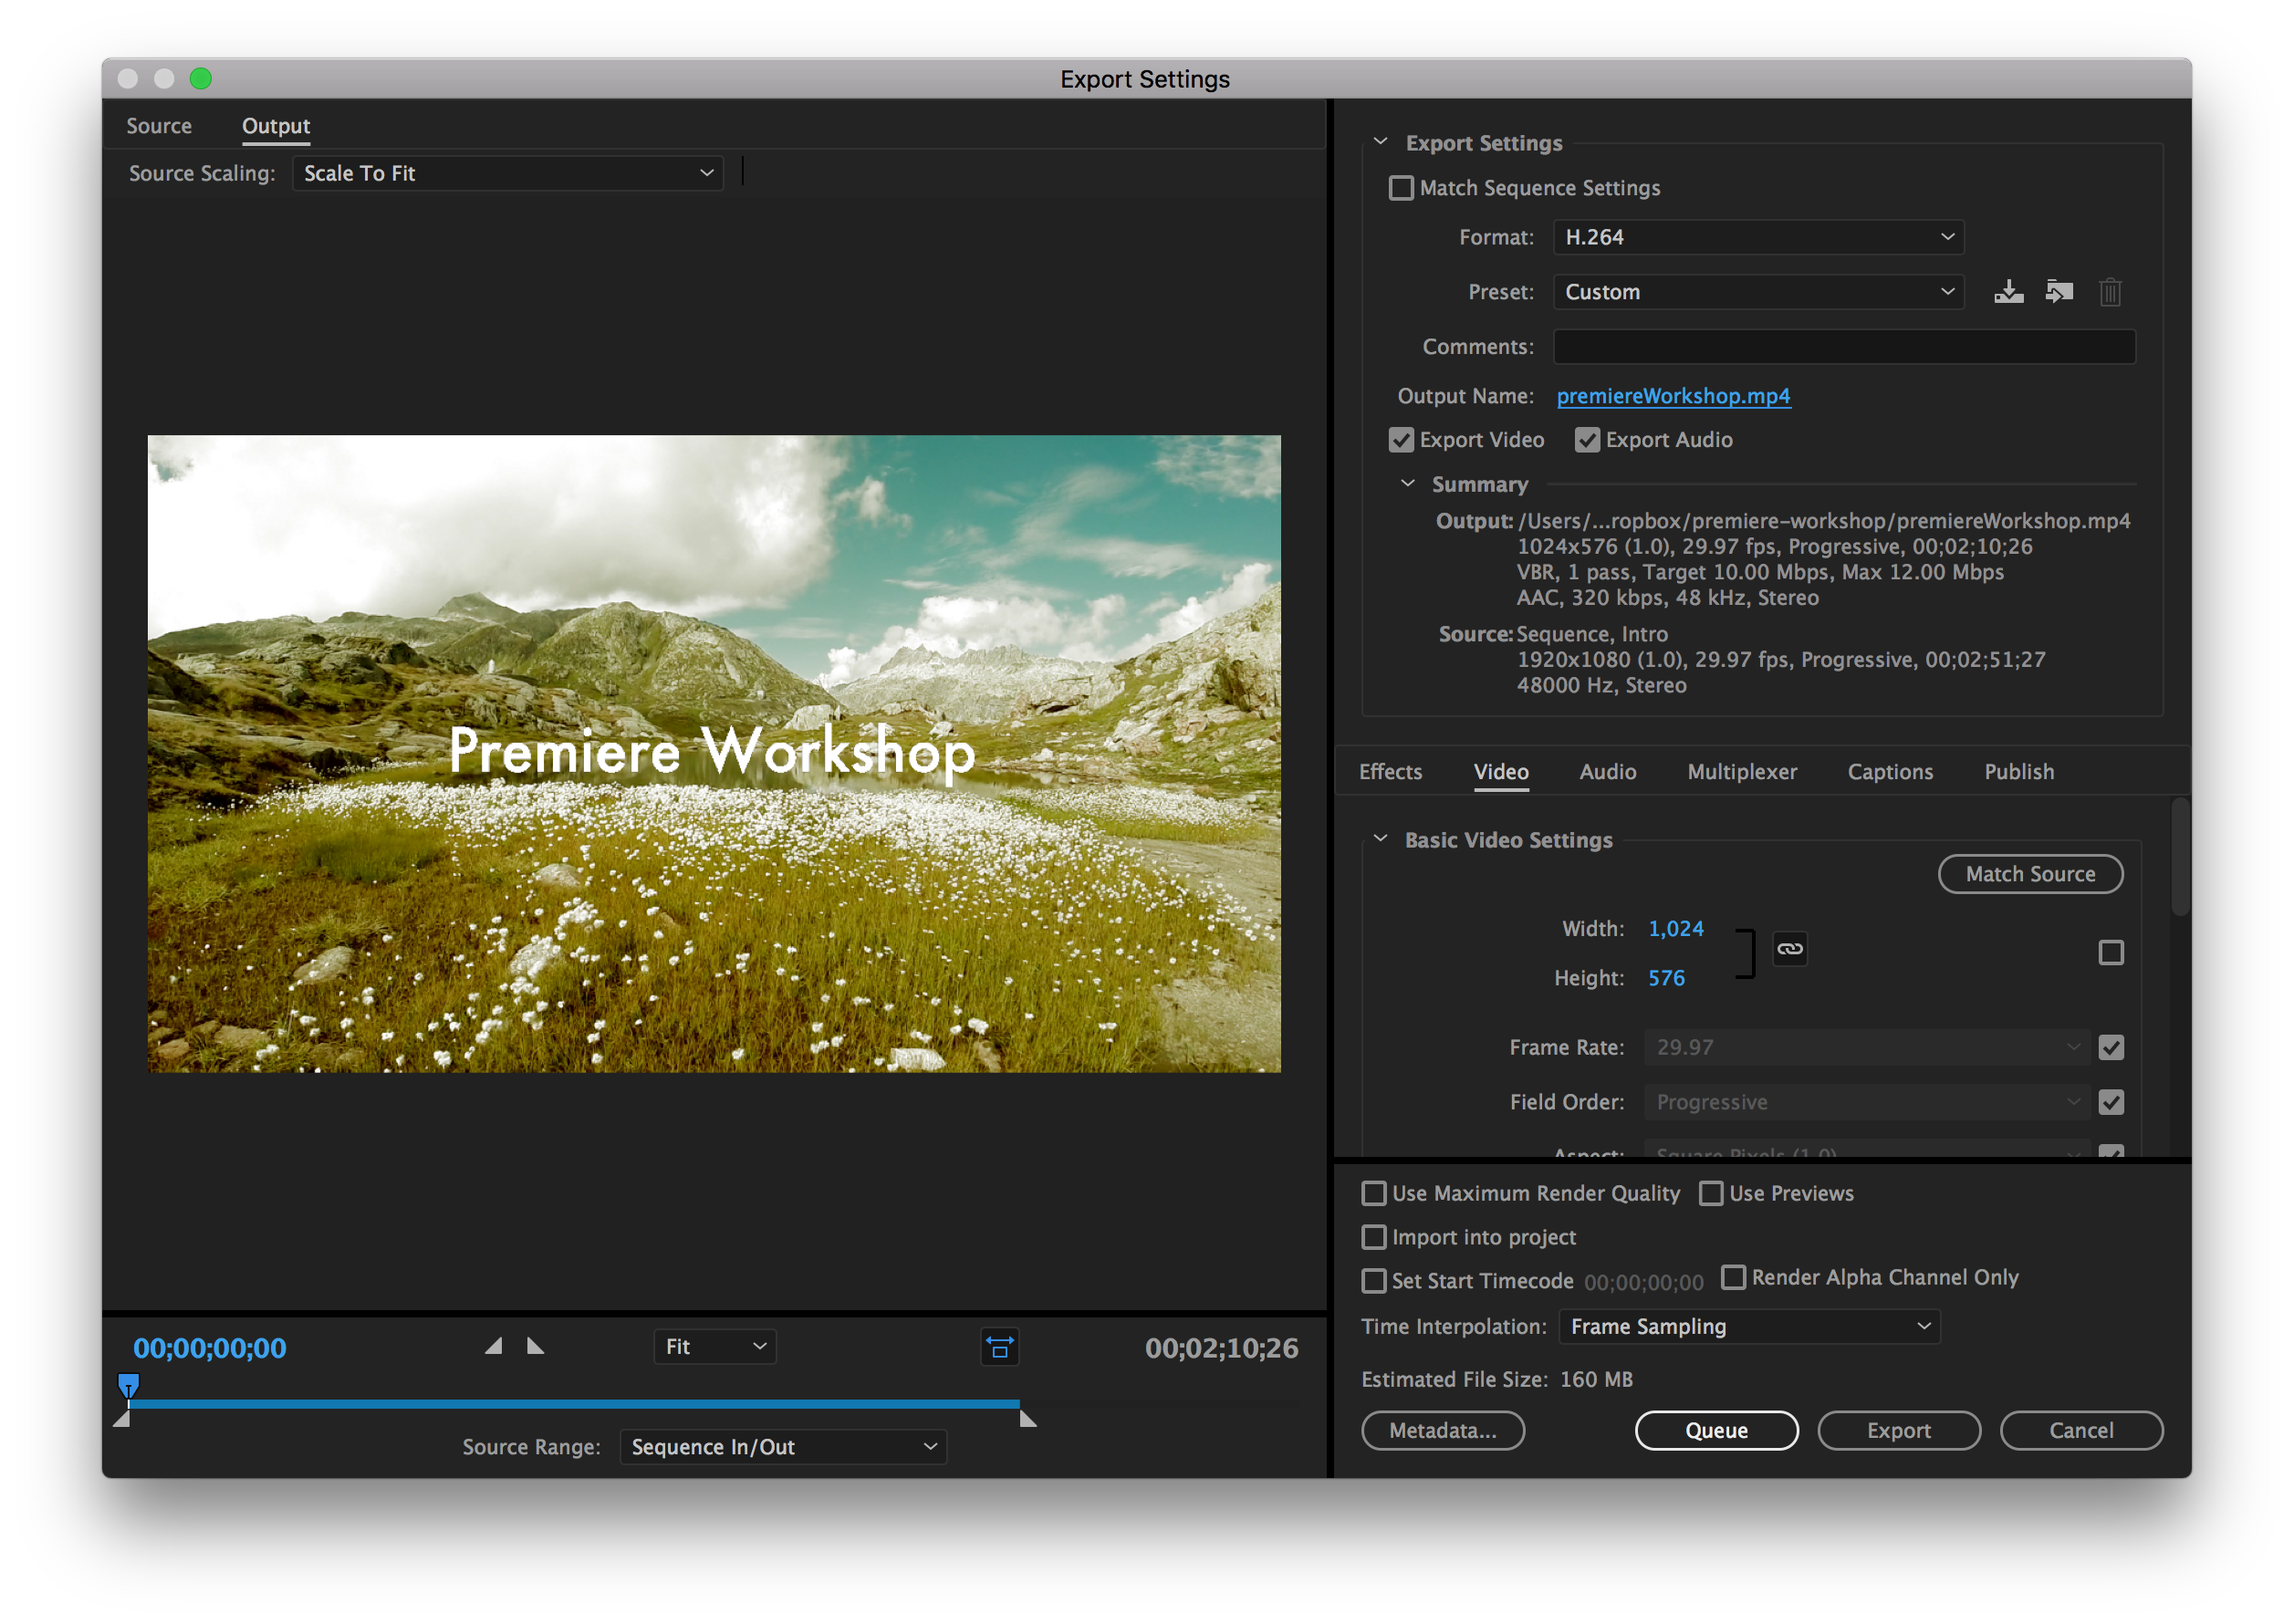
4) There are a few things we need to note in Export Settings:
- Set Format to H.264
- Click Output Name and specify the name and location
- Under Video > Basic Video Settings, we can change the resolution by uncheck the first checkbox and specify the width and height.
5) We have two options for the final step:
- We can click Export to export the video, but we won’t be able to do anything in Premiere while it’s encoding.
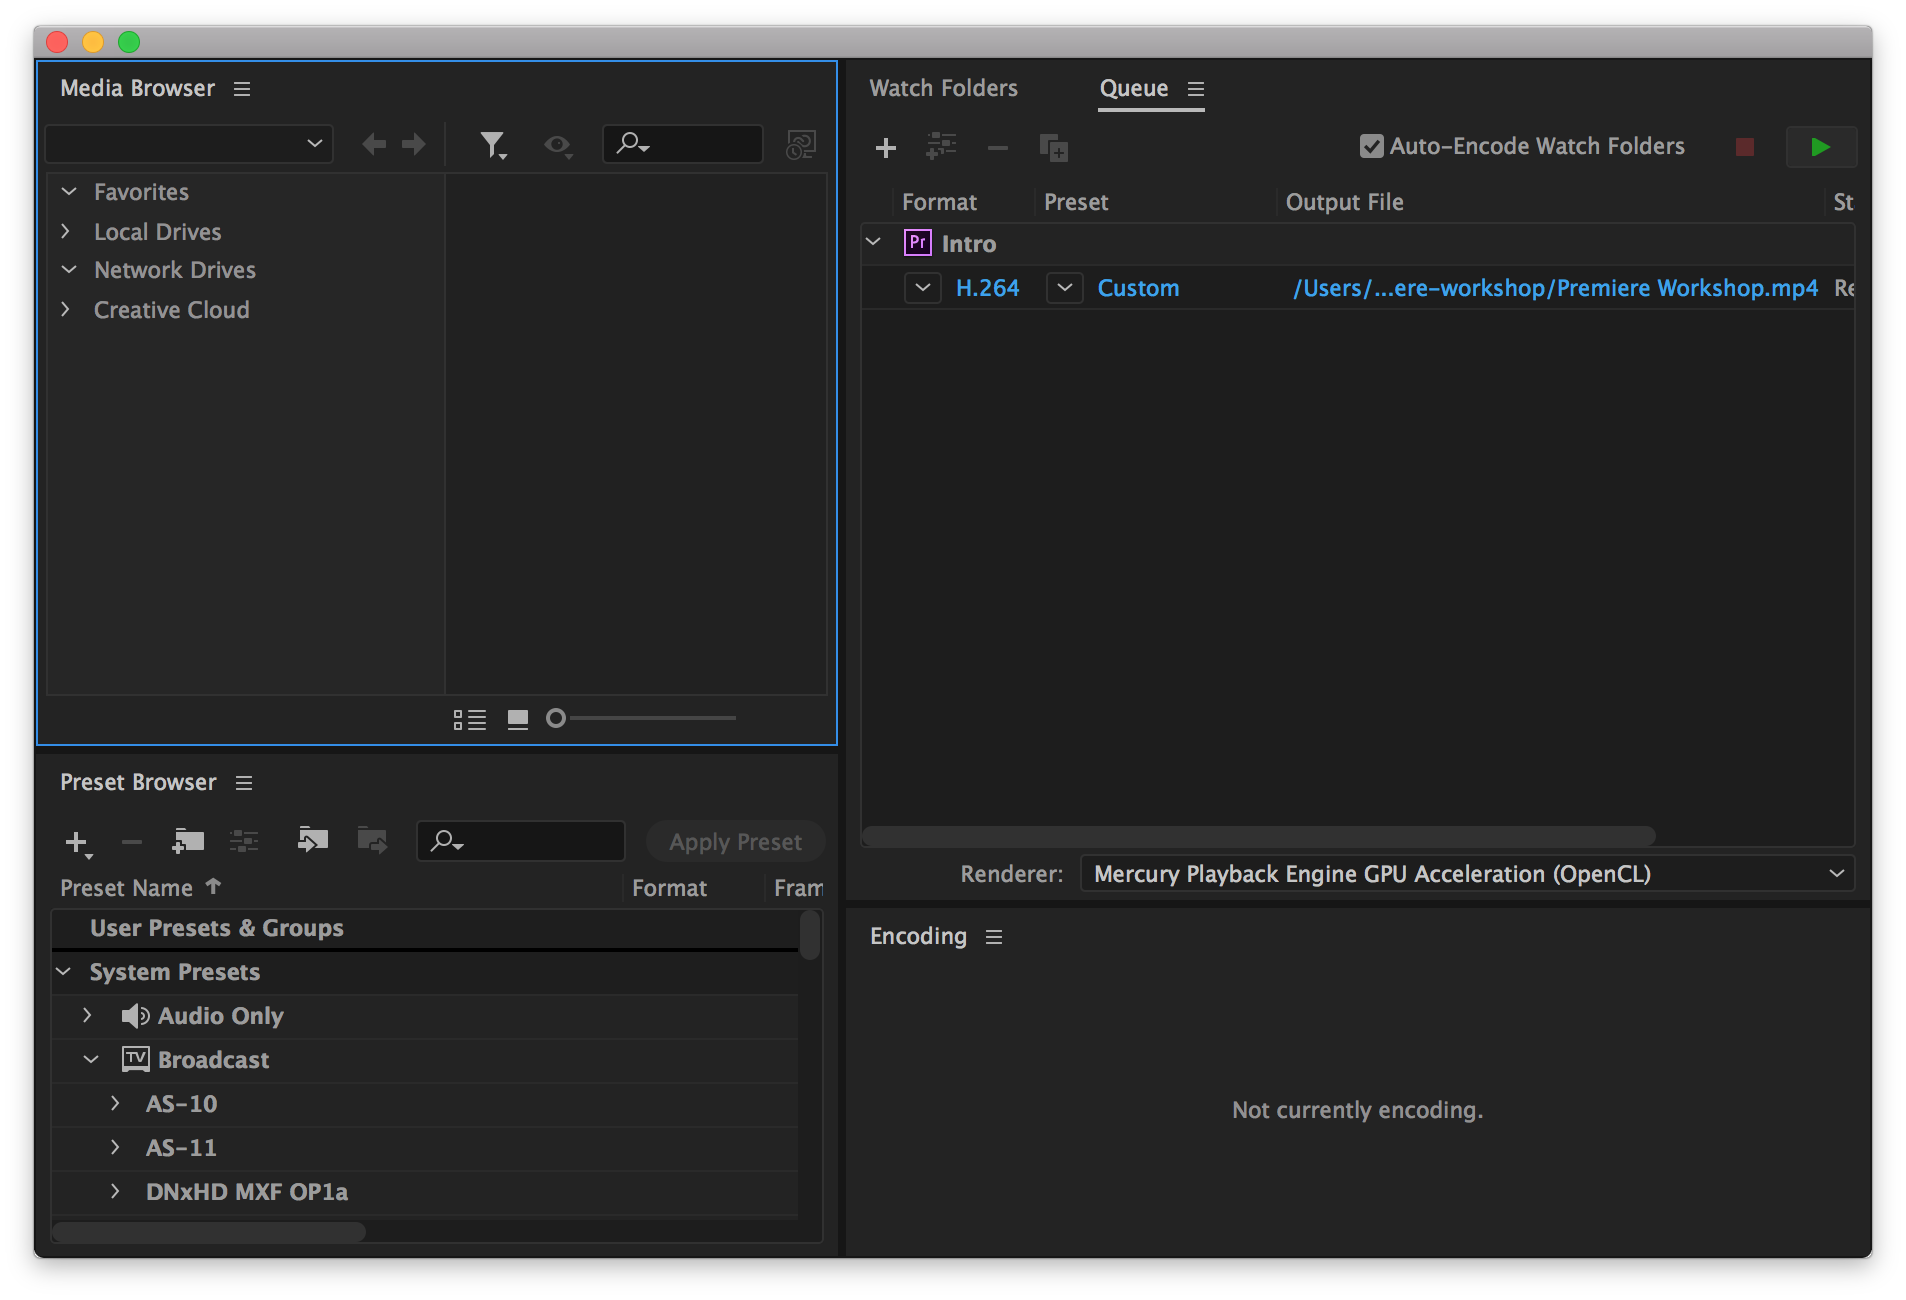
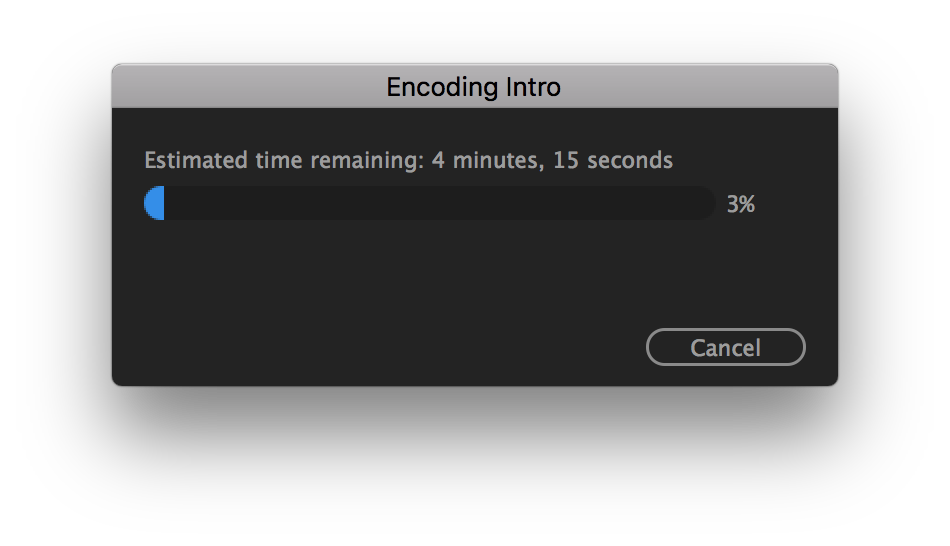
- Or we can click Queue, which opens up Adobe Media Encoder. Click the green start button at the top-right corner to start encoding the video.
More Resources
Premiere tutorials on the Adobe site
Premium Beat: 15 Premiere Tutorials Every Editor Should Watch
Lynda.com Premiere Tutorials
Media College Premiere Pro Tutorials
Acknowledgement
Big thanks to Jiwon Shin, who kindly provided the video footage. Here’s a link to her workshops.